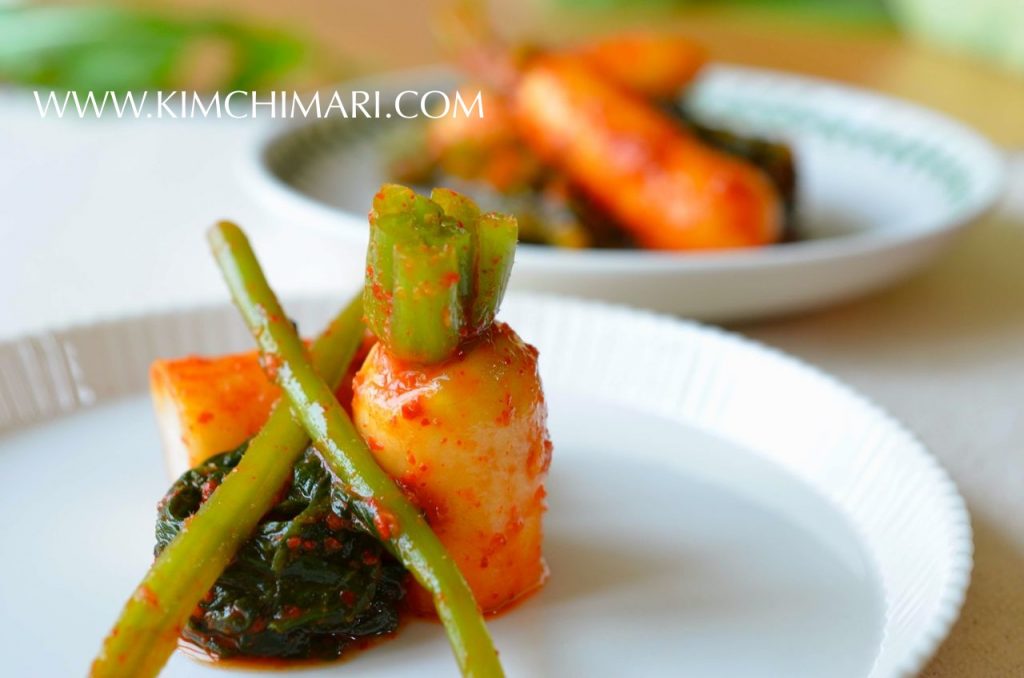
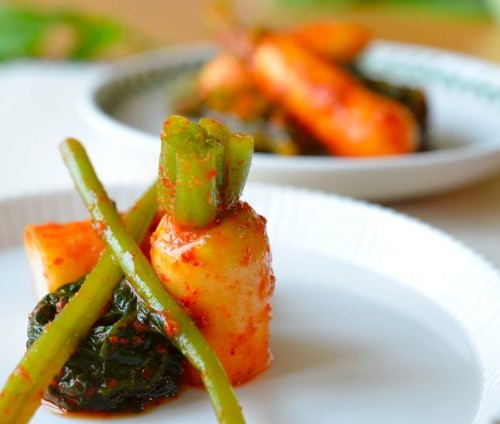
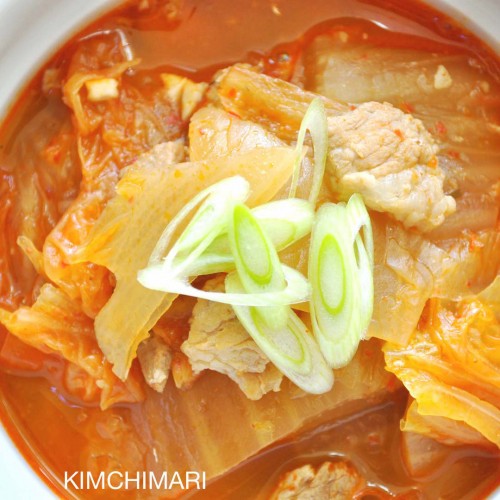
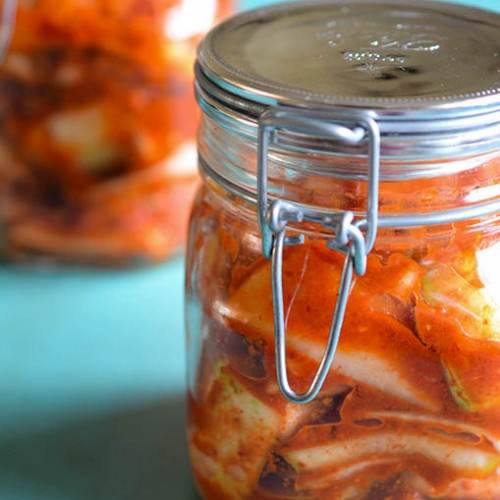
If you like crunchy foods then you will love how crunchy and flavorful this Kimchi is. This young radish Kimchi – also known as Chong Gak 총각 (pronounced ‘gaak’) / Chongkak Kimchi -is definitely my favorite Kimchi of all because it has both great taste and great texture. Chong Gak Kimchi is also a very simple Kimchi with minimal ingredients. No fussing about with extra ingredients like pear, persimmon, chestnut, etc.. Also this kimchi makes a fabulous Kimchi Jjigae (stew) when it’s too sour to eat fresh so remember that when you make Kimchi Jjigae next time!
The word Chong Gak (총각) means bachelor and the most common story behind the name is that the young radish greens look similar to how bachelor’s braided their hairs in the old days. The other story is that this Kimchi is so easy to make that even bachelors could make this Kimchi without too much trouble. Which is also quite plausible since traditionally this Kimchi is pretty much made with the whole radish intact, the green leaves and all – no cutting to make it into edible sizes or to make it look pretty. And unlike Baechoo (whole korean cabbage) Kimchi or Cucumber Kimchi, there’s no need to make any fancy stuffing to go inside.
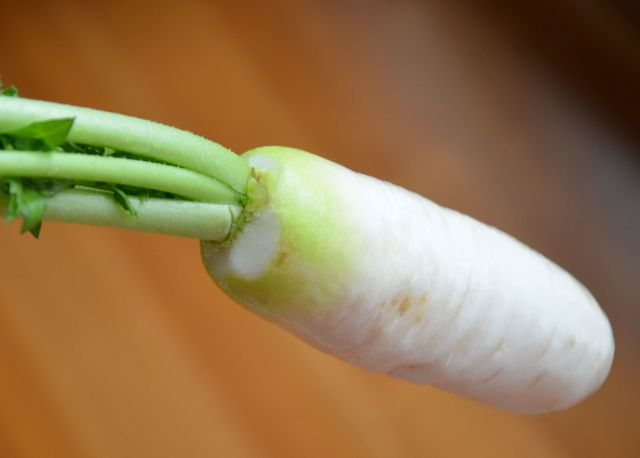
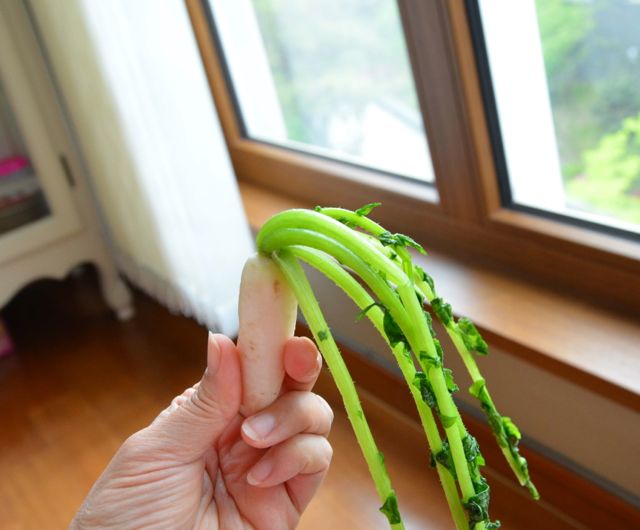
You may wonder if this radish is just a young version of the usual large Korean radish you see at Korean markets. Unfortunately, the answer is no. It actually is a different variety. In Korean, this radish is called by three different names: chong gak moo (총각무), altari moo (알타리무) and dalang moo(달랑무). Hence, it goes by 3 different kimchi names – chong gak kimchi, altari kimchi and dalang moo kimchi. In English, the plant variety is called Passion Altari or Altari Radish with Raphanus sativus being the scientific name. The radish is very tender and crisp with almost no pungency. It usually grows 2-3 inches long and 1 in wide. In Korea, it is a fall season vegetable but is now produced pretty much all year around.
When buying the altari radish, don’t buy radishes that are too big. If the radish part is larger than 3 in long and/or the greens should are too thick (thicker than 1/4 in?) then it is going to be a little too fibrous and stringy.
How to make Korean Pony Tail Radish (Chonggak) Kimchi
Servings: 10 servings Time: 2 hrs Difficulty: Moderate to Hard
Ingredients
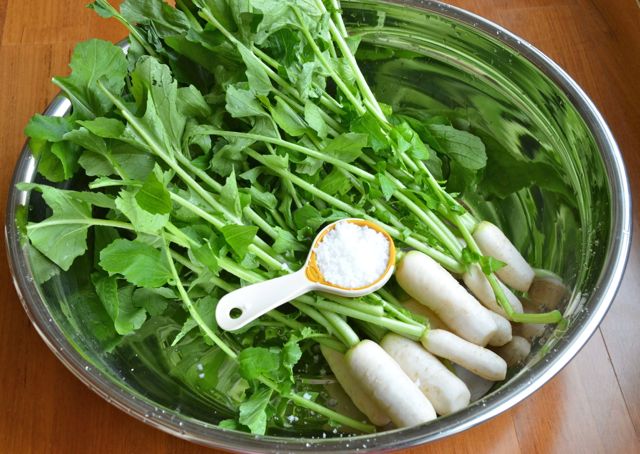
- 2 lbs Young Korean Altari Radish (총각무)
- 1/4 C sea salt (for salting radish) – use 25% more salt if using Korean Cheonilyeom (solar sea salt). see my Kimjang post for discussion on salt
- 1 C water
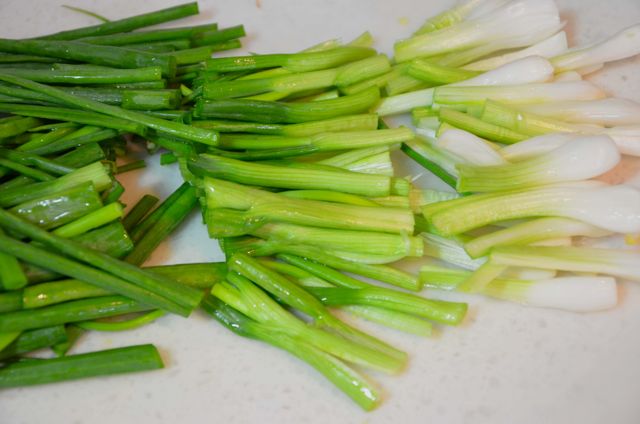
- 2 bunches green onion
- Yangnyum (Seasonings)
- 3/4 C Korean red chili powder (고추가루 Gochookaroo)
- 3 T chopped garlic
- 2 T chopped ginger
- 1/4 C fermented anchovy liquid (멸치젓 Myeolchijeot) or fermented shrimps (새우젓 Saewoojeot)
- 1~2 T sugar
- pinch of salt (if needed)
- Flour paste
- 1 T flour
- 1 C water
Directions
- Wash radishes and clean off excess dirt and roots. Works best if you scrape the outside with the edge of a knife. Clean the edges where the root part ends and the green stems start. Cut off any yellow leaves or stems and the outer greens if they look tough. Cut off the pointy root ends of the radish.

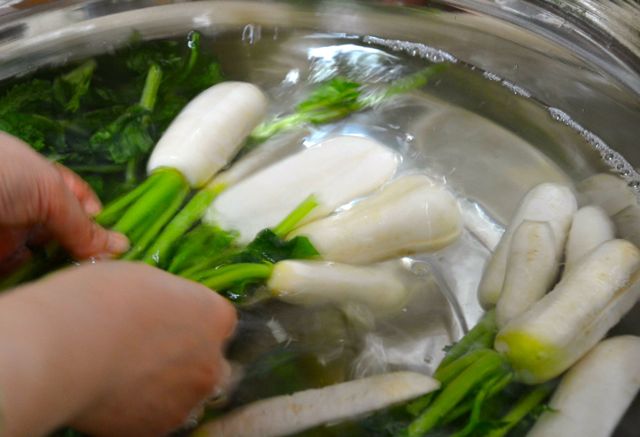
cleaned radish for chong gak kimchi - Get a large bowl as in the picture below. Salt radish evenly by layering the radish and salting each layer as you go. Evenly spread out 1/4 C salt throughout. Sprinkle 1 C water on top of the salted radish. Gently turn the radish and salt water to make sure it gets an even coating of the salt and water. DO NOT handle the radish too much because it can bring out a grassy taste from the kimchi. Let it sit about 2 hours. In hot weather, 1 1/2 hrs should be sufficient. About half way through, turn the radish once making sure every radish is salted properly.

cleaned altari radish for kimchi - Wash and clean green onions (about a handful or 2 bunches). Cut some of the thicker root ends in half and then cut green onions into 2 in long pieces.

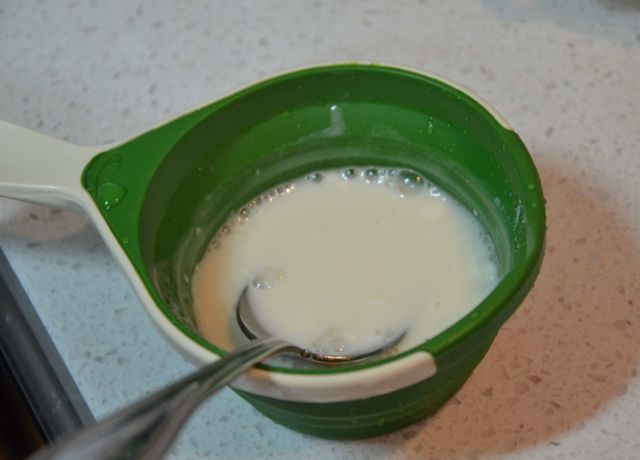
handful of green onions - Prepare the flour paste :

flour and water - Mix 1 T flour and 1/2 C water until there are no big lumps.
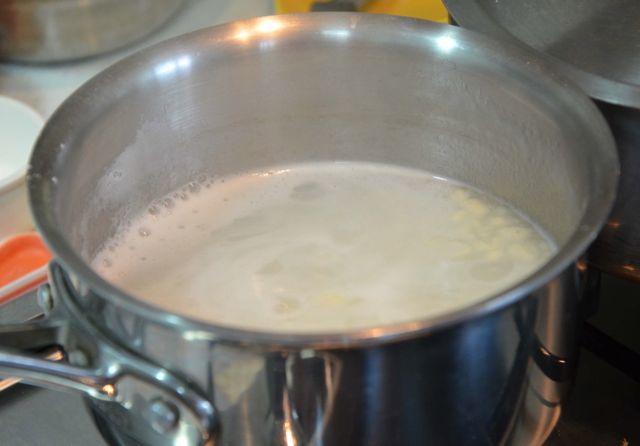
- Heat 1/2 C water in a pot.
- When the water starts to boil, add the flour mixture and lower heat immediately.
- Simmer while stirring often so the flour does not stick to the bottom and everything is evenly mixed. The paste is fully cooked when it no longer looks opaque (prob. 3~5 min on med heat). It is OK if there are some small lumps as long as there are no huge ones.
- Set aside and let it cool.

flour paste for kimchi
- Prepare the yangnyum (seasoning):
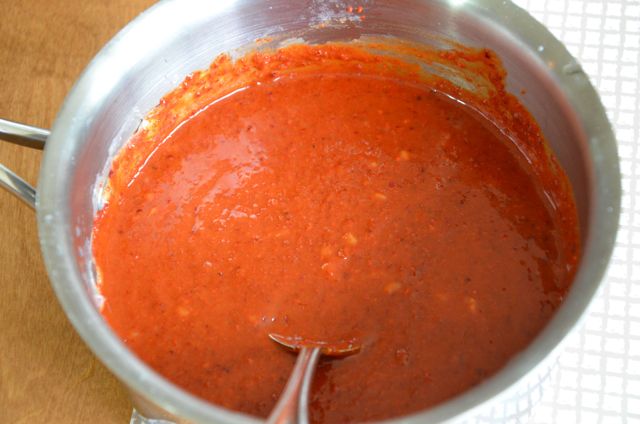
- To the flour paste (should be cooled, it can be lukewarm but not too warm), add chili powder and mix it well.
- Set aside for few minutes so the chili powder has a chance to soak.
chili flour paste
- Back to the radishes…when radishes are fully pickled, like so-

close up of salted radish Rinse it in cold water 2-3 times and drain. When rinsing, be careful when handling the radish because you can easily bruise the radish and release a pungent grassy taste. Just gently shake the salted radish in the water 2-3 times and then drain.

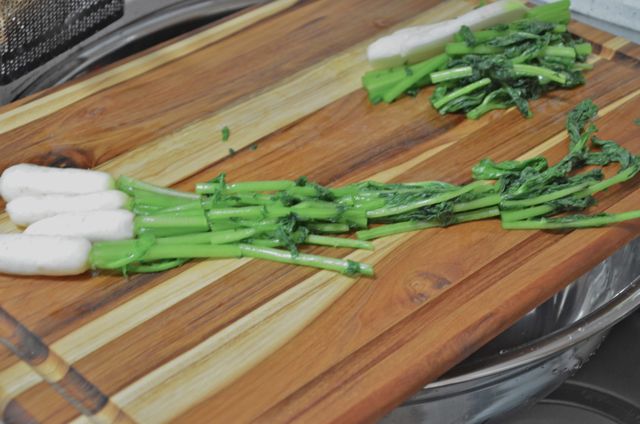
rinsing salted radish in water - Cut the rinsed and drained radish into bite size lengths – about 2-3 in long. Leaving the smaller radishes whole and cutting larger ones -along with some of the green stems attached.
cut salted radish for kimchi If the radish is too big, you can cut it in half or even into quarters like below but leaving the top end intact.
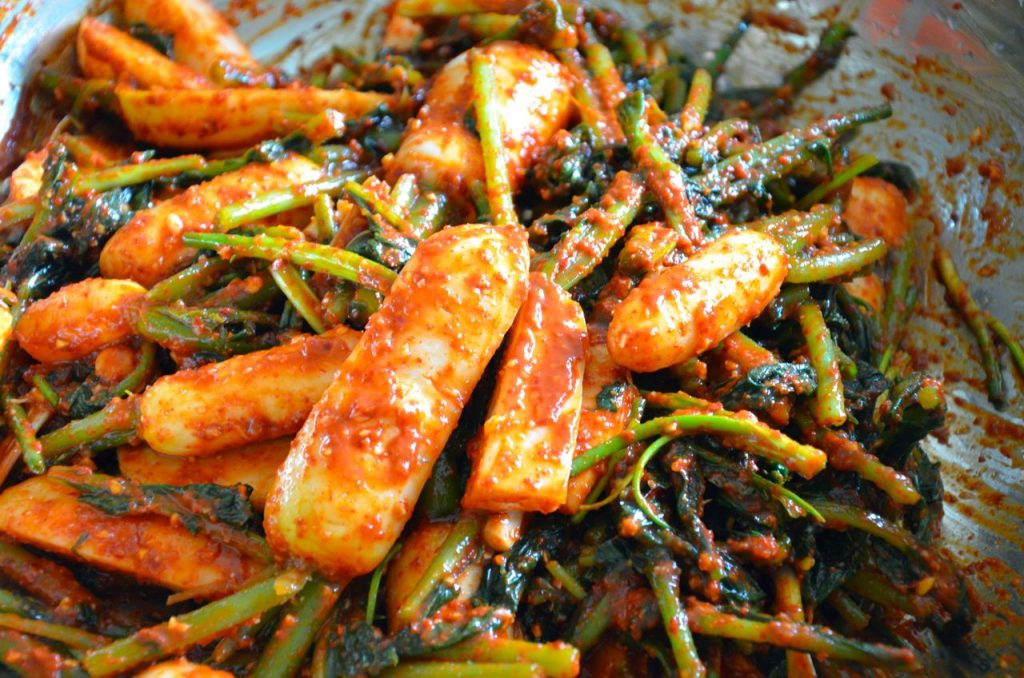
radish quartered for kimchi - In a large bowl, add the radish, green onions, fermented anchovy liquid, ginger, garlic and the chili flour paste.
chong gak kimchi ingredients
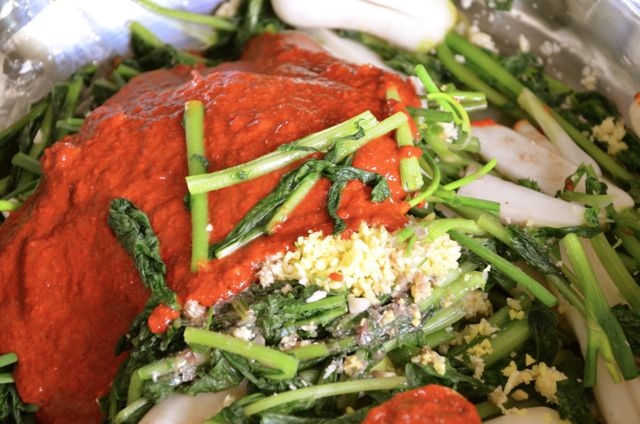
Gently mix the kimchi and yangnyum until everything is blended. Add 1~2 T sugar and salt to taste. Remember raw kimchi is supposed to taste a bit saltier than how you want it to taste when it’s ripe so if it taste just right when it’s raw, then it’s not salty enough.
Finally, fill a container with the chong gak kimchi. Press the radishes down into the liquid to make sure there are no air pockets.

Store the kimchi at room temperature for 1~2 days to kick off the fermentation. In cooler temperature, you may need to leave it out longer. See my No Crazy Kimchi post for more detailed info on how to ferment Kimchi.
Extra
- Do I NEED to use flour or rice paste? Using paste is actually optional. The flour or rice paste serves as food for the bacteria, and it helps to ferment the kimchi so definitely use it in cold temperatures. It also helps with any green grassy taste from the radishes. See my Kimjang Day: Part 2 post for more info.
- RICE vs FLOUR paste: Optionally, you can use rice paste or sweet rice paste instead of flour paste. Traditionally, flour paste is used for kimchis that uses radish or other greens because it is known to do a better job of taking away the grassy taste. It is also known to protect the minerals and vitamins in the radish so overall, it’s a better match with radishes.
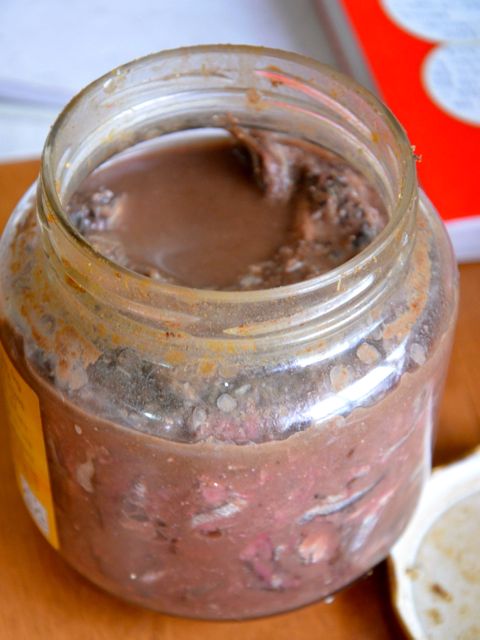
- Can I use fermented shrimps (새우젓 saewoojeot) or any other fish sauce instead of fermented anchovy liquid (멸치젓 myeonlchijeot) ? Yes, you can use fermented shrimps instead of anchovy sauce or use both. I happened to have a great tasting fermented anchovies so I used the liquid. Here’s a picture of what my mother-in-law gave me. See how this one has whole anchovies with the liquid. This is the real stuff.. I did not use the anchovies itself but only the liquid.

fermented anchovies (멸치젓 myeolchijeot) Access to better quality fermented shrimps (saewoojeot) is probably easier so go ahead and use saewoojeot if you have it.
Easy Young Radish Kimchi (Chong Gak Kimchi)
A very simple kimchi with minimal ingredients made with Passion Altari or Altari Radish, a type of radish that's very tender and crisp with almost no pungency.Prep: 2 hoursTotal Time: 2 hoursserves: 10Ingredients
- 2 lbs young Korean altari radish
- 1/4 cup Sea Salt (Trader Joe's) increase amount by 25% if using Korean Cheonilyeom (solar sea salt)
- 1 cup water
- 2 bunches green onion
Yangnyum (Seasonings)
- 3/4 cup Korean red chili powder (Gochookaroo)
- 3 Tbsp chopped garlic
- 2 Tbsp chopped ginger
- 1/4 cup fermented anchovy liquid (Myeolchijeot or fermented shrimps, Saewoojeot)
- 1-2 Tbsp sugar
- Pinch of salt (if needed)
Flour paste
- 1 Tbsp flour
- 1 cup water
Instructions
- Wash radish and clean off excess dirt and roots. Works best if you scrape the outside with the edge of a knife. Clean the edges where the root part ends and the green stems start. Cut off any yellow leaves or stems and the outer greens if they look tough. Cut off the pointy root ends of the radish.
- Get a large bowl. Salt radish evenly by layering the radish and salting each layer as you go. Evenly spread out 1/4 cup salt throughout. Sprinkle 1 cup water on top of the salted radish. Gently turn the radish and salt water to make sure it gets an even coating of the salt and water. DO NOT handle the radish too much because it can bring out a grassy taste from the kimchi. Let it sit about 2 hours. In hot weather, 1 1/2 hrs should be sufficient. About half way through, turn the radish once making sure every radish is salted properly.
- Wash and clean green onions (about a handful or 2 bunches). Cut some of the thicker root ends in half and then cut green onions into 2 in long pieces.
Prepare the flour paste:
- Mix 1 Tbs flour and 1/2 cup water until there are no big lumps.
- Heat 1/2 cup water in a pot.
- When the water starts to boil, add the flour mixture and lower heat immediately.
- Simmer while stirring often so the flour does not stick to the bottom and everything is evenly mixed. The paste is fully cooked when it no longer looks opaque (prob. 3-5 min on med heat). It is OK if there are some small lumps as long as there are no huge ones.
- Set aside and let it cool.
Prepare the yangnyum (seasoning):
- To the flour paste (should be cooled, it can be lukewarm but not too warm), add chili powder and mix it well.
- Set aside for few minutes so the chili powder has a chance to soak.
Back to the picked radishes:
- Rinse it in cold water 2-3 times and drain. When rinsing, be careful when handling the radish because you can easily bruise the radish and release a pungent grassy taste. Just gently shake the salted radish in the water 2-3 times and then drain.
- Cut the rinsed and drained radish into bite size lengths – about 2-3 in long. Leave the smaller radishes whole and cutting larger ones along with some of the green stems attached.
- If the radish is too big, you can cut it in half or even into quarters but leaving the top end intact.
- In a large bowl, add the radish, green onions, fermented anchovy liquid, ginger, garlic and the chili flour paste.
- Gently mix the kimchi and yangnyum until everything is blended. Add 1-2 Tbs sugar and salt to taste. Remember raw kimchi is supposed to taste a bit saltier than how you want it to taste when it’s ripe so if it tastes just right when it’s raw, then it’s not salty enough.
- Finally, fill a container with the chong gak kimchi. Press the radishes down into the liquid to make sure there are no air pockets.
- Store the kimchi at room temperature for 1-2 days to kick off the fermentation. In cooler temperature, you may need to leave it out longer. See my No Crazy Kimchi post for more detailed info on how to ferment kimchi.
Tips & Notes:
- Do I NEED to use flour or rice paste? Using paste is actually optional. The flour or rice paste serves as food for the bacteria, and it helps to ferment the kimchi so definitely use it in cold temperatures. It also helps with any green grassy taste from the radishes. See my Kimjang Day: Part 2 post for more info.
- RICE vs FLOUR paste: Optionally, you can use rice paste or sweet rice paste instead of flour paste. Traditionally, flour paste is used for kimchi that uses radish or other greens because it is known to do a better job of taking away the grassy taste. It is also known to protect the minerals and vitamins in the radish so overall, it’s a better match with radishes.
- Can I use fermented shrimps (saewoojeot) or any other fish sauce instead of fermented anchovy liquid (myeonlchijeot)? Yes, you can use fermented shrimps instead of anchovy sauce or use both. I happened to have a great tasting fermented anchovies so I used the liquid.
Nutrition Information:
Calories: 31kcal (2%)| Carbohydrates: 6g (2%)| Protein: 1g (2%)| Sodium: 296mg (13%)| Potassium: 234mg (7%)| Fiber: 1g (4%)| Sugar: 3g (3%)| Vitamin A: 50IU (1%)| Vitamin C: 21.6mg (26%)| Calcium: 32mg (3%)| Iron: 0.5mg (3%)


I grew a bunch of radishes that ending up bolting so I tried this recipe. Radish kimchi is now has become one of my favourite kimchi and I don’t feel too bad about the radishes not growing well 😀
I’m so glad you like it! Radish kimchi is one of my top favorite too! And it’s the taste that matters, how it looks, right? Thanks for the great comment.
This recipe was top notch! Thank you so much. My first attempt was pretty good. It was amazing to have actually crispy young radish! Flavor was very good. Some differences were that with my type of Korean red pepper flakes it was way too much. And the glutinous pepper paste came out super red. I don’t know enough about Korean pepper flakes to know why. But luckily you can add a little bit at a time. Another thing was I need to buy a steam pan. It was really stressful washing the young radish because my bowels were not long enough. Planning on buying a 20 inch long steam pan for next time because this stuff is just so much better home made.
Yay!! So glad that you liked it. And oh yes, the red pepper powder – you can always adjust to your liking. Thank you!
Hi I’m trying to make this again. The recipe seems to require 1/4c of regular sea salt? How much salt should I use with course korean sea salt cheonilyum?
Also what do you mean by this part? Just flip everything?
“Gently turn the radish and salt water to make sure it gets an even coating of the salt and water.”
Thank you!
Hi Hanna, that’s a great question and I’m sorry I didn’t make a note about using Cheonilyeom. You can use about 5 Tbsp Korean Cheonilyeom instead of 1/4 cup (4Tbsp) of sea salt. And what I mean by flip everything is to turn over (or rotate) the radishes in the salt water so that the radishes floating on top goes down to the bottom in the brine and the radishes that were at the bottom of the brine comes to the top. You do this because the radishes that are at the top is not fully immersed in brine and doesn’t pickle as well as the ones that’s totally under the water. Hope that helps. Thank you!
It is very delicious and thank you for the recipe!!!
I’m soo happy to hear that! So glad you liked it and thank you for the 5 stars! 😍
I have read about nitrites in Kimchi. And there is certain time period that they are at the peak. So how about this young radish Kimchi? How long should I keep them in the refrigerator for better fermentation but no nitrites. Thank you!
Hi Jin Joo! I was going through your recipe ingredients and one: Yangnyum (Seasonings), I haven’t seen before and tried to find it on your K Ingredients page and only a Sea Salt under Saline Seasonings came up. Is this Sea Salt what you are referring to?
I really like young radish kimchi and want to try this one out, thanks for posting.