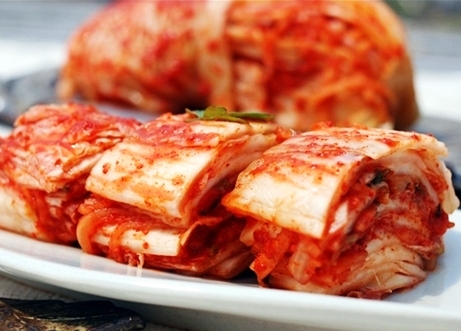
How to Ripen Kimchi
Everyone has a different preference as to when Kimchi(김치) tastes the best – some love eating freshly made, raw kimchi (kind of tastes like a salad); some love eating it when it is just perfectly ripe and then there are those who love sour kimchi (신김치 shin kimchi) which has basically over fermented and obviously tastes quite sour. But one thing is for sure – no one likes the stage when it is in the in-between stages of being raw and ripe. Kimchi really does not taste good at all when it is in the process of getting ripe – I had an aunt who used to call this the time when kimchi has gone CRAZY! And you certainly don’t want to eat the kimchi when it’s crazy! 🙂 So here’s how to ripen Kimchi and avoid CRAZY kimchi.
Since most of us now buy kimchi from the store, let me first write about the best way to eat a store bought kimchi. Too often, I hear people say that the kimchi served at our house tastes great, but when they try the same brand themselves, they think it doesn’t taste nearly as good. I realized it was because they don’t take the time to ripen it properly and then also forget to serve it cold (right out of the fridge). I found that most kimchi (even the poorly made ones) will taste quite palatable when they have had time to ripen properly.
Now, the hard part about buying kimchi from a store is that it is hard to tell at what stage of the fermentation process they are in. One clue is the appearance of the vegetables. They will look more shriveled up if they are further along in the fermentation process. And the chances are that it will also have lost a bit of the juice because the content will start to bubble and balloon up when it ferments which ends up usually overflowing out of the jar. This is actually too bad because kimchi should always be immersed in its own juices for it to taste the best.
The best way is to buy the freshest kimchi possible and bring it home and ripen it from the beginning. But this is usually not possible…So far, I have found the best tasting kimchi that you can buy are actually the ones that are directly imported from Korea (종가집Jongajip is my favorite). It is expensive but worth it in my opinion as long as it hasn’t traveled too far or stayed on the shelf too long at your store. Other than that, the next best thing is to try to buy kimchi that is made locally if it’s available (less chance of it over ripening) and when you bring it home, open it, smell it or better yet, taste it. If your store has a fast turnaround, it is probably in the “crazy” stage.
If it’s already fully ripe, put it in the fridge in the coldest possible setting. If it’s not yet fully ripened and you can wait, let it ripen in your fridge. This will take about 2 weeks in your fridge. Also note that the juice may overflow so either move the kimchi into a bigger container or take some out (1/5th) and leave some room for the kimchi to expand. If your kimchi is still very fresh, not at all ripe and you need to eat it quickly, you can ferment it at room temperature.
In the summer, Kimchi will ripen in 12 ~ 18 hrs and in cooler weather it can take about 24 – 48 hrs. Just check every 4-6 hrs.
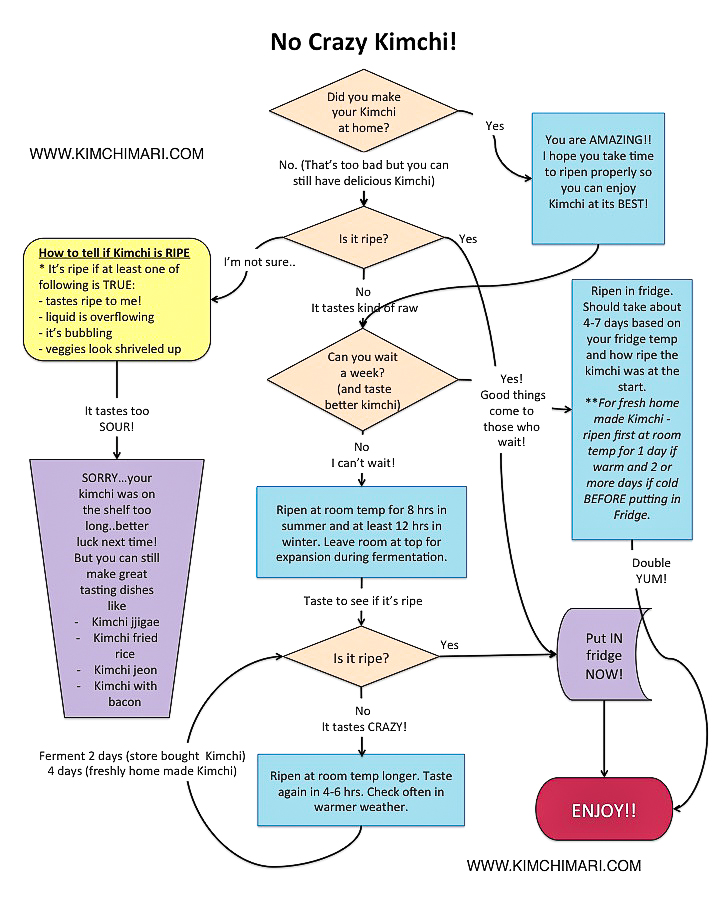
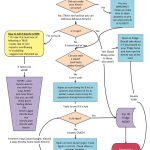
If this is all too much info for you to digest, I have a chart at the bottom of this post that can help you with the process. (Boy, it’s been ages since I drew up a flowchart…brings back memories from my college days of hand drawing the charts using graphic rulers..)
What is the ultimate best way to ripen or ferment kimchi?
The most delicious and fantastic kimchi is made when it is fermented the old fashioned way…In a traditional Korean clay jar, buried in the ground in winter time. Even though the ground freezes in the winter, the jar and the saltiness of the kimchi keep it from freezing completely. This is called 김장김치 (kimjang kimchi). Kimjang kimchi is usually made around the ‘start of winter’ (입동 ipdong) in the lunar calendar which is just about now (Nov 7-8th in Gregorian calendar).
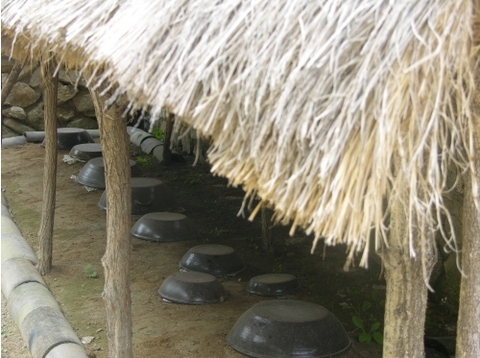
I remember when I was a kid, we spent days preparing and making kimjang kimchi so that it could last us through the winter and into spring. We first dug big holes in the ground big enough to hold our huge clay jars (so big that a child can fall in). In the meantime, we spent the day washing and brining 100+ napa cabbages and also preparing the ingredients for the stuffing. The next day we took these salted napa cabbages and inserted the stuffing in between each cabbage leaf. It was an enormous amount of work but boy…was it worth it. All winter long, we got to eat these amazingly crunchy and zingy and sometimes even ever so slightly frozen kimchi that came out of these jars in the ground. So why was it so tasty?
According to research, when it is buried in the ground, the temperature remains quite constant – at 32 – 35 F all winter long. At this temperature it takes about 20 days for the kimchi to fully ripen but it is definitely worth the wait.
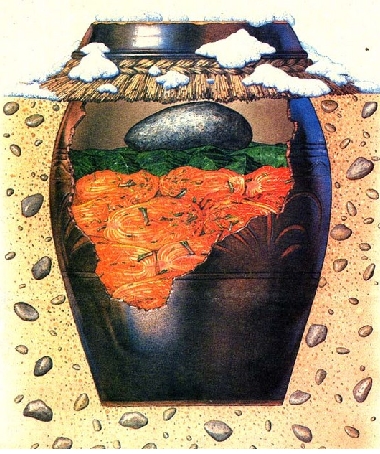
The clay jars are glazed to hold the moisture in but it can still breathe which allows just the right amount of air circulation to take away any heat produced from the fermentation (keeping the temperature stable). It also keeps the air tight enough for the bacteria to not grow too fast which helps the kimchi maintain its peak flavor for a longer period. The history of kimchi can be dated back almost 2000 years to the Goguryo Dynasty according to some historians, so you can see how long Koreans had time to refine the technique of kimchi making.
Since most Koreans now live in apartments and have no backyards to bury the jars, they have invented what is called a kimchi refrigerator. This fridge is different from the conventional refrigerator because the interior walls of the fridge are cooled instead of the air which helps to keep the interior at a more constant temperature. I own one and I have to say it is the next best thing to having your own kimchi jar in the ground. It even has temperature options for fermenting and then just storing it to prolong its freshness.
How to tell if Kimchi is ripe and ready to eat?
When a kimchi is not fully ripe, you are able to smell and kind of taste the individual ingredients – garlic, cabbage, radish, green onion, fish sauce, etc – as they have yet to fully integrate with each other. When it is fully ripened, the tastes of all the ingredients are well blended together and there is full flavor embedded in each cabbage leaf or vegetable pieces. There is also a slight sour taste with an added zing at the end. You can also no longer smell the raw ingredients individually but rather have a combined, wonderful slightly stinky smell that is unique to kimchi. Below is the chart that I promised earlier –
So how long can I store Kimchi in the fridge?
When stored at the ideal temperature that’s close to the freezing point of 32 F (-1 to 0℃), kimchi will keep for 3 months or more.
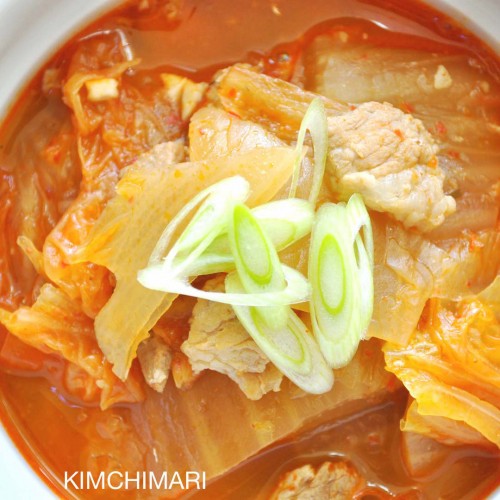
If the temperature of your fridge is higher (which is normally the case), it will probably keep for at least a month or more. Kimchi will start to taste just too sour when it starts to go bad – at which point, the best way to eat them is by cooking them by making Kimchi Jjigae, Budae Jjigae, Kimchi soft tofu stew, Kimchi fried rice and of course Kimchi Mari! Kimchi will sometimes go bad – it will have this whitish kind of film when it has been really too long and will also smell very pungently sour. You don’t want to eat it at this stage.
Can I take my Kimchi out from the refrigerator and leave it on the counter again to ripen further?
YES! Whether you have store-bought kimchi or made your own kimchi, you can take Kimchi out of the refrigerator at any time and let it ripen or sour further.
If it’s not ripe enough, it will take a long time to ripen in the fridge.
The whole point about my flow chart above was for people who have store-bought Kimchi. You may think it’s ready to eat because you got it from the store, but many times they are not fully ripe and therefore doesn’t taste as good.
Well, I hope this was helpful. Please share this info so that more people can learn how to ripen Kimchi properly and enjoy it at its best!
Take care,
XOXO
JinJoo
PS – if you want to learn more about Kimjang, here are two posts that teach you all about it!
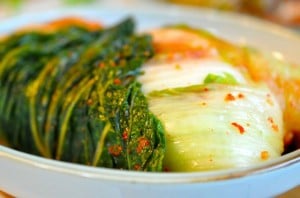 kimjang kimchi
- Kimjang Day: Part 1- How it’s done – I share my experiences and tips learned while doing Kimjang with my mother-in-law.
- Kimjang Day: Part 2 – Ingredients and Tips





I just realized I my question might be insensitive considering the brand name. Feel free to change the Brand name, if so and no need to display this second comment 🙂
Hi Brian, no problem! I don’t have the e-jen container myself so I’m not sure but I would just leave about at least 1 inch or more room on top for your kimchi to expand. Hope that helps. Good luck!
Hi! I use the e-jen kimchi container. How much room should I leave at the top for expansion? I have the 0.9 gal/ 3.4L size.
Hi! In the diagram of the onggi (third pic), what’s the green material above the kimchi? I’m planning on trying out kimjang kimchi next ipdong and I’d like to know the details. Thanks!
Hello, the green material is just showing the top layer of green cabbage leaves that typically are used to cover Kimjang kimchi. You can see that in my kimchi recipe – https://kimchimari.com/easy-kimchi-cabbage-recipe-blender/. Good luck!
Follow up question: for kimjang style kimchi, do you ripen it at room temp before putting it into the cold (as described in the flowchart) or is it immediately put outside? Thanks!
Hi Jax, good question – yes, you should let it ripen at room temp for a 2 days or so (assuming it’s cold weather) and then put it into the ground.
Thanks for the info!! I love Kimchi and I enjoy making them myself! I usually make 2 jars (about 4 napa cabbages), I leave 1 jar at room temp for about 3 days to ripen then store it in the fridge. The other jar goes straight in the fridge! By the time I finish 1 jar, the other one just starts to ferment.. just perfect timing! Though, there were times when I finish it quickly! Thanks for your post! At least now, I’m confident that it’s okay for me to take out my kimchi from the fridge to ripen at room temp, then back to fridge when it’s ready! xx
Awesome!! Love to hear that you are making kimchi and my kimchi post is helpful. Cheers!!
OMG Thank you so much for the flowchart and all the info! I was looking for these information for so long! Btw, can I ask if it is really a necessary to get a airtight container with those press down weight to fully submerged the kimchi for better fermentation or I can just use any airtight containers? Really confused with this… Kindly please advise, thank you! Cheers! 🙂
No, the weight is not necessary although it can certainly be used. It is good to have the kimchi submerged in liquid but you can do that either by covering it up with large cabbage leaves (see my Blender Recipe https://kimchimari.com/easy-kimchi-cabbage-recipe-blender/) or you can just keep it covered and airtight by covering it with plastic or plastic wrap. Hope that helps!