I have been wanting to do a post on Mak Kimchi for a while but somehow it just kept staying on my to do list. Hmm… I’m sure you have had instances where you tend to procrastinate on certain things more than others and then never really think why you are doing it. Until, you actually do it and then realize that it was NOT so hard to do.. so why did you NOT DO IT IN THE FIRST PLACE???
So I thought about it and I think it’s because I never really liked Mak Kimchi as much as Tong Baechu Kimchi. You may ask, what’s the difference?? The word Mak (막) basically means ‘haphazardly, roughly, carelessly’ which then also hints that it is much easier to make and is meant to be an everyday Kimchi in the Korean home. So instead of brining the cabbage in halves and stuffing in between leaves as it is done in Tong Baechu Kimchi (통배추김치), cabbages and radishes are cut into pieces and then just mixed with the seasoning. Tong Baechu means ‘whole cabbage’ and as you can imagine, it is a lot more work than Mak Kimchi. But to me, it always tasted sooo much better.
Somehow the cut cabbages in Mak Kimchi always lacked crunch and flavor which meant the overall Kimchi also tasted kind of dead when compared to the uncut cabbage kimchi version or tong baechu kimchi. That uniquely special zing was missing…And my problem is that I have a really hard time blogging about something that I am not totally excited about. So I just kept coming up with excuses why I should cook and blog something else and not this great easy everyday kimchi called Mak Kimchi.
Well, I finally have an Easy Cabbage Kimchi recipe that I’m excited to share!!!
I made this Easy Mak Kimchi last week but I had to wait to see how it tasted to make sure it was delicious as I thought it was going to be. And then, it just so happened that last weekend, all of my 3 sisters flew into my area for a sister’s reunion. So I was able to have all of my 3 sisters taste and critique my new recipe and I am proud to say that all of my 3 sisters and even my husband loved it!! I only wish I had worked on this recipe long time ago~
Before we get to the recipe, a friendly reminder~~
PLEASE ripen all your Kimchi properly!!
Otherwise, no matter how great the recipe, the Kimchi will not taste good if it’s not fully ripened. And as I wrote in my No Crazy Kimchi post, you have to find your personal preference of how you like your Kimchi. Kimchi goes from unripe, to just ripe, to slightly sour and then pretty sour stage. Depending on your palate, you may like your Kimchi at different stages so taste it every couple days to see when you like it the best.
Refer to my No Crazy Kimchi post for details but roughly, for this Easy Kimchi, I let it ripen for 2 days at room temperature of 70° F/21° C and then it was all ready to eat. If the weather is warmer, shorten the time. 1 day may be enough in the summer so check every 4-6 hours. If it’s colder, you may need to leave it out longer. Also, if you want to ferment Kimchi more slowly at a colder temperature like Kimjang Kimchi then leave it out for overnight or one day and then ferment over several days in the fridge. The overall fermentation time also depends on the salt level of your kimchi so adjust time by checking for ripening signs and taste instead of using absolute time.
Tips for making crunchy, flavorful and zingy Easy Kimchi:
- Brine cabbage first and then cut! Most recipes will tell you to cut the cabbage first into smaller pieces before brining them. This is why I think many Mak Kimchi is less flavorful and crunchy than whole cabbage kimchi. Brine cabbage halves first and then cut into pieces. This way you lose less of the flavorful cabbage juice into the brine. Also the edges are protected from becoming mushy.
- NO rice or sweet rice paste needed!! Sweet rice paste is NOT a must ingredient for Kimchi. Southern (남도 Namdo) Korean kimchi typically uses sweet rice paste along with more heavy seasonings but after some experiments, I found that not using the rice paste actually makes a cleaner, lighter tasting Kimchi. It’s also one less thing you have to do… 🙂
- Good salt and gochugaru is most important! Read more at my Korean Ingredients page.
- Onions are optional. But increase amount of sugar by 1~2 tsp if you are not going to use onions. I made two different versions one with onions but with 2 tsp sugar and another with no onions but added 1 tsp of suagr and 1 T of maesil syrup. Both turned out just as good so no worries if you don’t have onions!!
Quantity: 3 quart (2.8 litre) Time: 3 hr 30 min Difficulty: Easy
Ingredients
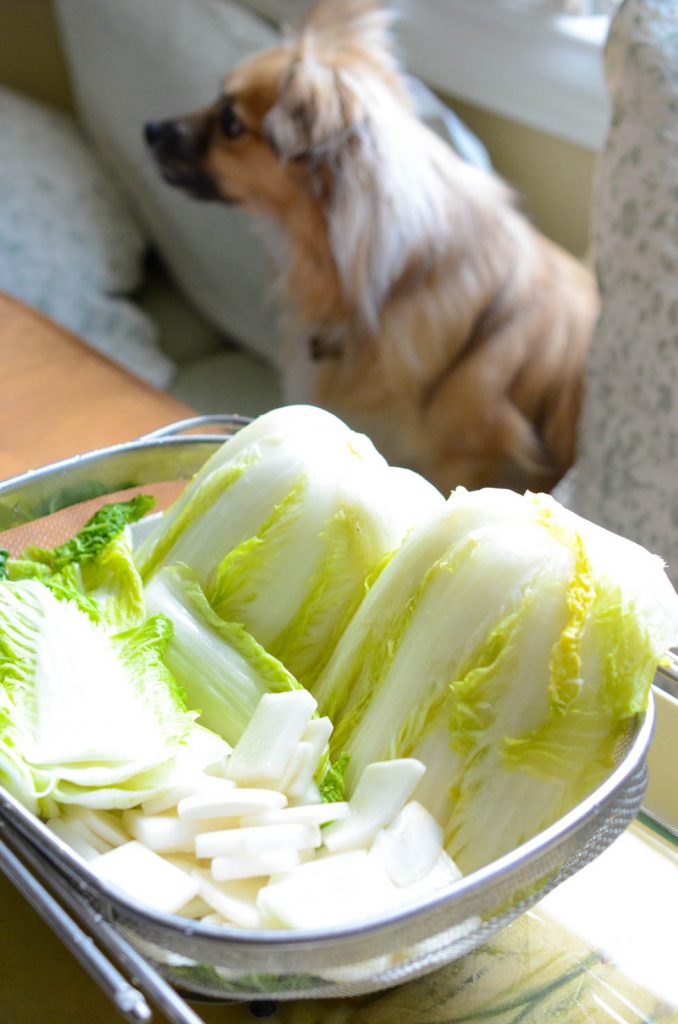
- 1 large Korean cabbage (approx 2 – 2.5 lb/900 – 1100g)
- 1 small radish (1.5 lb /600 g)
- 2 green onions, sliced
- 1 1/2 Cups + 3 Tbs Korean coarse sea salt with bittern removed (천일염 Cheonilyeom)
- Of which 1 1/2 Cup salt for brine
- 4 tsp salt for sprinkling between cabbage leaves
- 4 – 5 tsp salt for radish
- 9 Cups (240 ml x 9 = 2.16 litre, 2.3 quart) water
Mak Kimchi Seasoning Paste
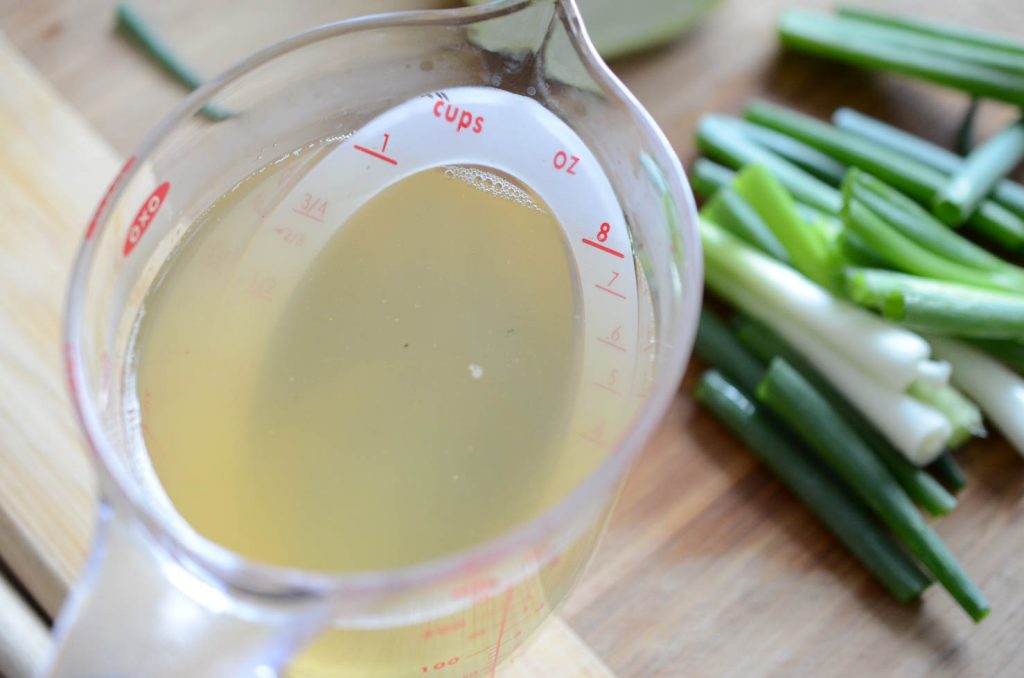
- 1 Cup anchovy stock
- 1 1/2 Cups water
- 1 handful of dried Korean anchovies (국물멸치 Gukmul myeolchi)
- 1 square (of dried Kelp (다시마 Dashima)
- 5~6 Tbs gochukaru (Korean red chili powder)
- 2 Tbs gochussi (dried red chili pepper seeds) – OPTIONAL but recommended
- 4 tsp anchovy sauce (멸치액젓 myeolchi aekjot)
- 2 Tbs fermented shrimp (새우젓 saewoojot)
- 1 Tbs chopped garlic
- 1 tsp chopped fresh ginger or 1/2 tsp ginger powder or
- 1/4 onion, finely chopped or blended (optional)
- 2 tsp sugar
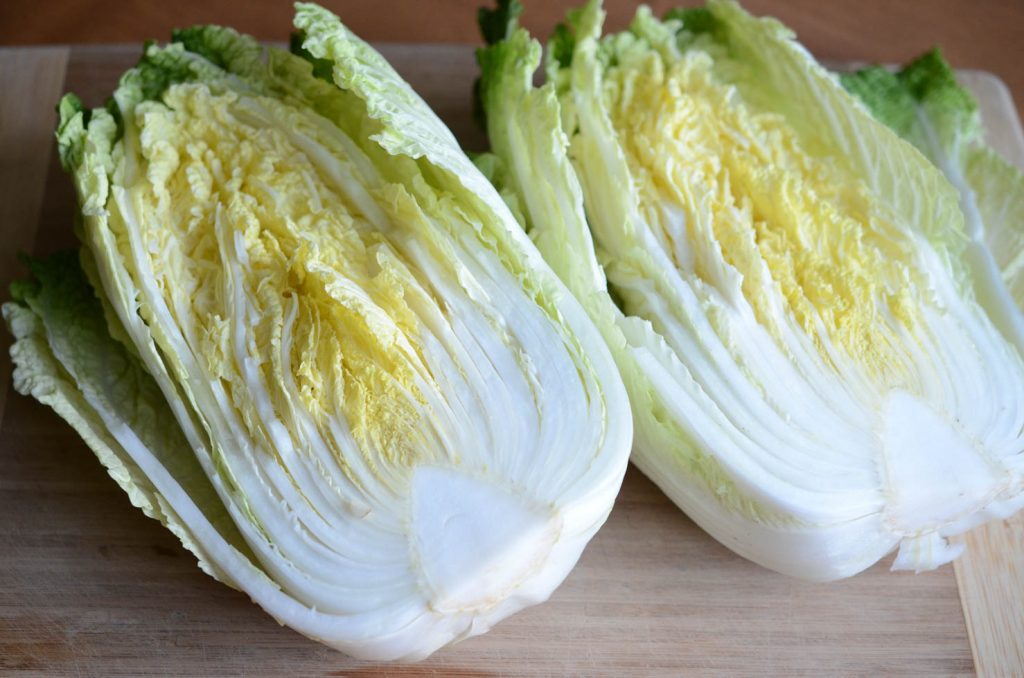
- Cut cabbage in half by cutting only the top head part (about 1/3) of the cabbage with a knife and then splitting open the rest with your hands.
cabbage halves for mak kimchi - In a bowl or pot large enough to hold the cabbages, mix 9 cups (240 ml x 9 = 2160 ml) lukewarm water and 1 1/2 cups of sea salt. Stir until salt is dissolved.
- Pickle cabbage halves in brine for 3 hrs.
- Pour some brine on top of cabbage to get it wet. Grab a generous pinch of salt (about 1/4 tsp) and sprinkle salt in between maybe 2-3 layer of leaves, focusing on the thickest part of the cabbage. You only need to sprinkle about 3 times per cabbage. Put the cabbage back in brine. Turn over the cabbage once every hour.

brining cabbage for easy kimchi - Try the ‘bend’ test on thickest part of cabbage to see if it’s fully pickled. It should bend easily without breaking when it’s fully pickled.
bending cabbage
- Pour some brine on top of cabbage to get it wet. Grab a generous pinch of salt (about 1/4 tsp) and sprinkle salt in between maybe 2-3 layer of leaves, focusing on the thickest part of the cabbage. You only need to sprinkle about 3 times per cabbage. Put the cabbage back in brine. Turn over the cabbage once every hour.
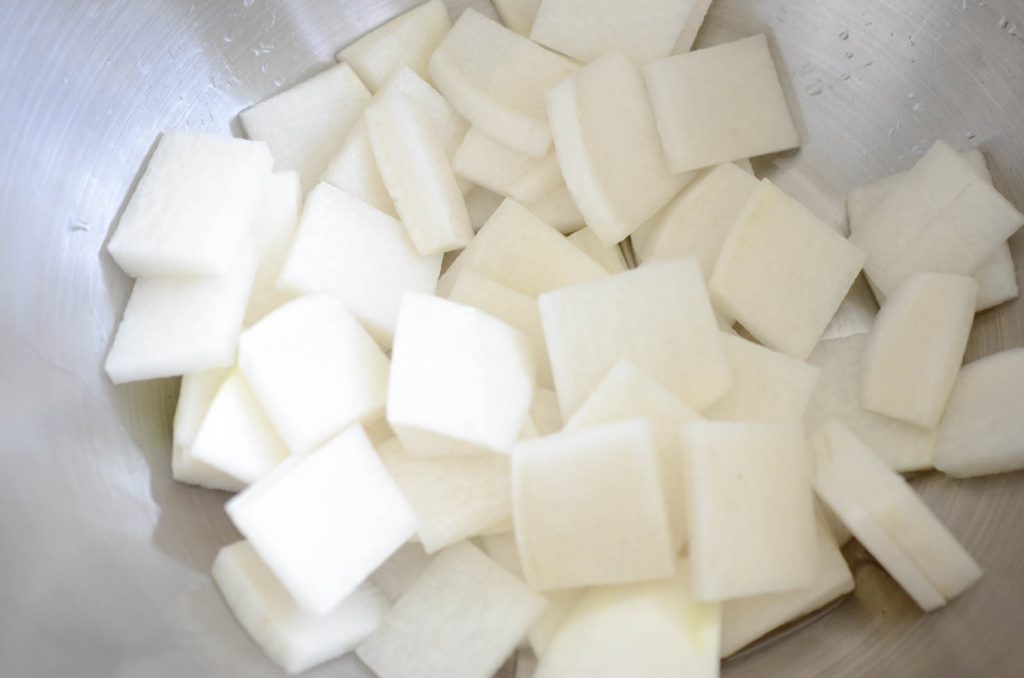
- After 2 hour 25 min into brining cabbage, cut radish into bite size squares. About 0.5 cm/0.2 in thick and 1.25 in/4cm sizes.
Cut radishes for easy kimchi - Pickle radish by sprinkling a handful (4 tsp) of salt and leaving them for 30 minutes. This way you can finish both radish and cabbage at the same time.
- Make anchovy broth by simmering handful of dried soup anchovies and dried kelp (dashima) in 1 1/2 cups of water. Simmer for 15-20 minutes until you get a yellowish cloudy broth. Let it cool. See Kongnamul Guk post for details.
Anchovy stock made from dried anchovies and sea kelp - Prepare kimchi seasoning paste in either one of two ways:
- Use a blender/chopper: throw onions, garlic, ginger together and chop or blend quickly for couple minutes until they are in small bits. In the pic, I put together little leftover purple and yellow onions and garlic cloves from the fridge.
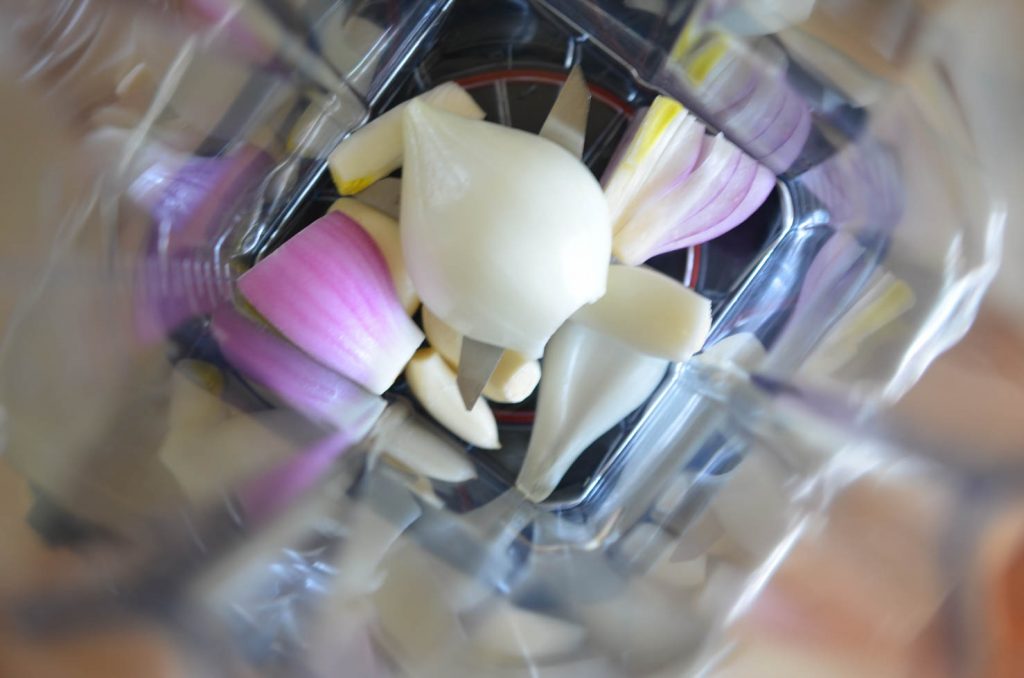
Purple, white onions and garlic for kimchi OR
- Chop finely onions, garlic, ginger separately by hand.
- Use a blender/chopper: throw onions, garlic, ginger together and chop or blend quickly for couple minutes until they are in small bits. In the pic, I put together little leftover purple and yellow onions and garlic cloves from the fridge.
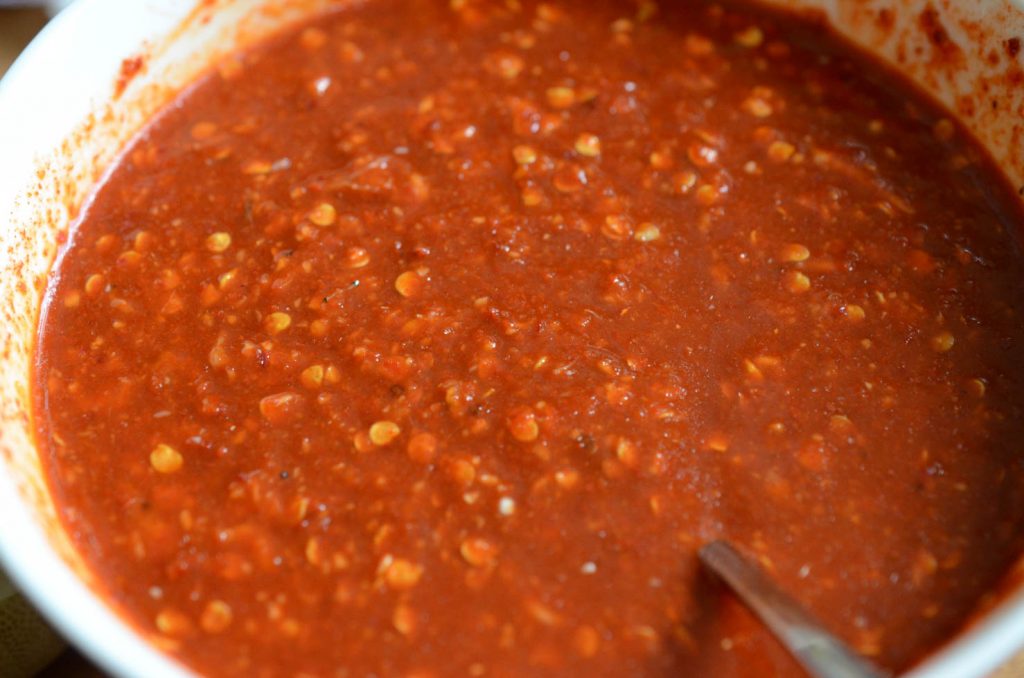
- Dump chopped onion, garlic, ginger into a bowl. Add red chili powder, anchovy sauce, saewoojeot, sugar and optionally chili pepper seeds. Substitute red chili pepper flakes for seeds. Mix.
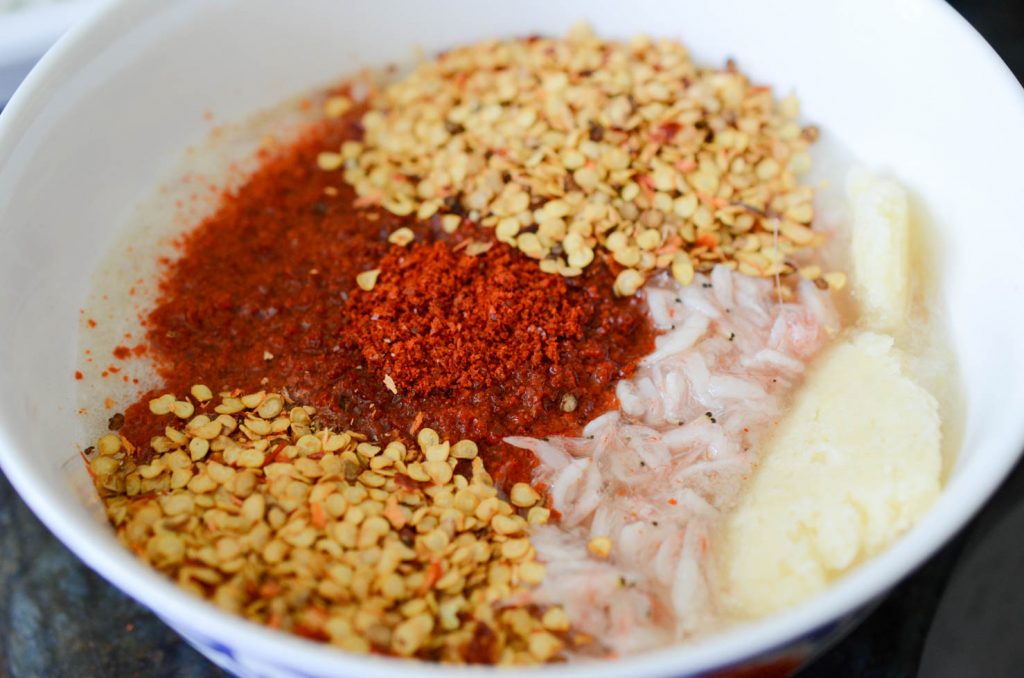

Chili seasoning paste for Easy Kimchi - Add 1 cup anchovy stock and mix. Set aside.
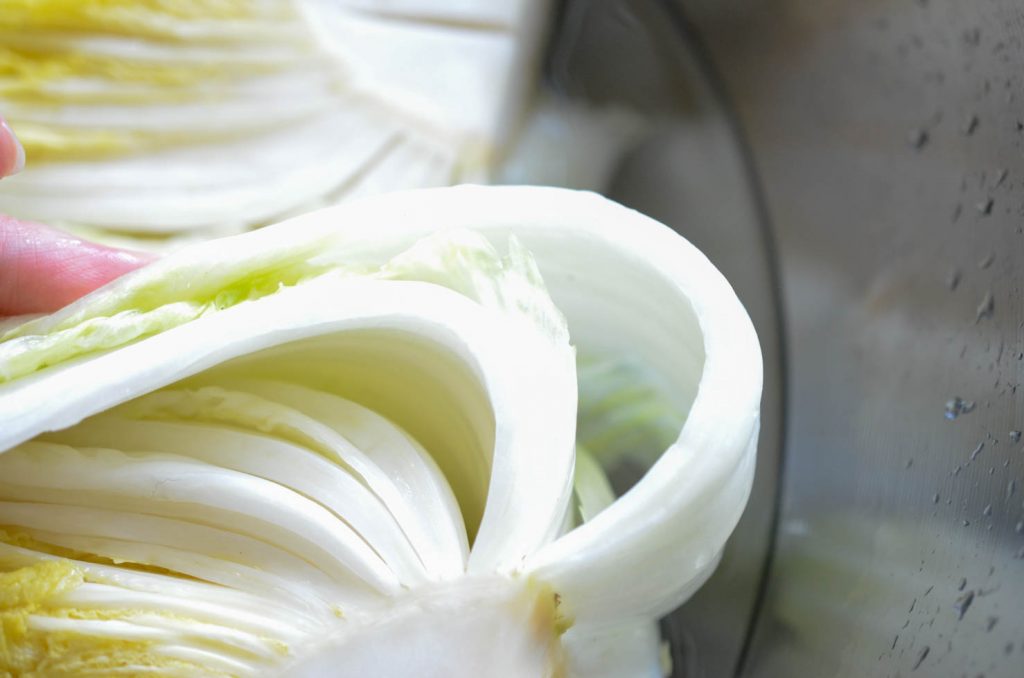
Seasoning mix for Easy Kimchi - Rinse brine from cabbage by soaking cabbage in water. Drain. Repeat 2 more times with new bowl of water. Let it drain for 5 min or more to completely drain excess water from cabbage.
- Rinse radish in water. Drain.
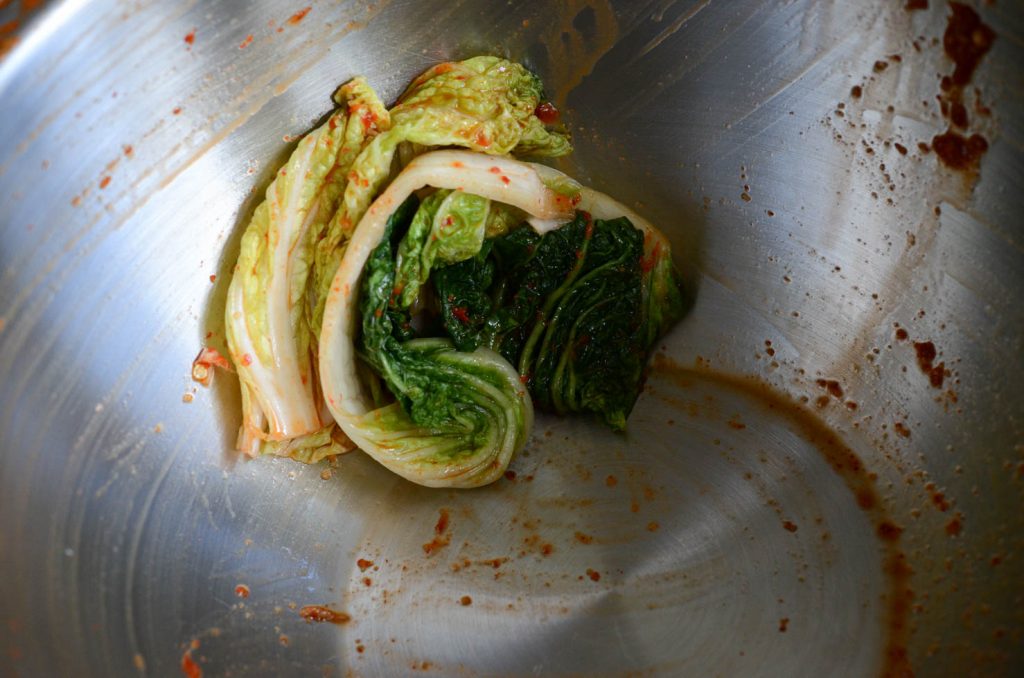
Brined cabbages and radish draining for kimchi - Cut out root end of brined cabbage halves by cutting in a V shape and carving it out.
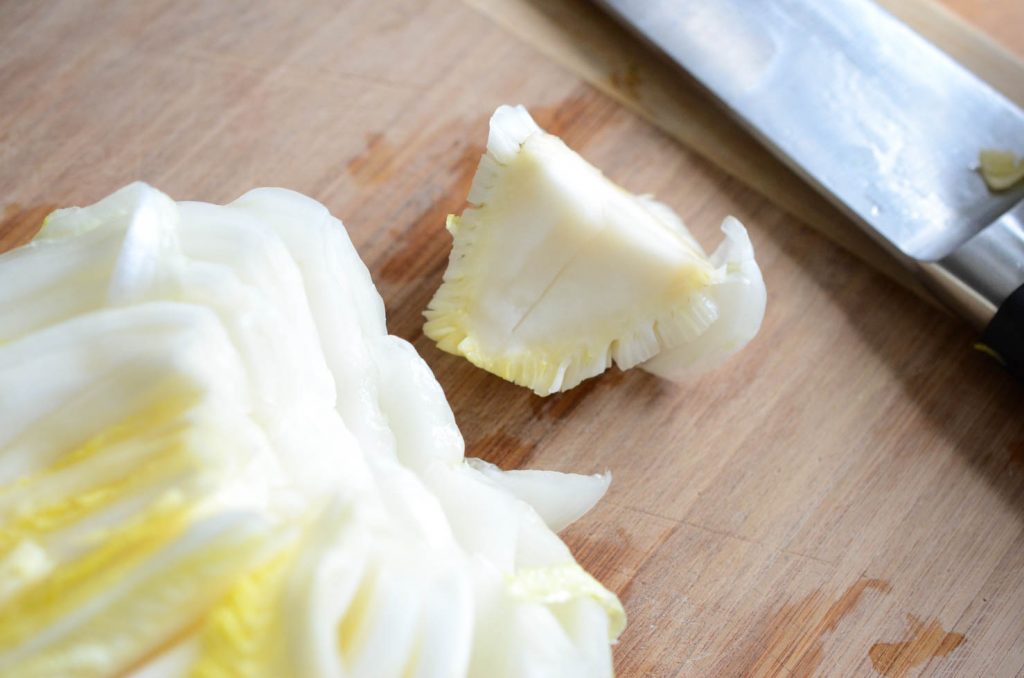
cutting cabbage core - Save some outer green cabbage leaves for later. Cut rest of cabbage leaves altogether into 1.5~2 inch slices.
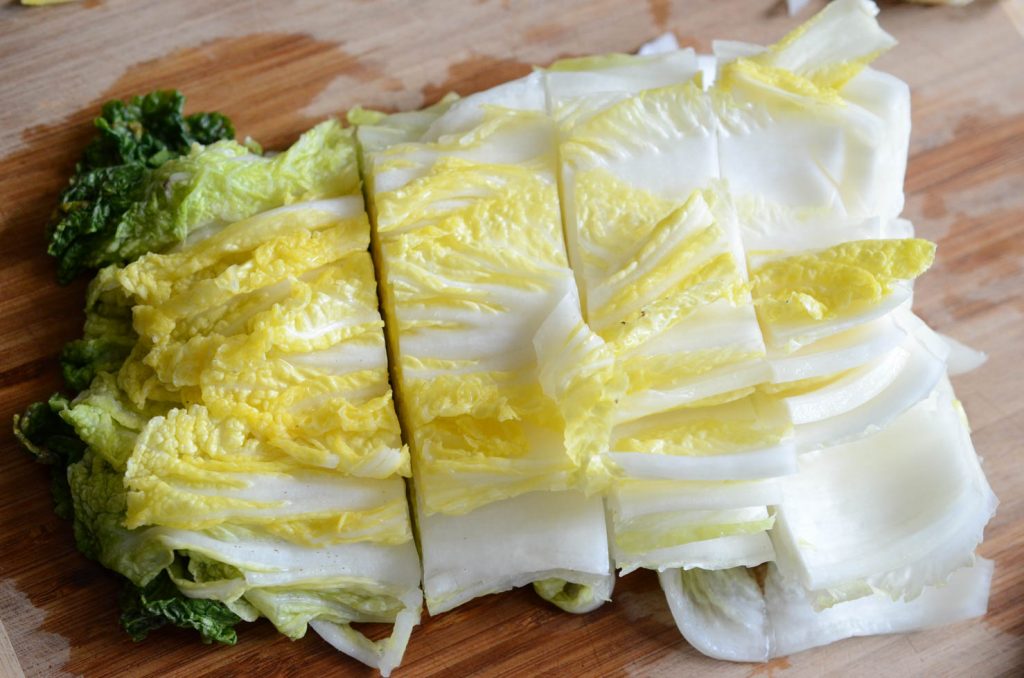
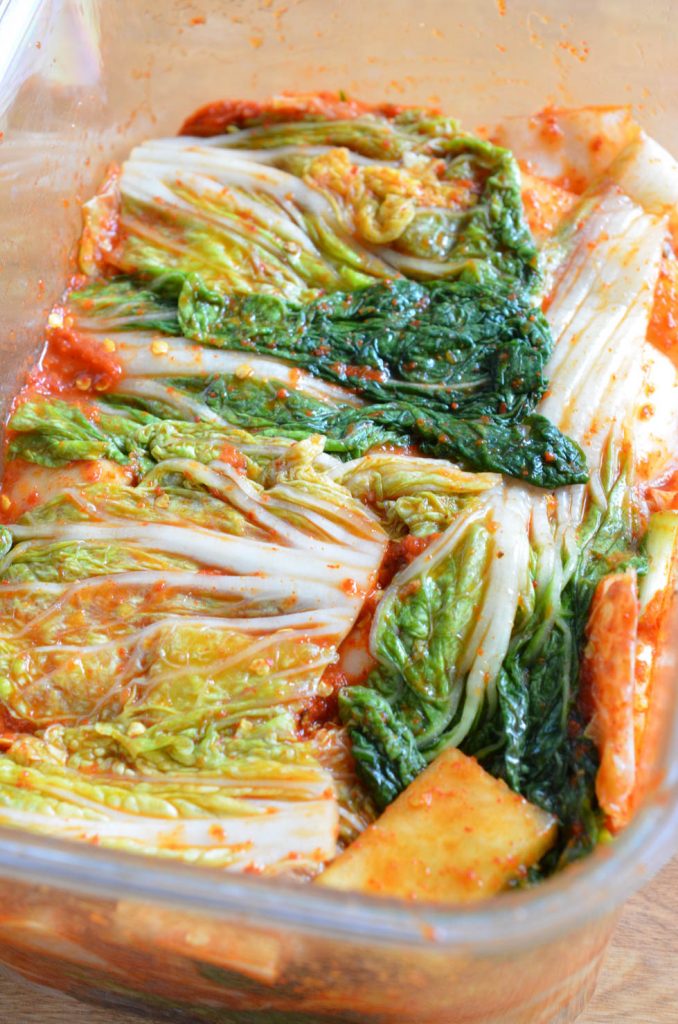
Cutting cabbage for Easy Kimchi - In a large bowl enough to hold everything, add the cabbage, radish and green onion slices and mix with the kimchi seasoning paste made in 7. Use plastic gloves to protect your hands from the spicy chili paste! Coat all cabbage and radishes evenly with the seasoning.
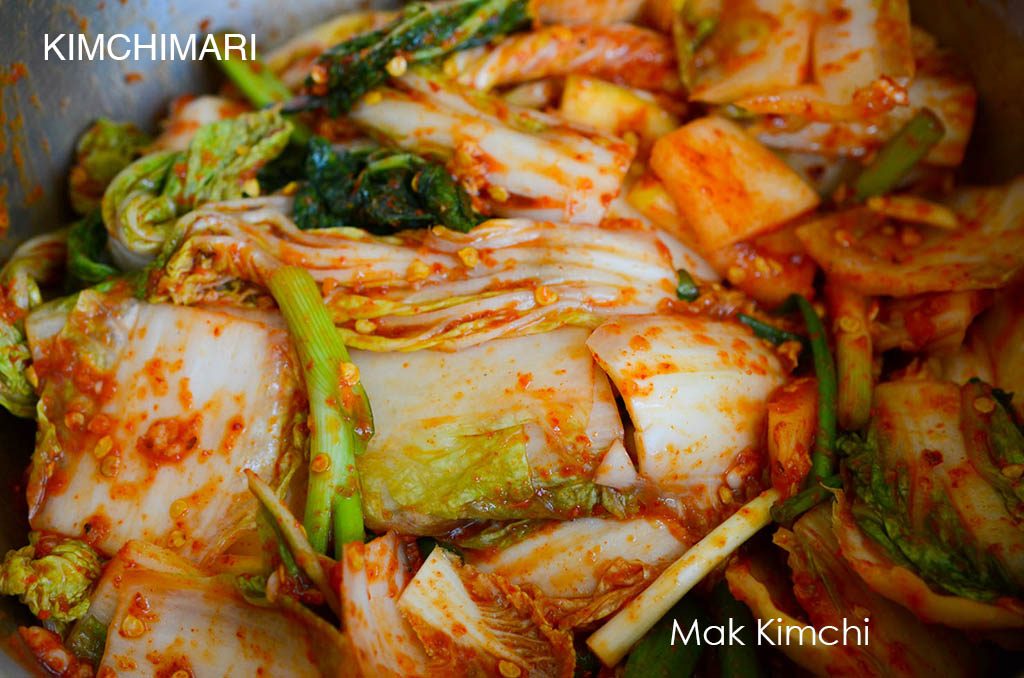
Easy Kimchi mixed - IMPORTANT!! Taste your kimchi and you can adjust seasoning. Remember it should taste a bit salty at this time and the saltiness will go down as it ripens. Also you don’t want it to taste sweet at all just enough to round out the edges. You can add more fish sauce or saewoojeot (1 T more?) if you’d like. Also maybe 1 more tsp of sugar at most.
- Get a glass jar or plastic container large enough to hold everything plus some head room for expansion during fermentation and transfer kimchi into the container.
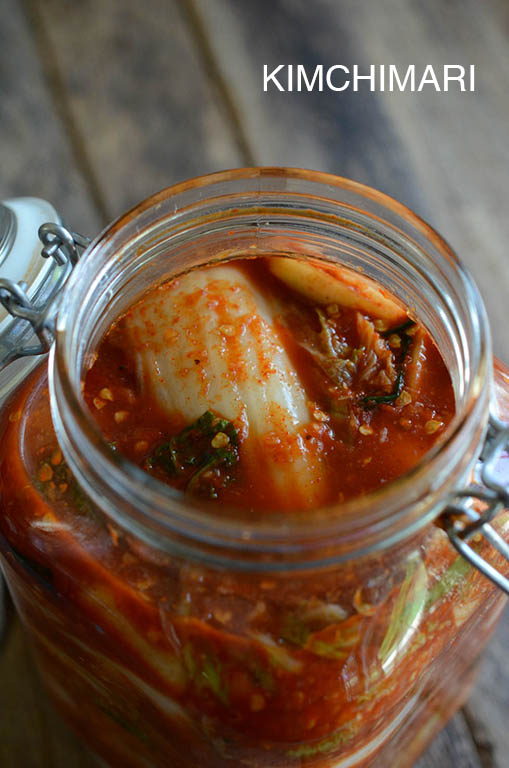
Easy Kimchi in glass jar ready for fermentation Use reserved green cabbage leaves to wipe all remaining seasoning from mixing bowl into container. Korean moms never wasted any Kimchi seasoning and this is how they cleaned up the bowl!
Wiping kimchi mixing bowl with cabbage leaves Cover top with large cabbage leaves.
Mak Kimchi top covered with leaves – this helps to keep everything soaking in juice Because this is not Kimjang kimchi, covering top with leaves is optional but recommended if you are storing Kimchi in a square container like above where lot of the Kimchi is exposed to air.
And there you go!! It wasn’t so bad, was it?? In total, I was able to make this and take pictures in one morning and as a result, you can have an amazing home made, fresh Kimchi. If you have never made Kimchi before, trust me and try this one!!
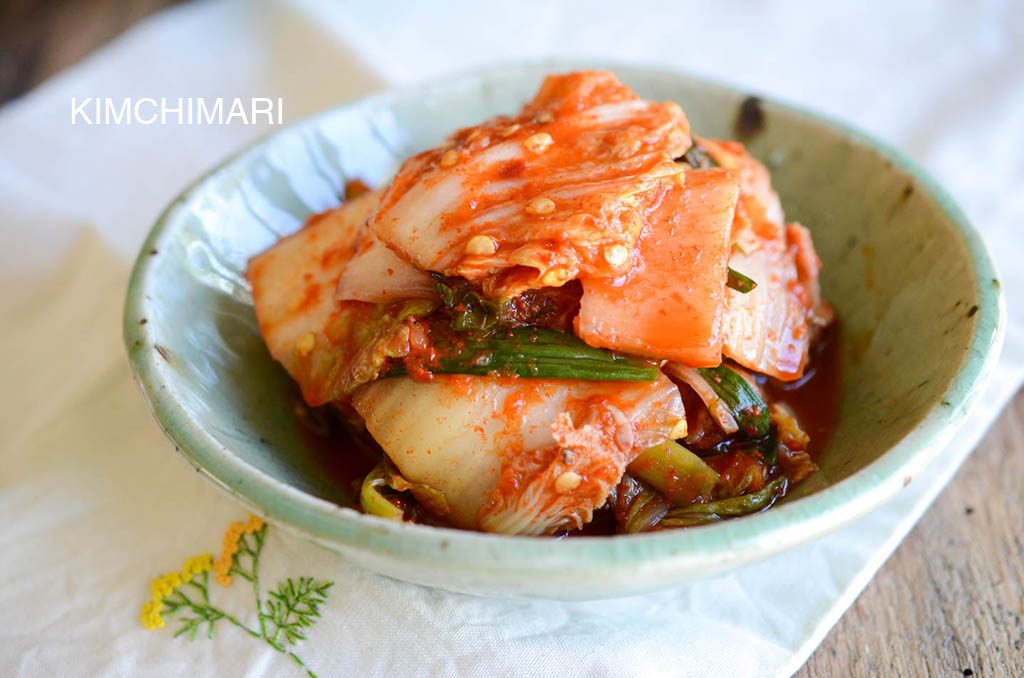
Leave it at room temperature for 2 days or so and then put in the fridge. It should be ready to eat in a few days.
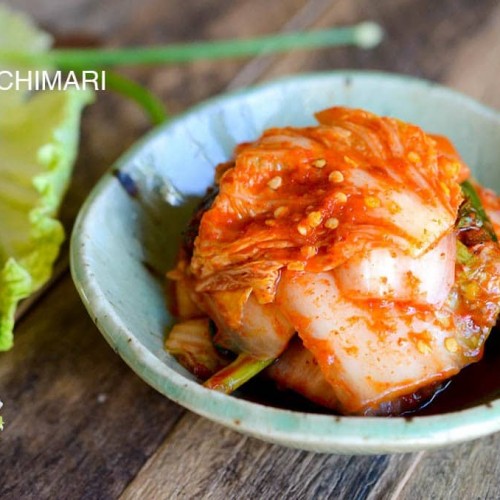
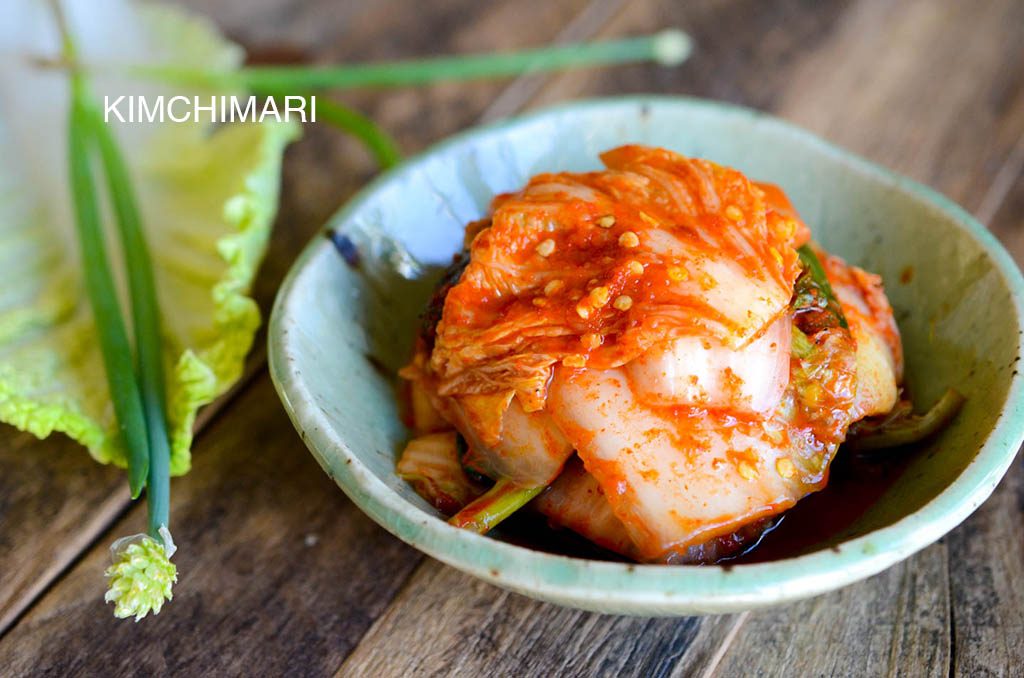
Easy Kimchi or Mak Kimchi (막김치)
Ingredients
- 1 large Korean cabbage (approx. 2 – 2.5 lb / 907.18 – 1133.98 g)
- 1 small radish (1.5 lb / approx. 680 g)
- 2 green onions (sliced)
- 9 Cups water (2.3 quart)
Salting Vegetables
- 1.5 cups sea salt for brine
- 4 tsp sea salt for sprinkling between cabbage leaves
- 5 tsp sea salt for radish
Kimchi Seasoning Paste
- 1 Cup anchovy stock
- 1.5 Cup water
- 1 handful of dried Korean anchovies (국물멸치 Gukmul myeolchi)
- 1 piece dried kelp (다시마 Dashima, 1 square piece)
- 5 Tbsp gochukaru (Korean red chili powder)
- 2 Tbsp gochussi (dried red chili pepper seeds – OPTIONAL but recommended)
- 4 tsp anchovy sauce (멸치액젓 myeolchi aekjot)
- 2 Tbsp fermented shrimp (새우젓 saewoojot)
- 1 Tbsp chopped garlic
- 1 tsp chopped fresh ginger (or 1/2 tsp ginger powder)
- 1/4 onion (finely chopped or blended)
- 2 tsp sugar
Instructions
- Cut cabbage in half.
- In a bowl or pot large enough to hold the cabbages, mix 9 cups (240 ml x 9 = 2160 ml) lukewarm water and 1 1/2 cups of sea salt. Stir until salt is dissolved.
Pickle cabbage halves in brine for 3 hrs
- Pour some brine on top of cabbage to get it wet. Grab a generous pinch of salt (about 1/4 tsp) and sprinkle salt in between maybe 2-3 layer of leaves, focusing on the thickest part of the cabbage. You only need to sprinkle about 3 times per cabbage. Put the cabbage back in brine. Turn over the cabbage once every hour.
- Try the ‘bend’ test on thickest part of cabbage to see if it’s fully pickled. It should bend easily without breaking when it’s fully pickled.
Pickle Radish for 30 mintues
- Cut radish into bite size squares. About 0.5 cm/0.2 in thick and 1.25 in/4cm sizes.
- Pickle radish by sprinkling a handful (4 tsp) of salt and leaving them for 30 minutes.
Make anchovy broth
- Simmer handful of dried soup anchovies and dried kelp (dashima) in 1 1/2 cups of water. Simmer for 15-20 minutes until you get a yellowish cloudy broth. Let it cool.
Prepare kimchi seasoning paste
- Use a blender/chopper: throw onions, garlic, ginger together and chop or blend quickly for couple minutes until they are in small bits.
- Dump chopped onion, garlic, ginger into a bowl. Add red chili powder, anchovy sauce, saewoojeot, sugar and optionally chili pepper seeds. Substitute red chili pepper flakes for seeds. Mix.
- Add 1 cup anchovy stock and mix. Set aside.
Rinse cabbages and radishes
- Rinse brine from cabbage by soaking cabbage in water. Drain. Repeat 2 more times with new bowl of water. Let it drain for 5 min or more to completely drain excess water from cabbage.
- Rinse radish in water. Drain.
Cut cabbages
- Cut out root end of brined cabbage halves by cutting in a V shape and carving it out.
- Cut rest of cabbage leaves altogether into 1.5~2 inch slices.
Mix kimchi vegetables with seasoning
- In a large bowl enough to hold everything, add the cabbage, radish and green onion slices and mix with the kimchi seasoning paste. Use plastic gloves to protect your hands from the spicy chili paste! Coat all cabbage and radishes evenly with the seasoning.
- IMPORTANT!! Taste your kimchi and you can adjust seasoning. Remember it should taste a bit salty at this time and the saltiness will go down as it ripens.
- Get a glass jar or plastic container large enough to hold everything plus some head room for expansion during fermentation and transfer kimchi into the container.
Tips & Notes:
Nutrition Information:
Happy Spring!
XOXO
JinJoo


Hi where can I get red chili pepper seeds? I went to the Korean market here in the US and I didn’t see any seeds where the red pepper flakes were.
Yes, unfortunately, chili seeds are hard to buy separately in the US. You can buy the whole dried Korean chilis and then remove the seeds OR you can just buy the red pepper flakes (like the ones you add to pizza) and use a bit of that which usually has seeds in them. Hope that helps Good luck!~
What would produce a better outcome in your opinion? Just using more regular Korean pepper flakes or using the American pepper flakes for pizza?
Hi Hanna, just using regular Korean pepper powder for Kimchi will work best. The American pepper flakes are a different kind of pepper and won’t give you the same flavor as the Korean ones. YOu can omit the seeds – they are just an ‘extra’ seasoning but not a must.
The best kimchi recipe so far ! Like what my mother use to make.
That’s awesome to hear!! Hope you can also give me 5 stars!! Thank you!
Hi Jin Joo, may I ask.. why do other recipes use Glutinous Rice Flour to make kimchi paste? I noticed that yours is the only one that does not use it, is it better that way? Thank you!
You can make Napa cabbage kimchi with or without the sweet rice flour paste. But somehow most common recipes that people share are ones that use the paste. Radish Kimchis or Yeolmu or other green leaf kimchis need the flour paste to ensure it doesn’t result too grassy tasting. The past is supposed to help with fermentation – it provides more food for the bacteria and helps the seasoning to adhere to the leaves more. It used to be that the more spicy, southern style Kimchis always use a lot of paste while the more Northern regions either used little or none. I wouldn’t say one is better than the other. Adding the paste speeds up the fermentation but in my view it can also make the kimchi taste less refreshing. But it’s up to you. Try it with or without and see what you like better. FYI – I do use paste in my other kimchi recipes – like my Blender Kimchi recipe.
I really like this recipe! I want to know a couple of things though. How do I adjust this recipe to do 30lbs of Napa Cabbage? I just bought a large onggi and I have never made this much at 1 time! Also, what about using pears and apples in the sauce? When using my onggi, will I need to add a stone or weight to the top of the cabbage to keep it down? Thank you so much.
So sorry for the late reply. Been a bit busy with some home projects recently. So, you can adjust the recipe by just entering the right number of servings until you get 30lbs. And just follow the recipe. You can certainly use pears. Apples, I’ve seen ppl use it but have not used it myself. I would advise that you use one or the other, not both. Yes, if you can, weighing it down should be good. You can also use this one because I use pear in this recipe – just cut the cabbage into smaller pieces like mak kimchi but do everything else the same. https://kimchimari.com/easy-kimchi-cabbage-recipe-blender. Good luck!
Hello!! Thank you so much for sharing. I am very excited to try this recipe. My partner is allergic to shellfish, so I cannot use the saewoojot. Is it alright to leave that out? Or is there a substitute? Thank you for your help!
Sure you can make it without saewoojeot but then increase the amount of salt a little.