
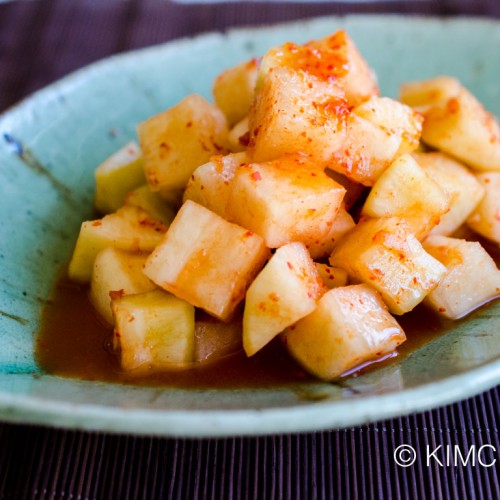
Kkakdugi or cubed radish kimchi is wonderfully crunchy and zingy that goes really well with any Korean food but especially with rich bone soups like Seolleongtang. It is also much simpler to make than the classic cabbage kimchi.
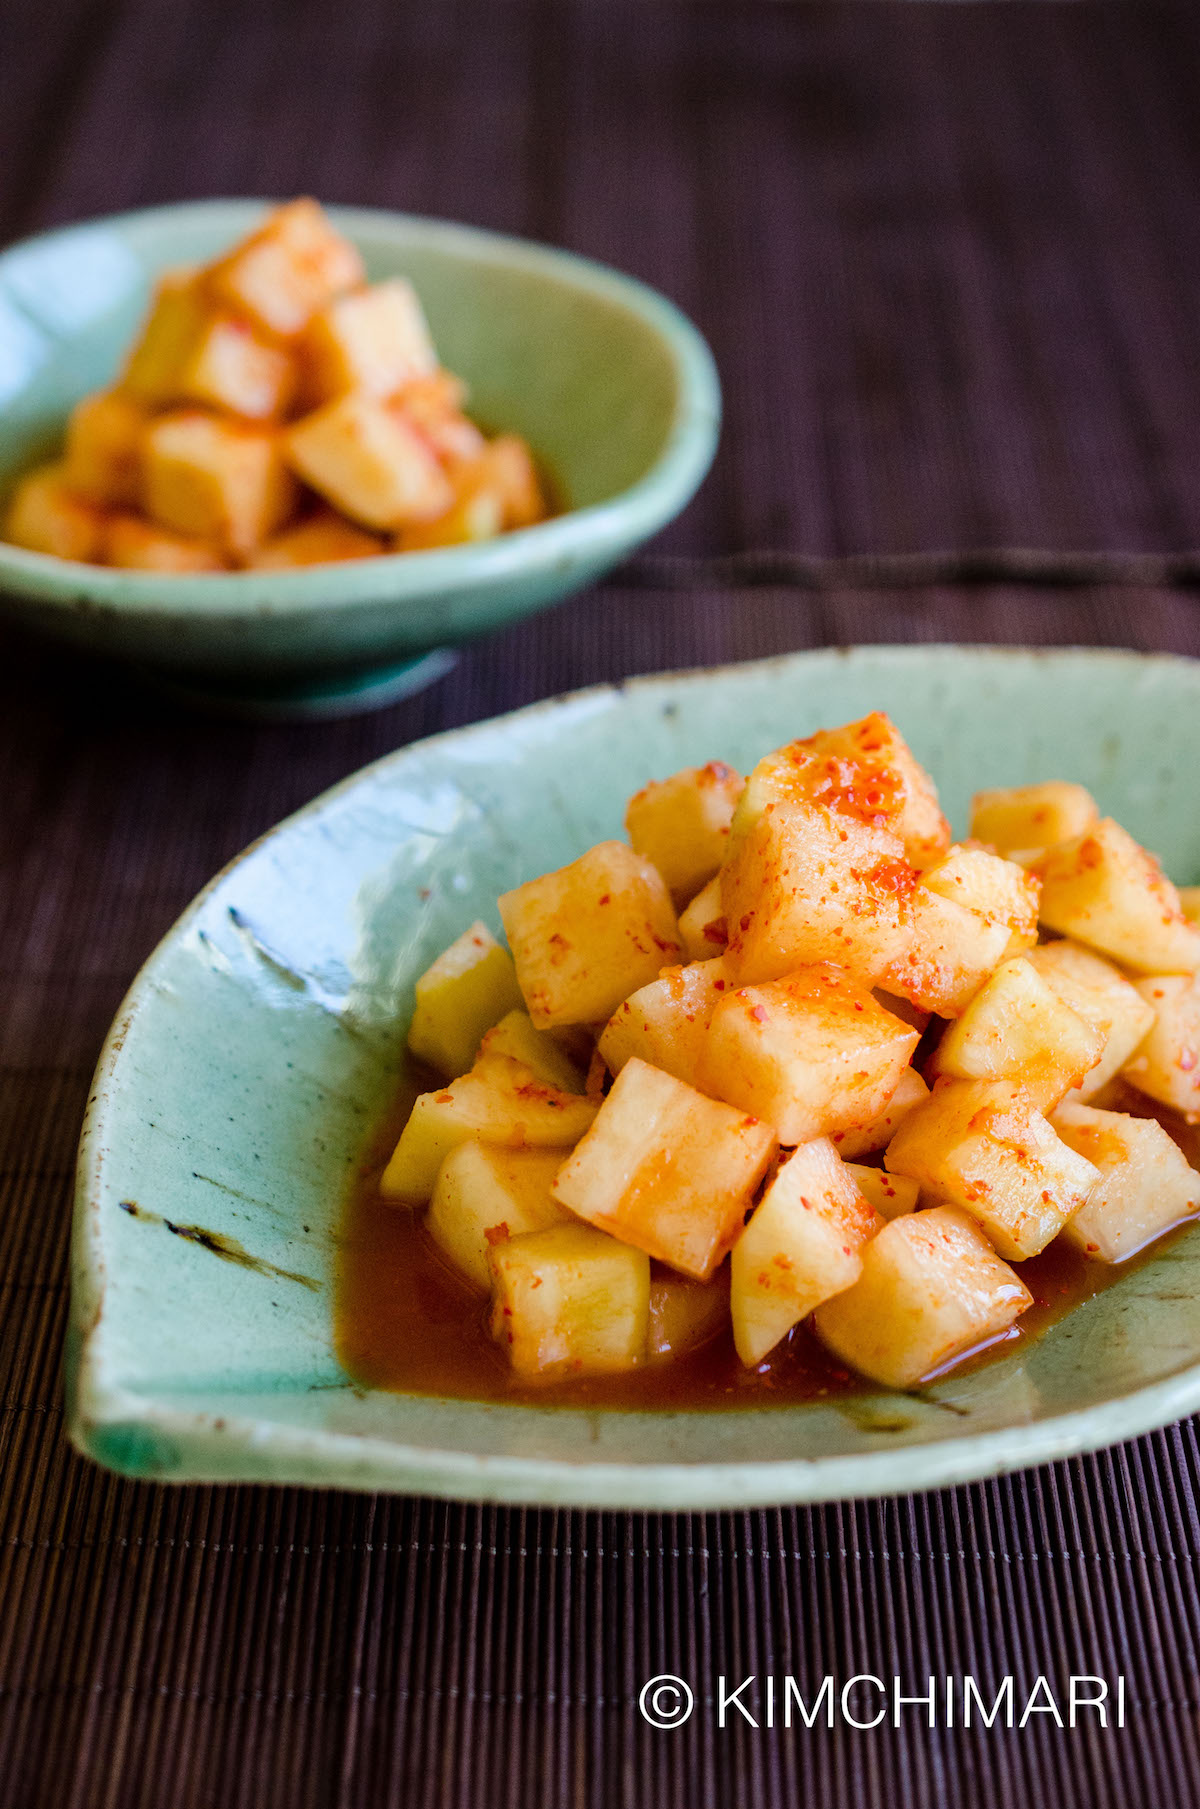
Kkakdugi 깍두기 is probably one of the most popular kimchi in Korean food, other than Baechu Kimchi that’s made with napa cabbage. Part of the reason for its popularity is because Kkakdugi is a very easy and quick Kimchi to make – just in 30 minutes or so.
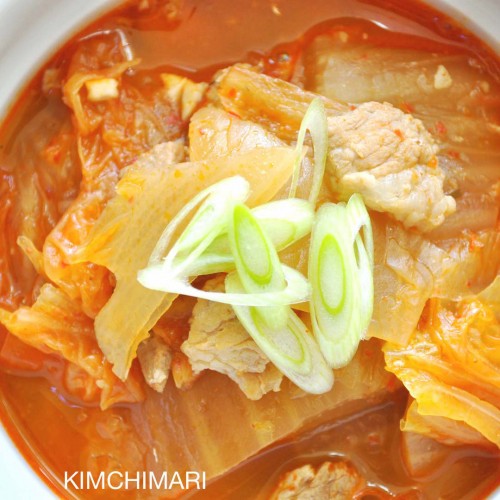
So, if you have never made Kimchi before, this is a great one to start with. It is also popular because, of course, it is very tasty. In my opinion, the best way to enjoy Kkakdugi is most definitely with hearty soups like Galbitang, Gomtang and Seollongtang. Oh, boy, my mouth is watering just thinking about eating the crunchy, slightly sour, mildly sweet, spicy and garlicky Kkakdugi with the hot, rich savory soup like Galbitang.
The zing of the Kkakdugi fermented taste really highlights the flavor of the beef soup, while also cleaning your palette from any fattiness the soup may have. So…that you are ready for the next spoonful!!
History of Kkakdugi
According to the book Choseon Yorihak (조선요리학), Kkakdugi was born about 200 years ago, during the era of King JeongJo (1752-1800). The wife of Hong HyunJoo (King Jeongjong’s son-in-law) was one of the many who were invited to the King’s royal family party. All the wives including Mrs. Hong was asked to prepare a special dish for the King.
Instead of using fancy ingredients like most of the other ladies in the royal family, Mrs. Hong decided to use a common radish to make a simple Kimchi which she often made for her family at her home. The King thought this kimchi made from cubed radishes was absolutely delicious and asked for the name of the dish.
Mrs. Hong replied that there was no name for the dish but that she just makes the Kimchi by cutting the radish in cubes-which is “kkakdug sseolgi” 깍뚝썰기 in Korean. And hence the name Kkakdugi 깍두기. To this day, the Korean culinary term for cube cuts is referred to as “kkakdug sseolgi”.
Benefits of Radish on Digestion
In a previous post, I have already shared how radish contains various digestive enzymes (Amylase) that helps with digestion. Additionally, the latest research also shows that radish extract reduces the toxicity in the liver (Effects of White Radish Enzyme Extract on Hepatotoxicity). So next time you eat your Korean BBQ, try eating radish salad like moosaeangche or radish kimchi (especially radish water kimchi called Dongchimi) and you will notice that it definitely helps you digest things better!
NOTE – Some time ago, I posted a recipe called Easy Radish Kimchi (Seokbakji). I need to make it clear that Seokbakji is NOT the same thing as this Kkakdugi. Kkakdugi is quickly pickled in brine so that as Kimchi ripens, large amount of radish juice seeps out from the radish making a lot of Kimchi juice.
Seokbakji on the other hand, is pickled longer which results in less liquid being produced during fermentation process. Thus Seokbakji Kimchi ends up having a much thicker sauce. Please don’t get them confused!
Frequently Asked Questions
What kind of Salt should I use for Kimchi?
I can’t STRESS this enough – PLEASE use Korean Cheonilyeom 천일염 (Korean Coarse Sea Salt aged with bittern removed) when making Kimchi. It is not enough to just use Coarse Sea Salt because non-Korean coarse sea salt will have different salinity and will not have the bittern removed. If the bittern is not removed, Kimchi will be bitter.
What is the best radish cube size for Kkakdugi?
The size of radish cubes for Kkakdugi comes in all different sizes. On average, the size ranges from the very dainty 0.5 in (1.2 cm) to a hefty 1 in (2.5 cm) cube. I like mine to be about 1.5 cm (0.6 in) but it’s totally your choice. Just make sure you adjust the time needed to pickle them in salt before adding the seasoning.
NOTE – The bigger the size of the cube, the longer you need to pickle them. But unlike brining cabbage, brining radish is quite forgiving so it’s OK to brine them a little less or a little more.
What to do with Kkakdugi that is too sour to eat?
You can make Kimchi Jjigae with it but usually not by itself but with some regular cabbage Kimchi. Check my No Crazy Kimchi post on more detailed instructions on how to ripen Kimchi properly. I even have a flowchart so check it out!
My Kimchi or Kkakdugi is too salty! How can I fix my Kimchi so that it’s less salty?
Don’t worry, as long as your Kkakdugi or cabbage Kimchi is not too ripe, you can add a handful or more of fresh radish cubes (unsalted) and let it ripen a couple more days. The extra radish will reduce the saltiness. You can also (in addition or in lieu of) add a bit more sugar or maesil extract (green plum syrup) to help make it less salty.
Cook’s Tips for Best Kkakdugi
- Buy good quality Korean radish (Mu) that is juicy, not dry and should not have air pockets inside. Pick up two radishes or similar size and buy one that is heavier. The outer skin should not feel rubbery or soft but hard.
- Adjust the amount of sugar and salt to taste. It should taste a little salty and slightly sweet when it is freshly made. The saltiness will lessen as the kimchi ripens.
- For warmer climates or if you like really spicy flavors, add more chili powder and fermented sauces to make the sauce stronger and saltier. Because my Kkakdugi recipe is a lighter and less spicy version than some. FYI, it will sour slowly in warmer temperatures if the salt content is higher.
- Kkakdugi sours pretty quickly and cannot be stored as long as regular cabbage Kimchi so it’s better not to make a huge amount.
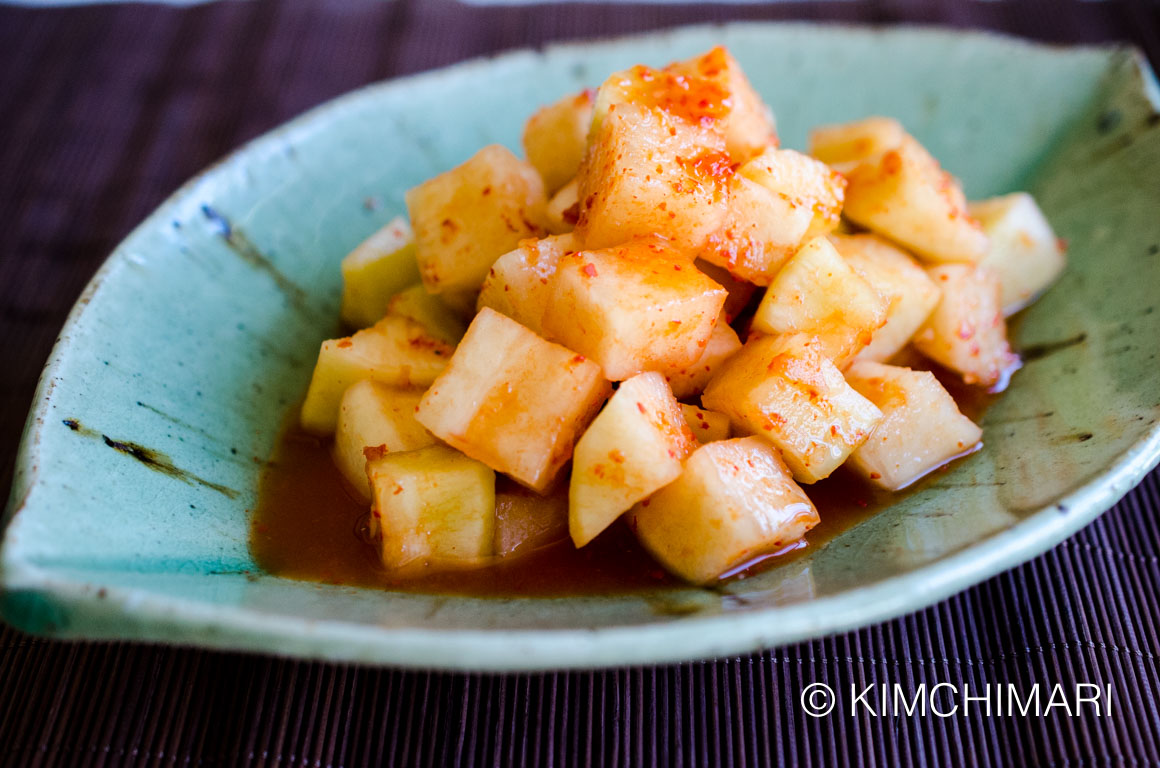
- Serve Kkakdugi cold, right from the fridge and it will be extra tasty!
Step-by-Step Directions
- Make sweet rice flour paste by mixing 10 Tbs water and 1 Tbs sweet rice flour with a whisk. Bring to boil and then simmer for 7-8 minutes, stirring frequently to ensure there are no lumps. Let it cool.
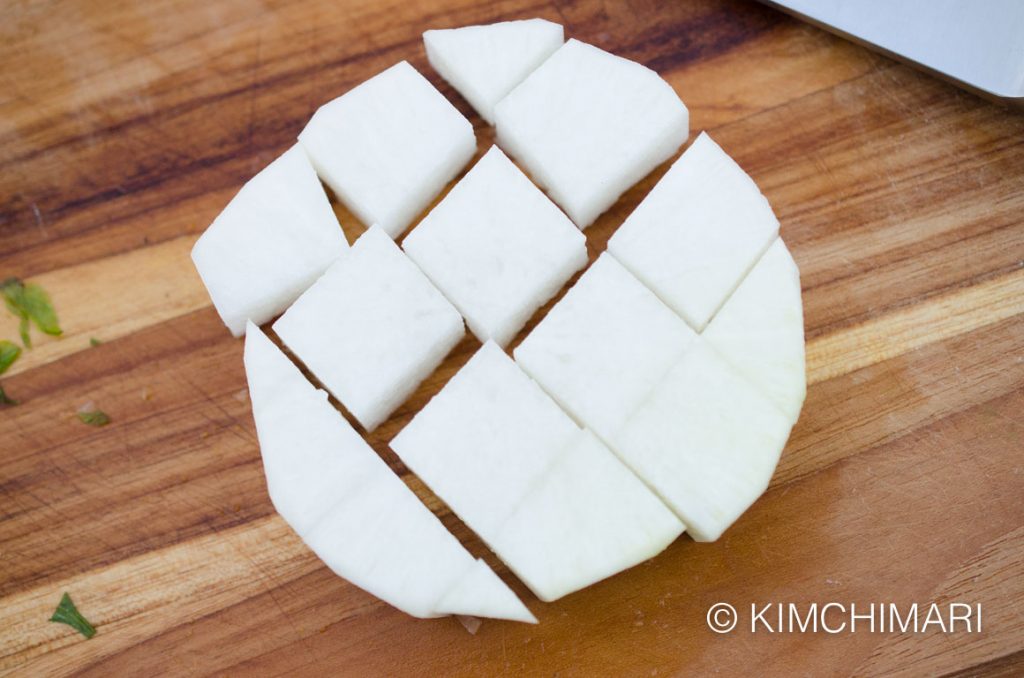
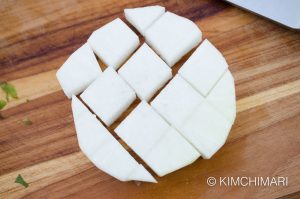
- Peel radish with a peeler and cut into 1.2 inch disks. Then cut into cubes like so –

Cutting Radish into cubes for Kkakdugi - In a bowl, mix 2 Tbs water and 3 Tbs Cheonilyeom Salt (Korean solar sea salt) and 2 Tbs sugar.
- Add radish cubes to bowl and pour brine from 3. Toss radish cubes to make sure everyone is evenly coated with the brine.
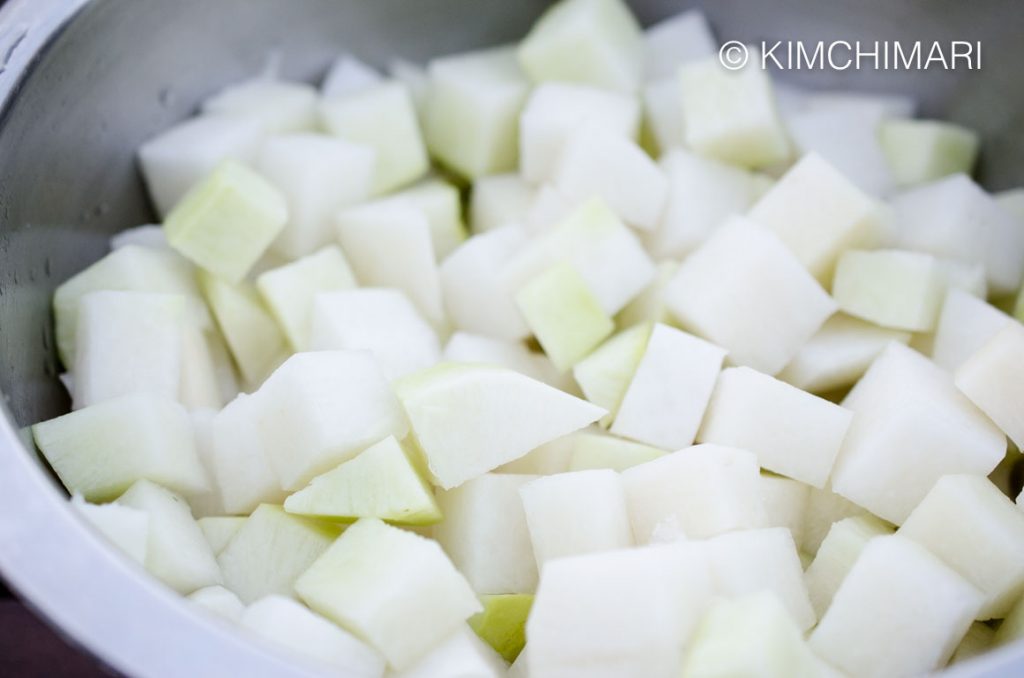
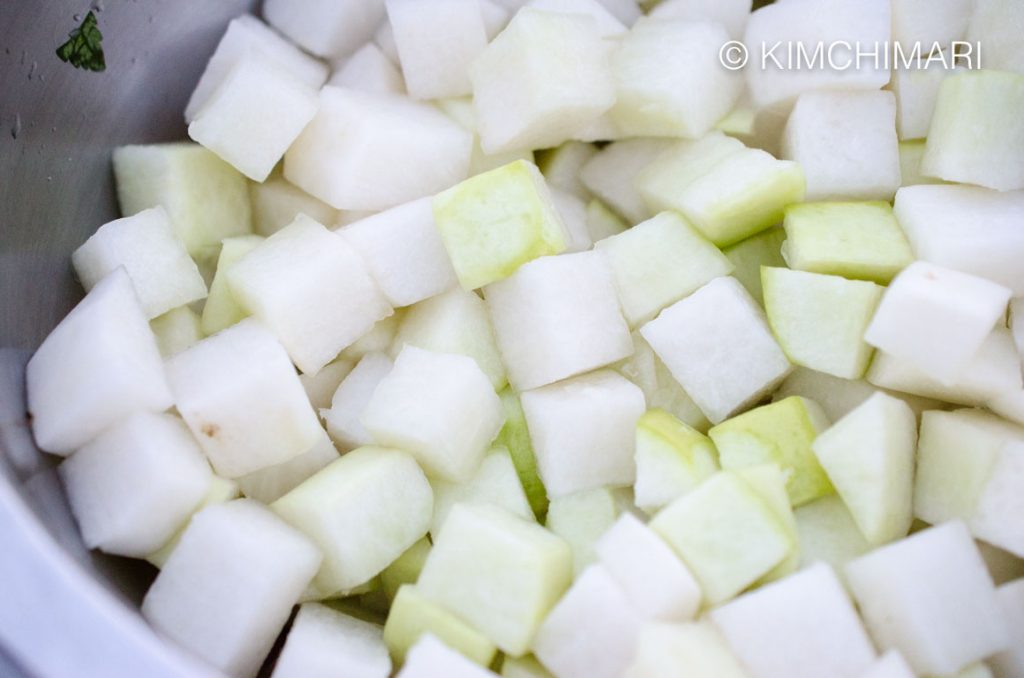
- Let radish cubes pickle for 20 minutes. And here’s how the kkakdugi radishes look BEFORE & AFTER being pickled in brine.
Kkakdugi radish cubes BEFORE brine was added Kkakdugi radish cubes AFTER it is pickled in brine for 20 miniutes - Drain radish from 5, discard the brine. Do not rinse radish.
- While radish is draining, prepare the yangnyeom (seasonings) – chop garlic, ginger and saewoojeot.
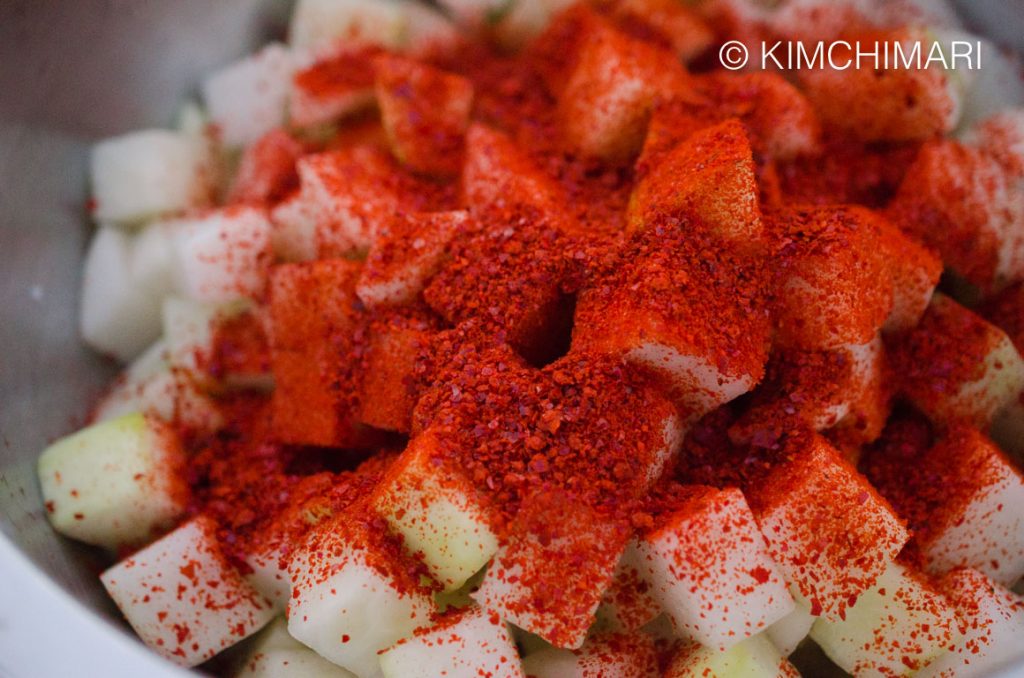
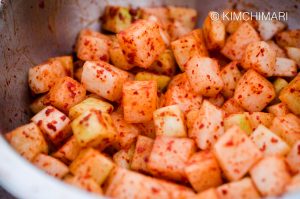
- Once radish is fully drained (about 2-3 minutes), sprinkle 3-4 Tbs Korean chili powder (gochukaru). Put plastic gloves on and toss and mix with your hands gently until evenly coated.
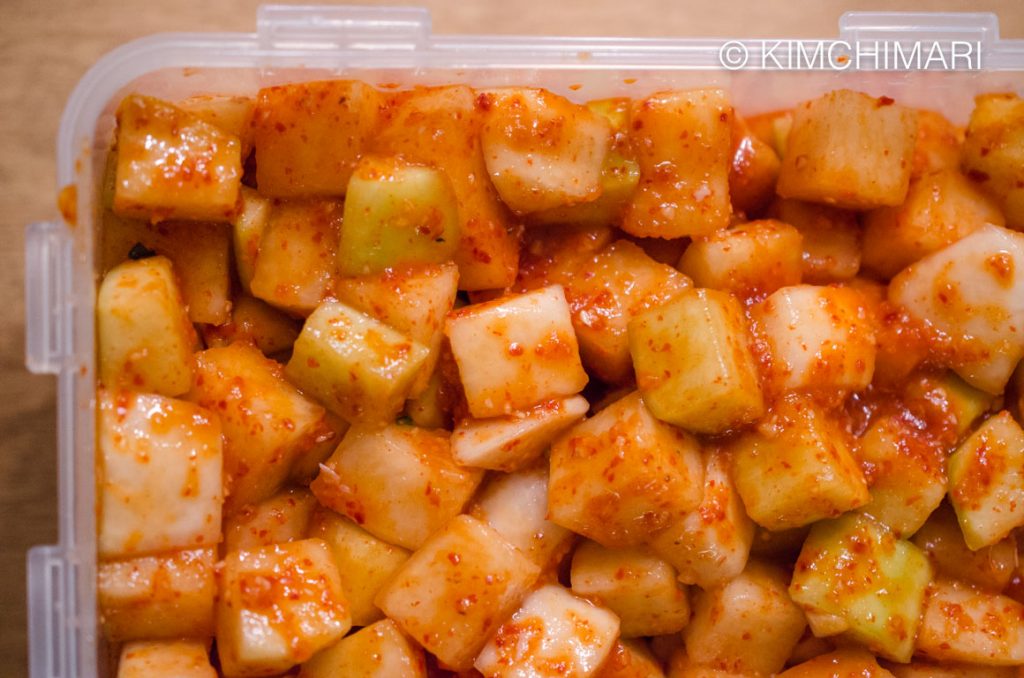
Chili powder on Kkakdugi radish cubes Chili powder coated Kkakdugi radish cubes - To 8, add cooled sweet rice flour paste, chopped garlic, ginger, saewoojeot and myeolchi aekjeot or kkanari aekjeot (sand lance sauce). Mix with your hands again. Add 1 Tbs sugar and 1 Tbs maesil green plum syrup (if you have it, otherwise just add a bit more sugar). Kimchi is all about adjusting to taste because the ingredient is different every time – taste it and you may want to add a bit more sugar if you want. It should taste sweet right away but just a hint of sweetness at the end.
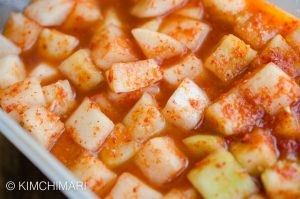
- Put in a container or jar, leave it out at room temperature for 1 -2 days until the top is bubbling. Put in fridge and serve cold for best flavor.
Kkakdugi finished – ready for fermentation!

And this is about 14 hrs later, left overnight in my kitchen. See how much juice has come out!!
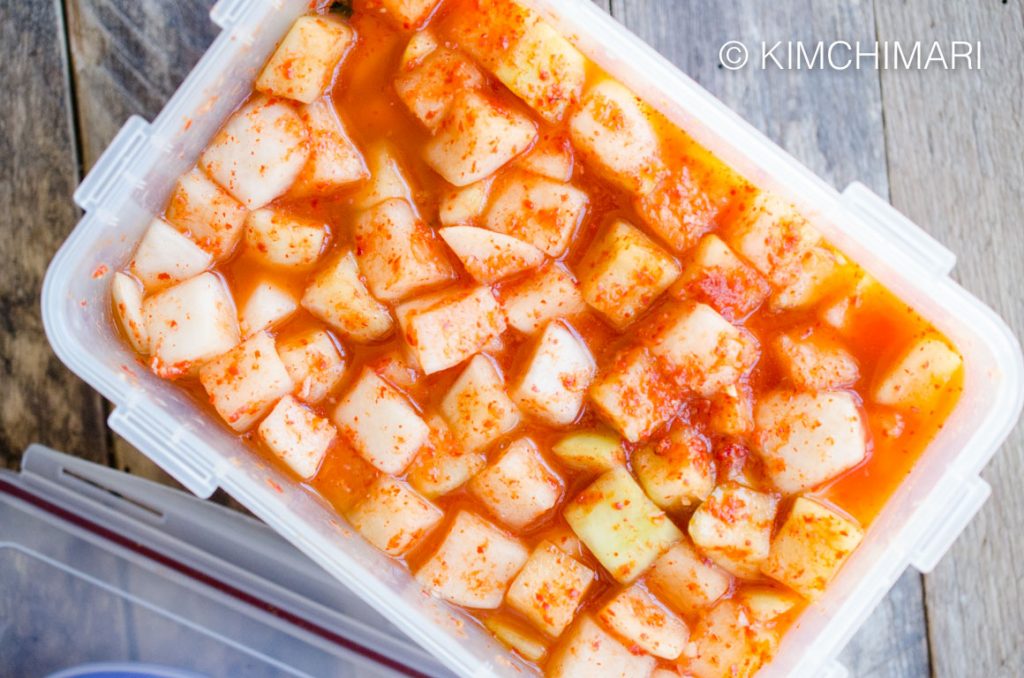
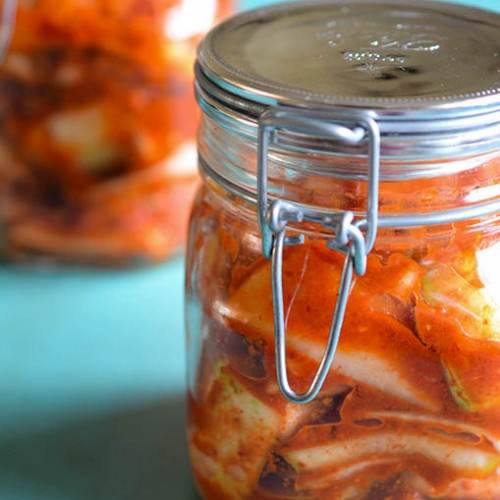
And here’s a beautiful photo of how Kkakdugi looks when it is fully fermented and ripened!
☆ Did you make this recipe? I hope you can give me a 5 star rating below!
And leave me a comment to let me know how you like it! I’d LOVE to hear from you! 😍
Wishing you success with your Kkakdugi!
XOXO ❤
JinJoo
Kkakdugi - Korean Cubed Radish Kimchi
Ingredients
- 1 large Korean radish (4 lbs or 1.8 kg)
Brine
- 2 Tbsp water
- 3 Tbsp Korean Cheonilyeom Sea Salt (Coarse sea salt with bittern removed)
- 2 Tbsp sugar
Sweet Rice Flour Paste
- 10 Tbsp water
- 1 Tbsp sweet rice flour
Seasoning
- 5 Tbsp sweet rice flour paste
- 3 Tbsp Korean chili powder (Gochukaru)
- 2 Tbsp garlic (chopped)
- 1 1/2 tsp ginger (chopped)
- 4 tsp saewoojeot (fermented shrimp)
- 2 Tbsp myeolchi aekjeot or kkanari aekjeot (fermented anchovy sauce or sand lace sauce)
- 1 Tbsp Korean cheonilyeom sea salt
- 1 Tbsp sugar
- 1 Tbsp green plum syrup (maeil syrup) (or just add a bit more sugar)
Instructions
- Make sweet rice flour paste by mixing 10 Tbs water and 1 Tbs sweet rice flour with a whisk. Bring to boil and then simmer for 7-8 minutes, stirring frequently to ensure there are no lumps. Let it cool.
- Peel radish with a peeler and cut into 1.2 inch disks. Then cut into cubes like so -
- In a bowl, mix 2 Tbs water, 3 Tbs Cheonilyeom Salt and 2 Tbs sugar.

- Add radish cubes to bowl with brine. Toss radish cubes to make sure everyone is evenly coated with the brine.
- Let radish cubes pickle for 20 minutes.
- Drain radish, discard the brine. Do not rinse radish.
- While radish is draining, prepare the yangnyeom (seasonings) – chop garlic, ginger and saewoojeot.
- Once radish is fully drained (about 2-3 minutes), sprinkle 3-4 Tbs Korean chili powder (gochukaru). Put plastic gloves on and toss and mix with your hands gently until evenly coated.
- Add to the chili powder coated radish, cooled sweet rice flour paste, chopped garlic, ginger, saewoojeot and myeolchi aekjeot or kkanari aekjeot (sand lance sauce). Mix with your hands again. Add 1 Tbs sugar and 1 Tbs maesil green plum syrup (if you have it, otherwise just add a bit more sugar). Kimchi is all about adjusting to taste because the ingredient is different every time – taste it and you may want to add a bit more sugar if you want. It should taste sweet right away but just a hint of sweetness at the end.
- Put in a container or jar, leave it out at room temperature for 1 -2 days until the top is bubbling. Put in fridge and serve cold.

Tips & Notes:
- The size of the radish cubes for Kkakdugi comes in all different sizes. On the average, the size ranges from the very dainty 0.5 in (1.2 cm) to a hefty 1 in (2.5 cm) cube.
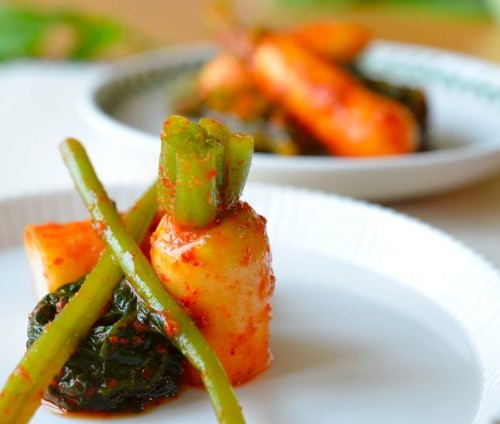
- Add some gat 갓 (green mustard greens) to Kkakdugi and it will add extra zing to it.
- PLEASE use Cheonilyeom 천일염 (Korean Coarse Sea Salt aged for 1000 days with bittern removed) when making Kimchi. It is not enough to just use coarse Sea Salt because non-Korean coarse sea salt will have different salinity and will not have the bittern removed which can make your Kimchi bitter.


I made this last weekend following the recipe except I only had a 3 to 3.5 pound daikon radish instead of 4lbs. It turned out a little bit too salty, but otherwise excellent. I am wondering if it would be better to use only 2TB salt for brining or stick with 3TB but increase the amount of water to maybe 1 cup. I suppose there is also the option to add less than 1TB when doing the final ingredient assembly. Thank you so much for such good kimchi recipes. I can finally make this a regular “thing” to do with less worry of bad batches.
Hi Kurt, yes, if the daikon radish was less by almost 1lb then that means you would have needed 1/4 less salt and other seasoning ingredients overall. I have a sliding scale recipe card, so next time I would recommend that you slide the scale to match your amount of main ingredient which in this case is radish. e.g. if it was 3 lb radish then it would be 2 1/4 tsp less salt in brining and also about 2 tsp of salt at the final assembly time instead of 1 Tbs. Also, did you use Korean cheonilyeom salt? If you used other salt then most likely that in itself was saltier. But most importantly because radishes sometimes can have more juice or less, it’s best to taste it fresh and see if it taste good to you. Also, note once it ferments fully the saltiness goes down becasue other flavors come into play. thank you so much for still giving me 5 stars even tho it didn’t come out as perfectly as you wanted. Have a great day!
Thank you for the added information JinJoo. Yes, I did use the Korean salt – the same brand you recommend, in fact. I’m glad to know that even the brining salt gets scaled depending upon the amount of radish. I haven’t ever heard anyone mention that, particularly when using less radish than the recipe calls for. Obviously, you would need more if using significantly greater amounts of radish, but I thought that with less radish, the excess brine would just run off and settle in the bottom of the bowl. Guess I need to adjust my thinking on that. Thank you again very much!
You are most welcome!!
Two questions: Q1. under Brine ingredient shows 3 TBSP Korean sea salt and 2TBSP of sugar but under insruction step 3 only show 2 TBSP of sea Salt and no Sugar?
Q2. under instruction step 6 you don’t list 1 TBSP Korean Sea Salt in seasoning mix even tho it is listed under ingredients?
I made this today and followed ingredients list; hoping it isnt too salty.
Hi Michelle, So sorry for the confusions – for Q1, you should follow the ingredients and add sugar. I corrected it. Q2 – you should again follow the ingredients list. But it’s probably ok to omit it if you want. The best thing is to taste it and how you like it because everyone has different preferences. The saltiness will get milder when it ripens and it’s ok for the kkakdugi to taste a little bit salty. But if it taste way too salty for you, you can always add a bit more sugar or a little more radish. Hope that helps – thank you for asking. My apologies once again.
It turned out fine. It is best tasting radish kimvhi. Now, I need to make some Korean oxtail soup to enjoy it with. Thank you for sharing this recipe.
Oh yes!! I made a batch right after you asked just to test the receipt again (as is) and we had it with Galbitang yesterday and it was soo good!
I have all ingredients except fermented anchovy sauce. I’m going to look for it today so i can follow exactly as your recipe.
I enjoy reading all information you share about each recipe history.
Thank you.
Awesome!! Yes, it will be best if you can add the anchovy sauce. Thank you for appreciating the recipe stories.. I love sharing them.