
Instant Pot Yaksik (Korean Sticky Rice Dessert) recipe that comes out perfectly soft and chewy. A perfect balance of sweet, salty and nutty!
Instant Pot Yaksik is not something I was planning on making anytime soon until recently a wonderful reader posted a request for Instant Pot Yaksik recipe in my Facebook group – Korean Food with Kimchimari. BTW, please come and join us if you want to talk, ask and share anything and everything about Korean food!!
So this lovely woman called Jenny told me that she tried to make Yaksik in her Instant Pot and the sweet rice totally burned on the bottom and asked me what she was doing wrong. Honestly, I didn’t have any perfect answer at that time because I’m still pretty new to Instant Pot cooking and had never made Yaksik in the Instant Pot before. But I gave her some suggestions and she literally took a whole day to try out 4 different versions based on my suggestions and reported the results back to me afterwards!! Jenny you are so sweet to do that. 😍 Thank you. She did succeed in one version I remember but because I accidentally deleted the comment, I couldn’t remember what she exactly did…sigh..
Anyway, I promised Jenny that I would work on the recipe and here it is! I expected that I would have to go through at least a few tries but I was surprised that it came out perfect the first time! I guess I kinda know something about cooking.. hahaha..
Before we get into the recipe, for those of you who are NOT into Instant Pot, you can go to my previous regular Yaksik post for my recipe that you can make in your rice cooker. In the post, I also talk about the history of Yaksik and the benefits of sweet rice / sticky rice / glutinous rice. Did you know that Yaksik is actually a snack/dessert created by my husband’s ancestor some 45o years ago?? Don’t you ever wonder where and how a certain food came into being? Who came up with pizza? or the hamburger? Usually the story is not known but in the case for Yakwa and Yaksik, the origin is clear.
The story of Yakwa and Yaksik has been passed down in my husband’s (Suh) family for generations and has also been recorded in the history books. It’s really is an amazing story of perseverance, ingenuity and survival, so you should definitely check out my post and read about the story. Oh and by the way, if you don’t have an Instant Pot, you should really consider getting one 😉, it just makes Korean cooking so much quicker and easier without losing the traditional flavors.
Made the traditional way of steaming twice, it takes around 7 hours cook time not to mention 6 hrs of soaking. My rice cooker recipe takes about 1 hr cook time including cooking it twice. This Instant Pot Yaksik recipe only needs 8 minutes pressure cook time, probably total 25 minutes including the pressurizing and releasing times which means total 30 min cooking time. AND, you only cook once.
Finally, some quick nutritional info before we get into cooking –
SWEET RICE (찹쌀 Chapssal) – very easy on the stomach (it’s great for people who have digestion problems) and also coats the stomach which means it’s great for people who have frequent heartburn.
JUJUBE DATES (대추 Daechoo) – long been known to have calming effects that help with anxiety and insomnia. Jujube tea is also great for preventing colds (it keeps your body warm) and strengthening the liver.
CHESTNUTS (밤 Bam) – lots of vitamin C and vitamin Bs which help to also strengthen your stomach, especially with diarrhea.
Instant Pot Yaksik Recipe (Korean Sticky Rice Dessert) – Gluten Free (with GF soy sauce)
*** NOTE – this recipe works perfect for 6 QT IP. For 8 QT, increase the water amount to 1.5 cups to avoid burns.
Servings: 6-8 Prep Time: 1 hr Cook Time: 30 min Difficulty: EASY
** Korean canned chestnuts work best but are optional because I know it is not always easy to buy this. You can use fresh chestnuts or roasted chestnuts too but personally I think the canned chestnuts retain the best crunchy texture after it is cooked.
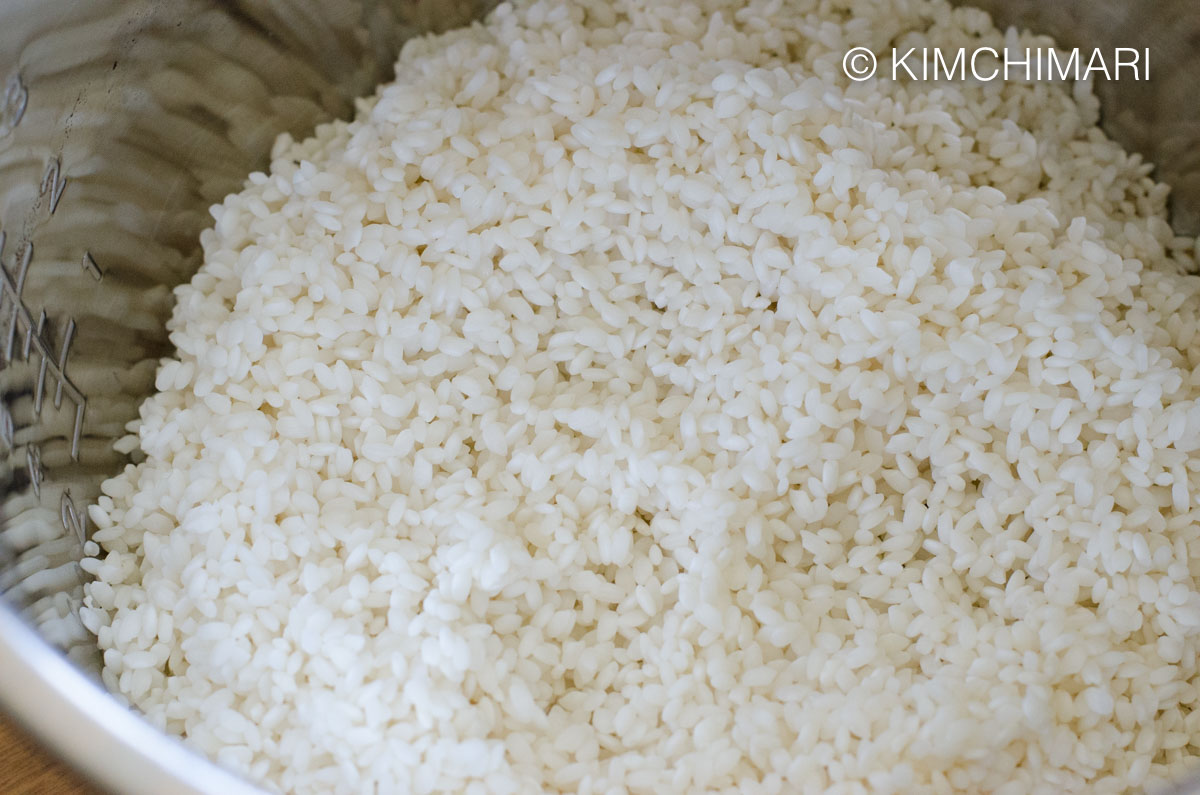
- Rinse and soak sweet sticky rice (chapssal) in water for at least 1 hr up to even 5 or 6 hrs. The more you soak, the softer your rice will be.
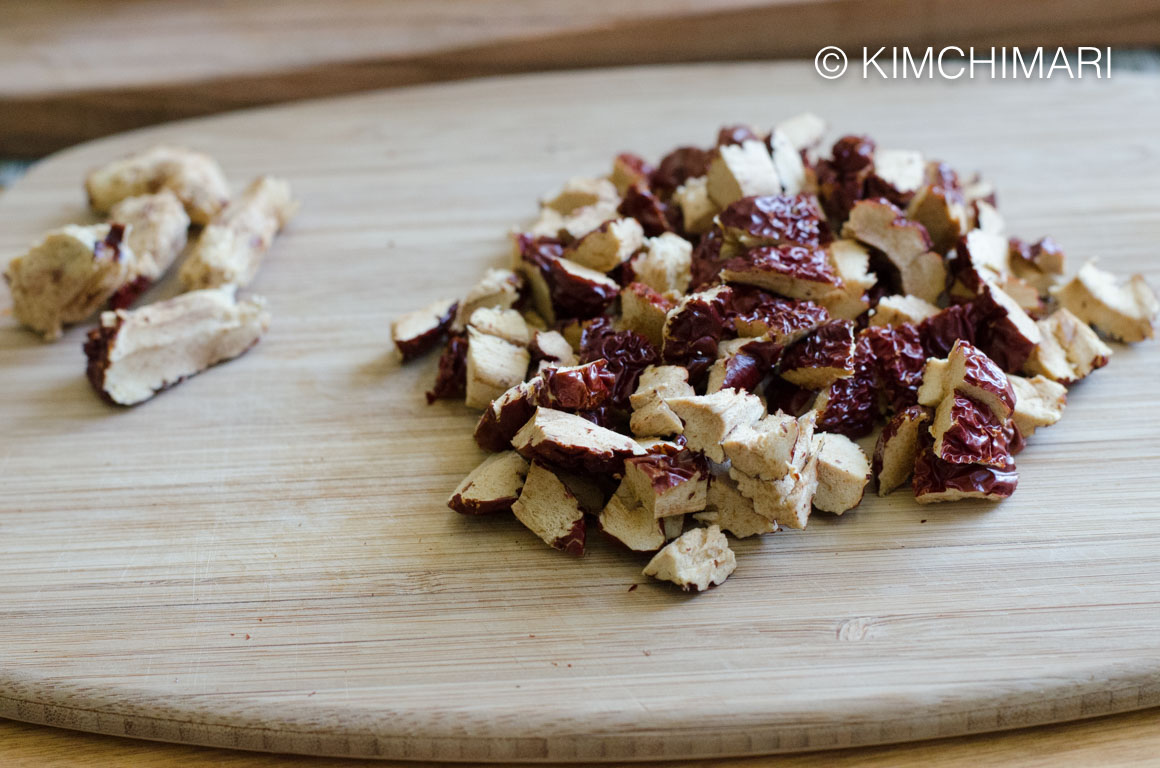
Soaked Sweet Rice for Instant Yaksik - Prepare jujube dates by rinsing under water and then with a knife, cut lengthwise to separate flesh from the pit. Cut flesh into smaller pieces like so.
Jujube Dates for Yaksik Instant Pot - Open the canned chestnuts and drain. Discard the syrup. Cut chestnuts into quarters.
Canned Chesnuts draining for Yaksik 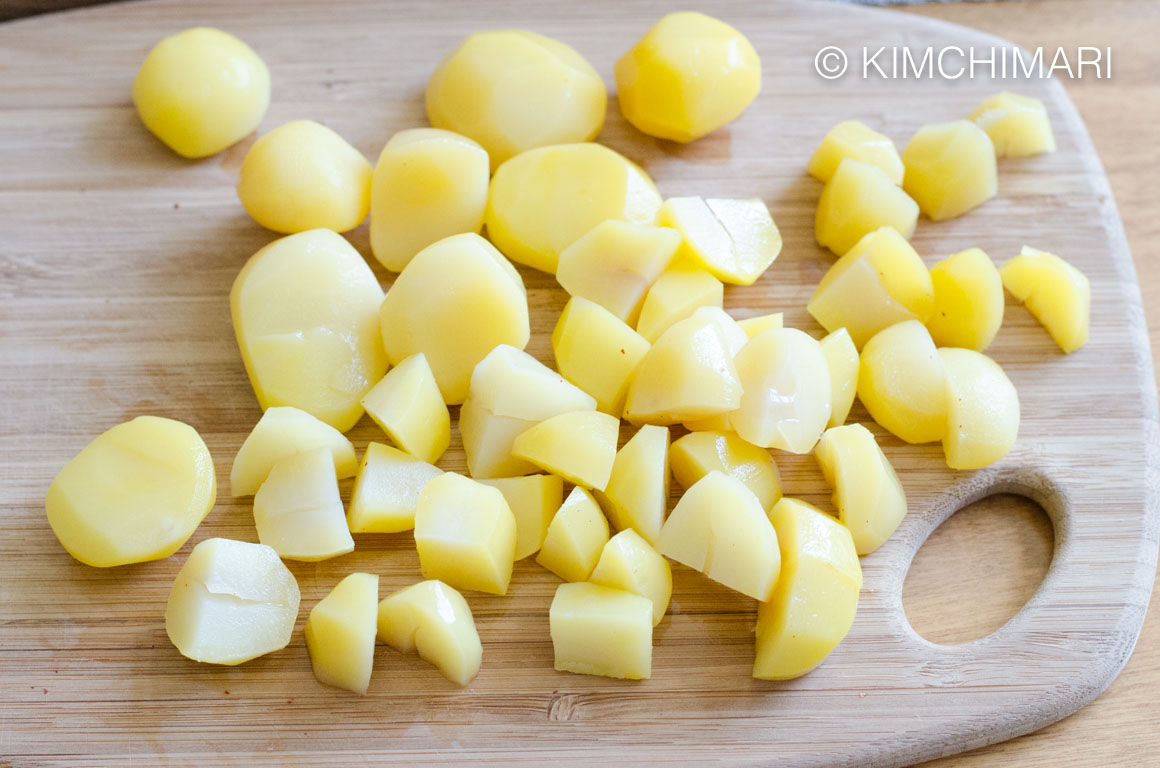
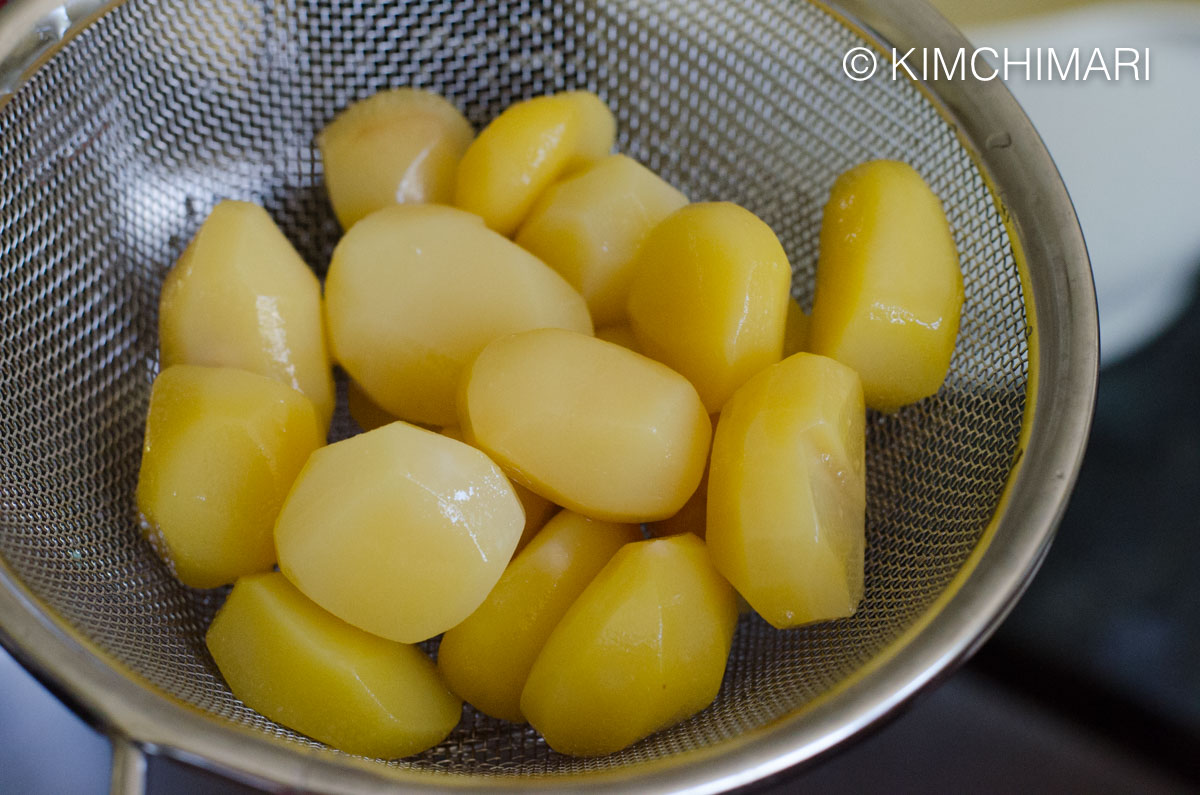
Chestnuts Cut Instant Pot Yaksik - Let sticky rice drain for few minutes.
- Coat bottom of Instant Pot with sesame oil.
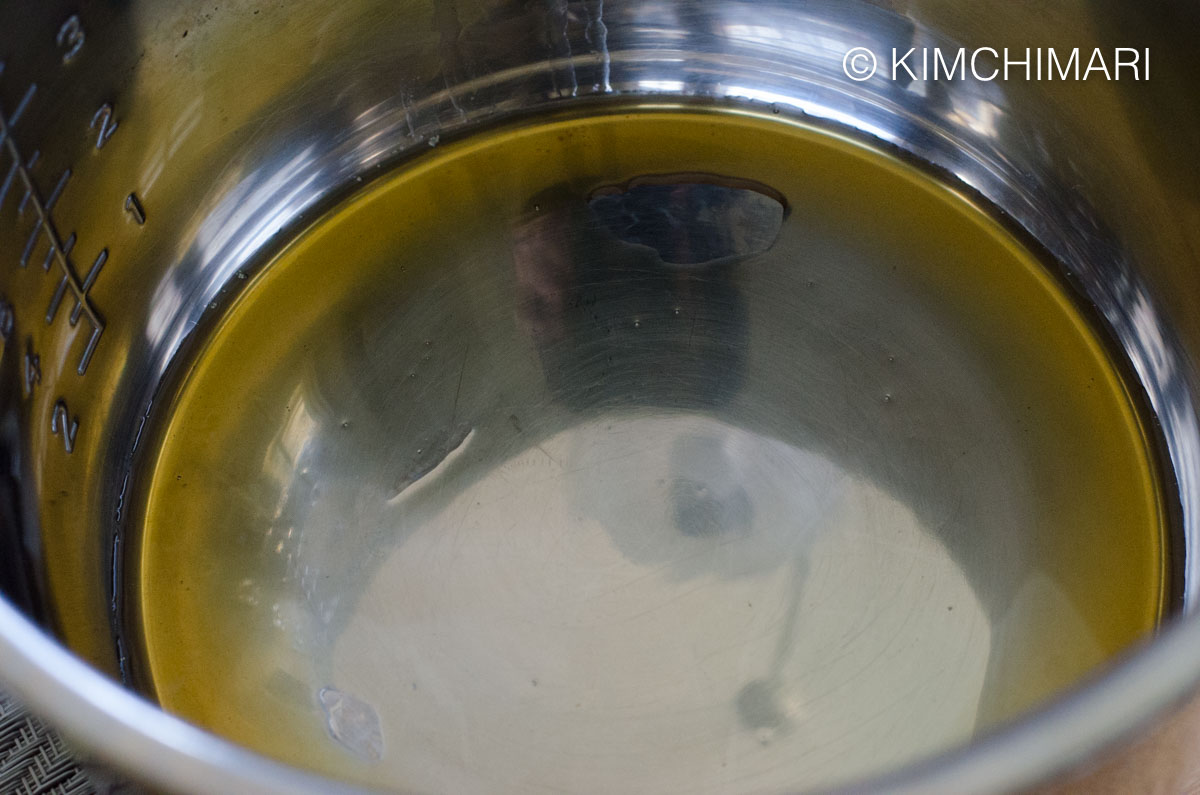
Sesame oil coating Instant Pot for Yaksik - Add drained sweet rice.
- Add soy sauce, sugar and water. Stir a few times to mix everything.
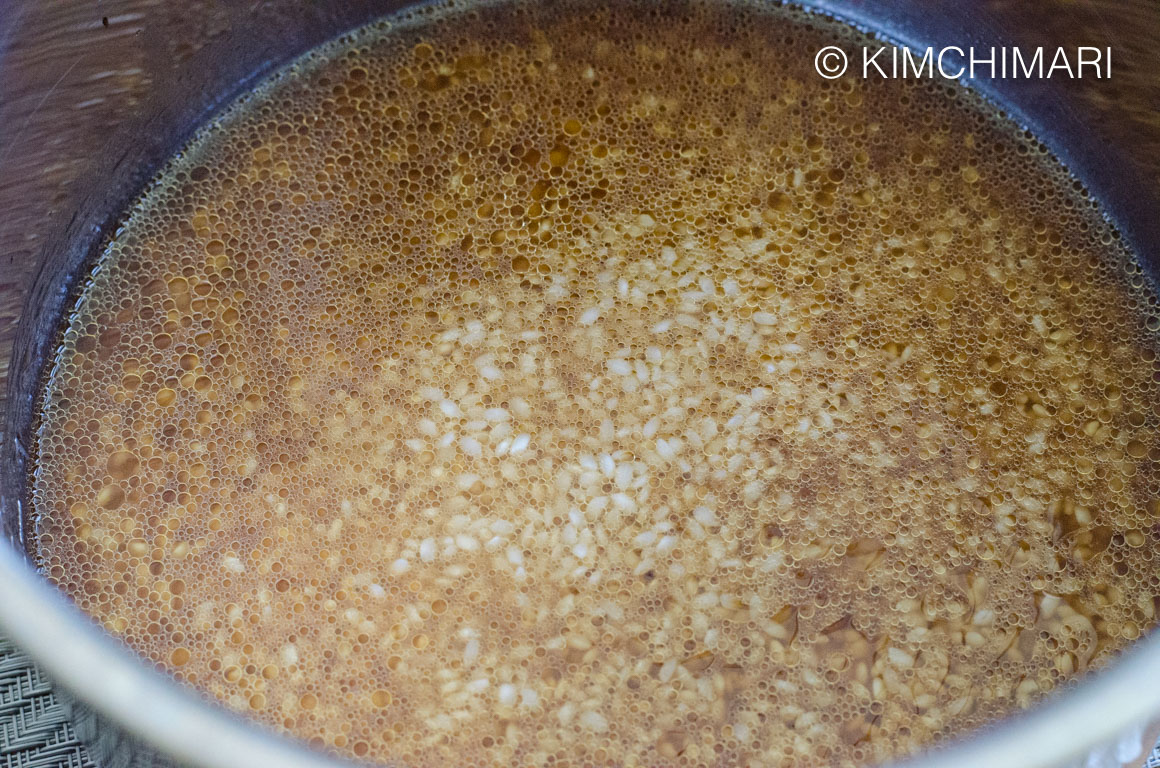
Sticky Rice Yaksik with Seasoning Ready to Cook in Instant Pot - Add chestnuts, jujube and pine nuts.
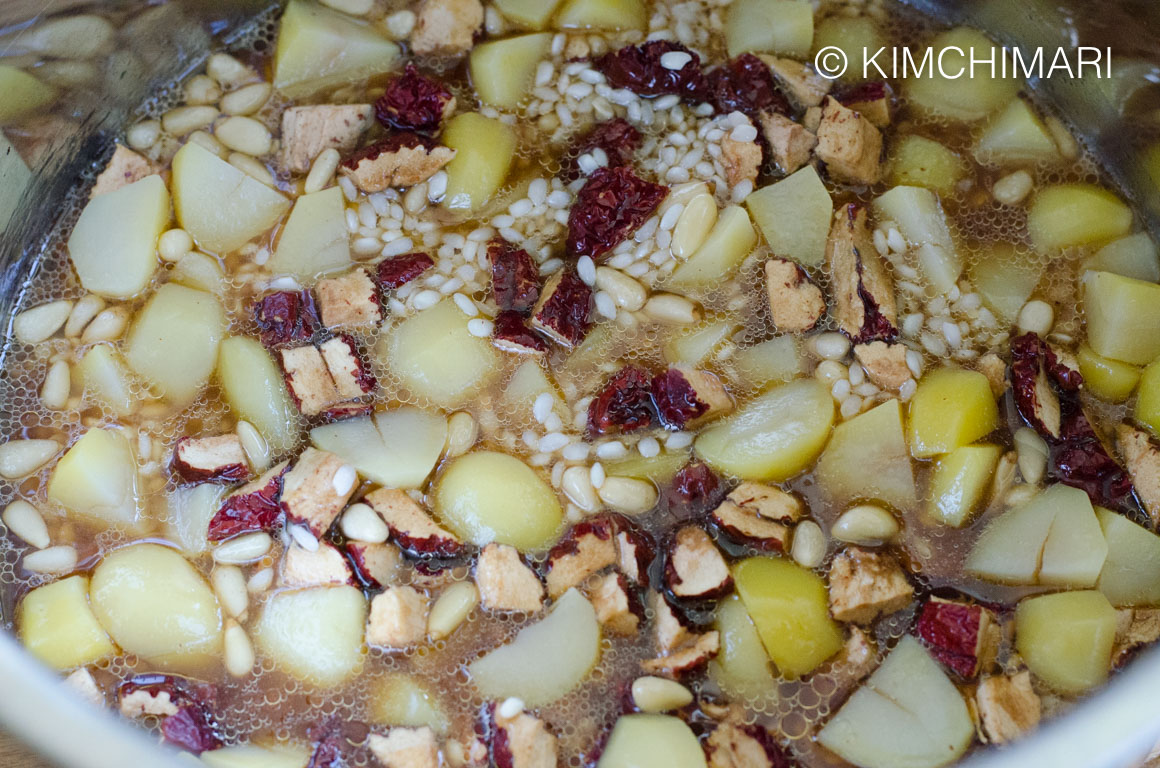
Yaksik ready to cook Instant Pot - Close the cover and set manual – 8 minutes at Low Pressure.
- Natural release (which takes about 20 min or so). And this is how it comes out!
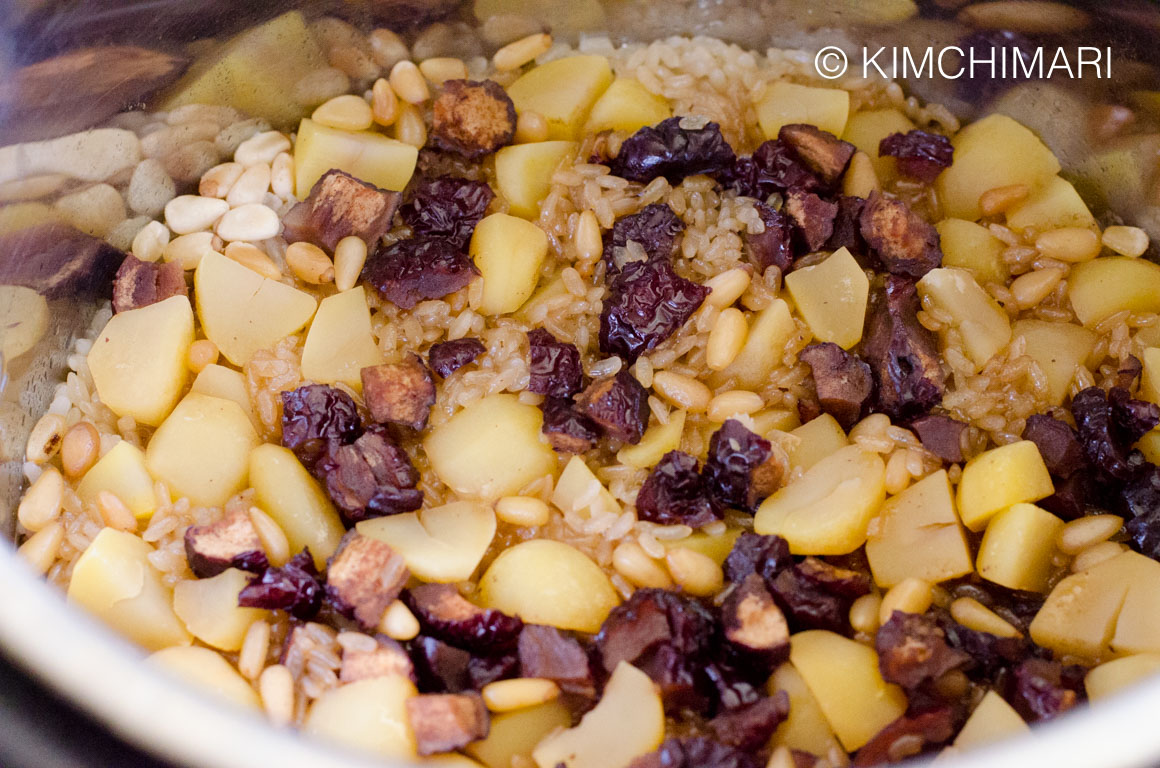
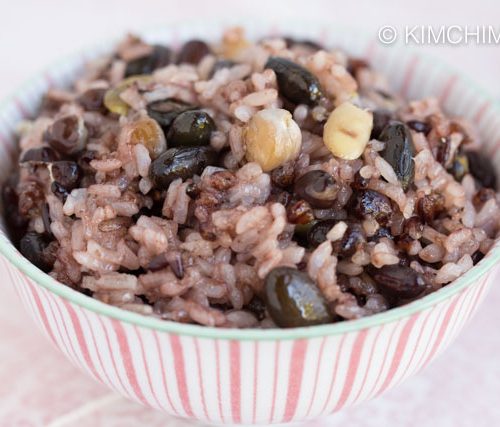
Yaksik cooked Instant Pot - Using a large wooden spoon, mix the cooked sticky rice so that everything is evenly mixed. You will find that when you first open, the rice looks a little pale than how it looks in my finished pictures. It’s because they haven’t been fully mixed. Make sure you mix the bottom parts because they will be the darkest.
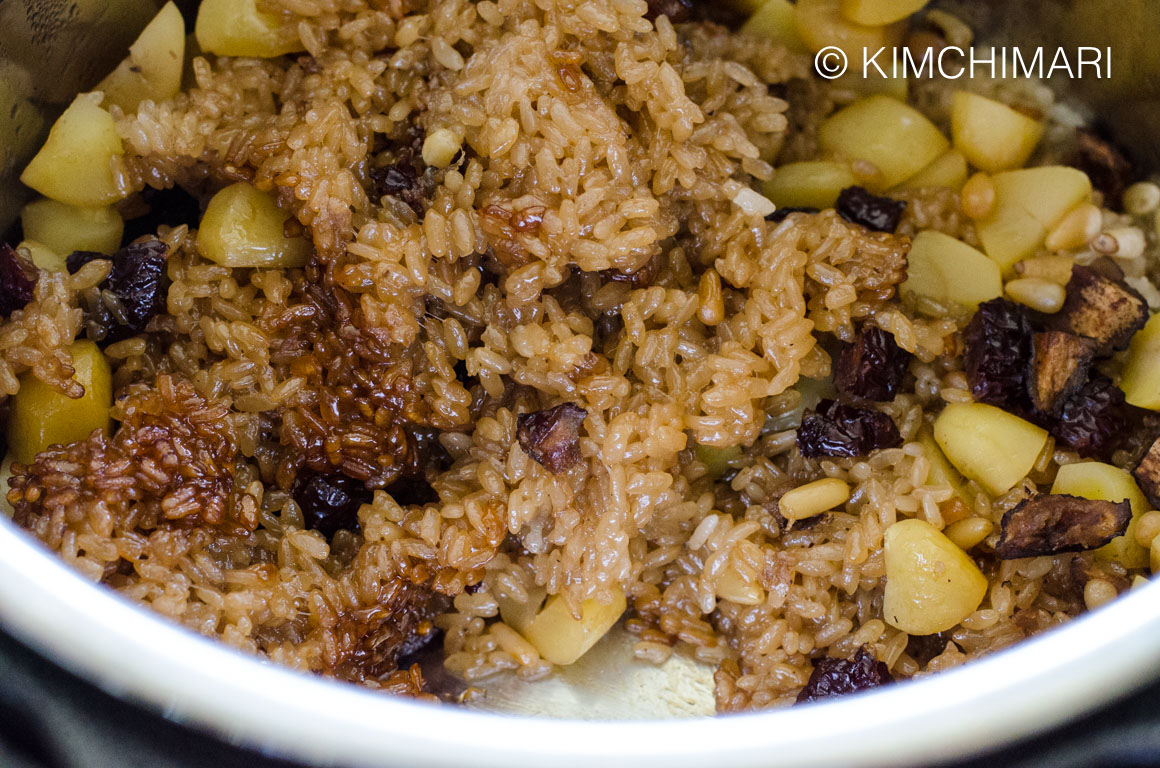
Mixing cooked Yaksik in Instant Pot Once everything is mixed, it will get darker in a few minutes.
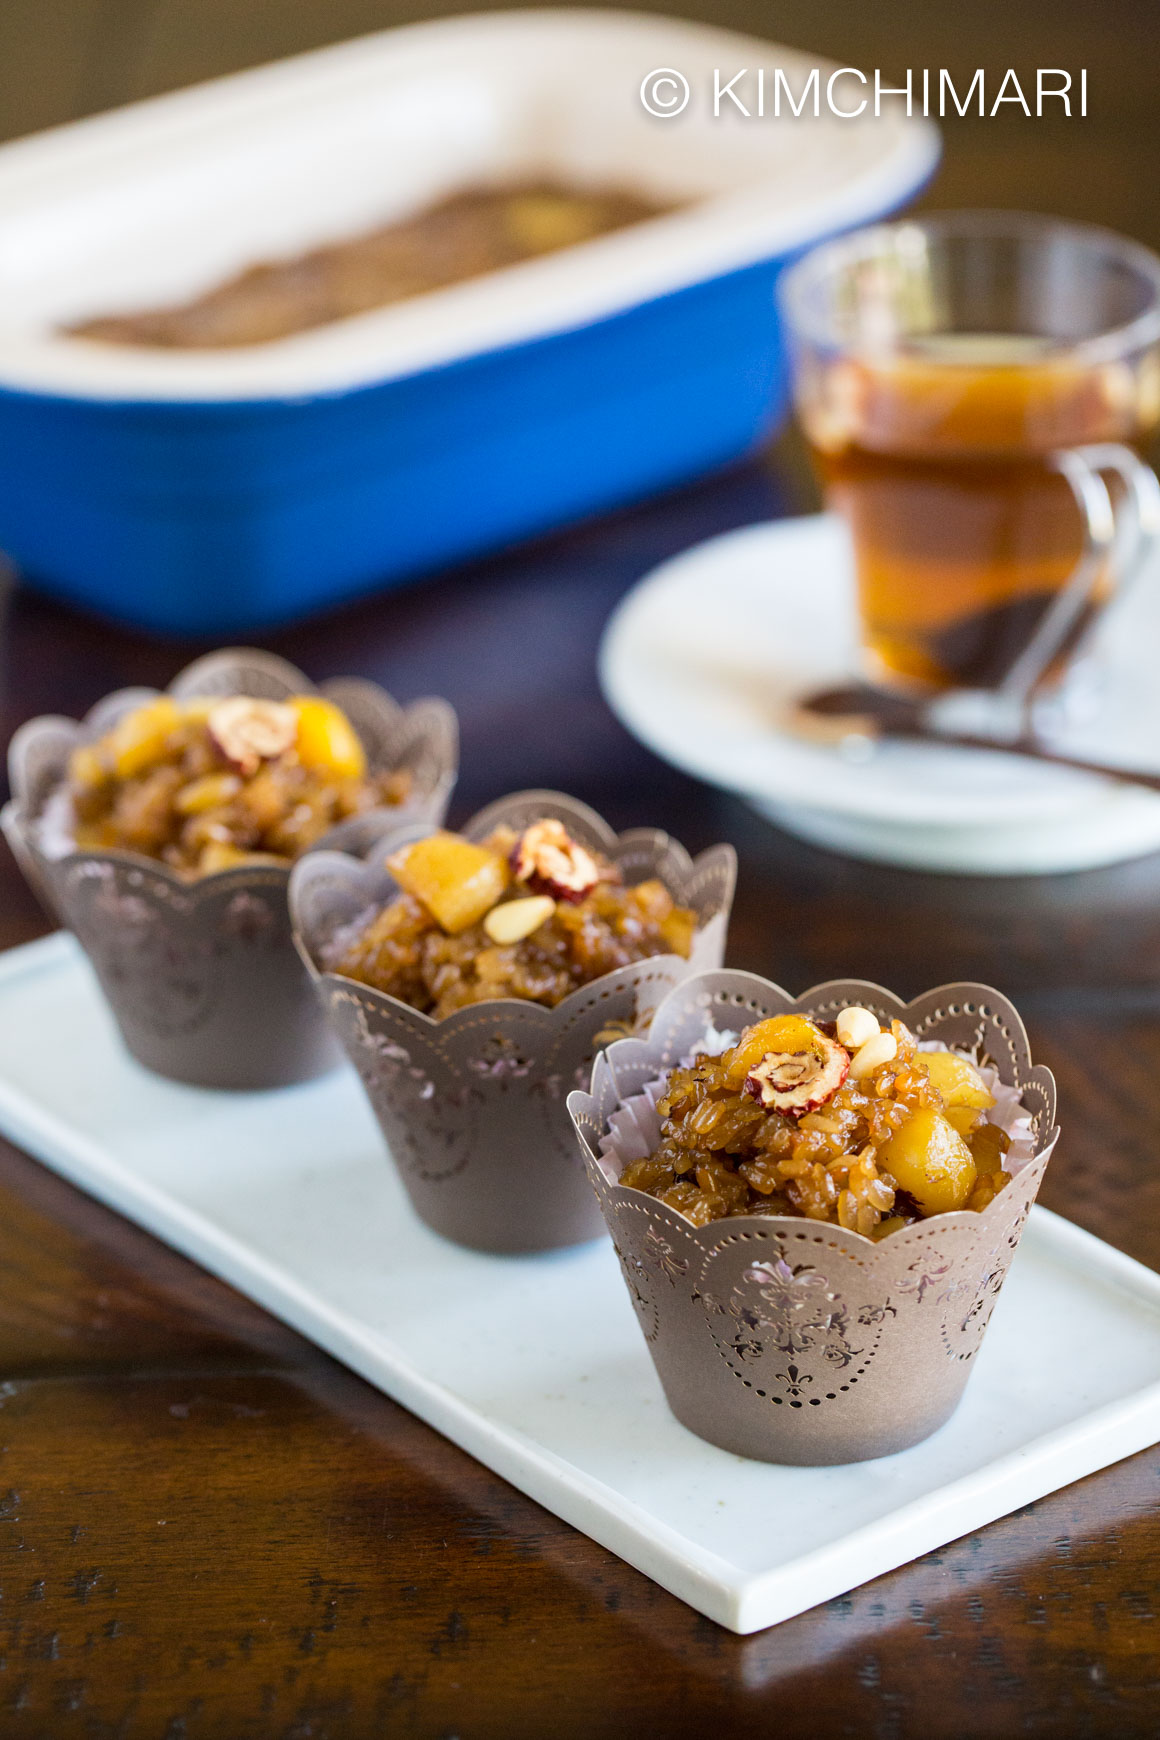
- Serve warm as is in a bowl or put it in a cupcake liner. For a more traditional style, pour yaksik into a bread pan and cover the top with plastic wrap.
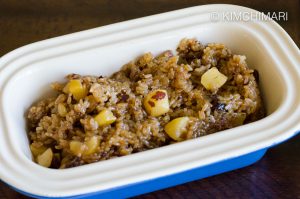
Instant Pot Yaksik in mold 
Pressing Yaksik with hand into mold 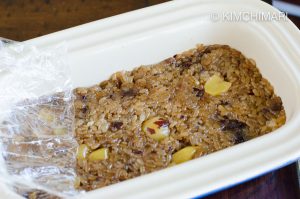
Yaksik after pressed into shape Then press everything down gently with your hands to flatten the top while molding yaksik into a bread like shape. Let it cool and then cut into thick slices and serve.
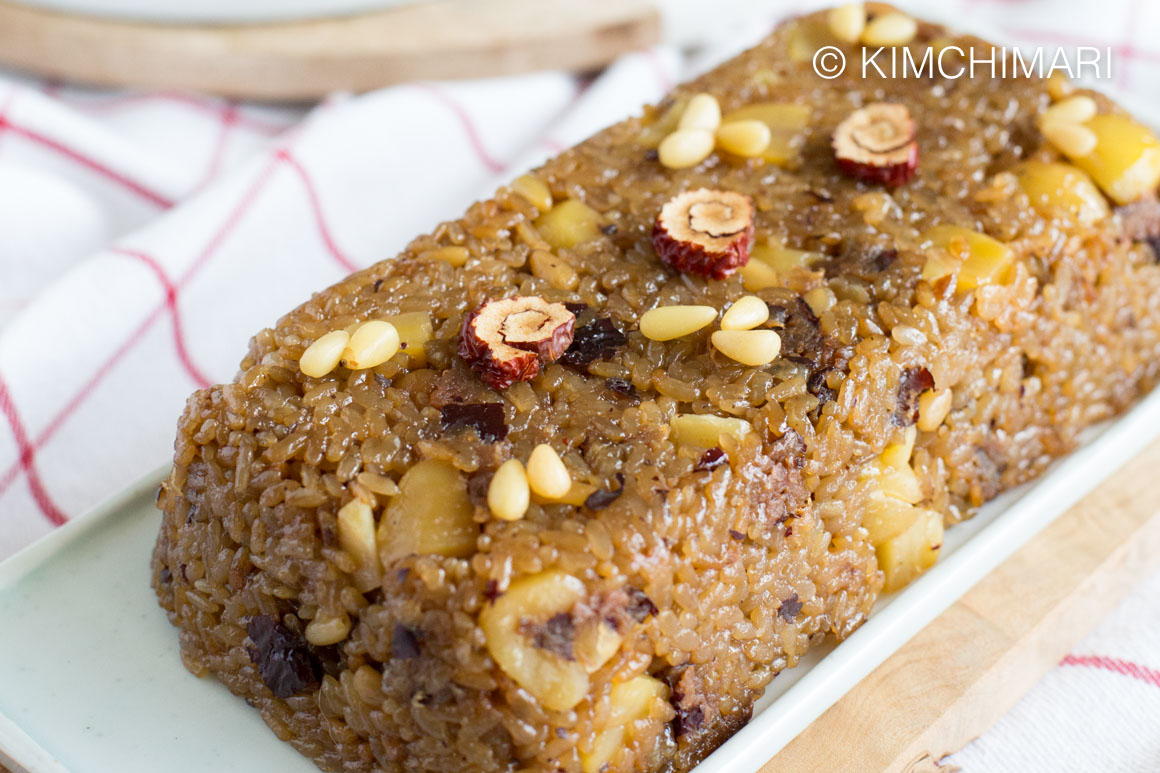
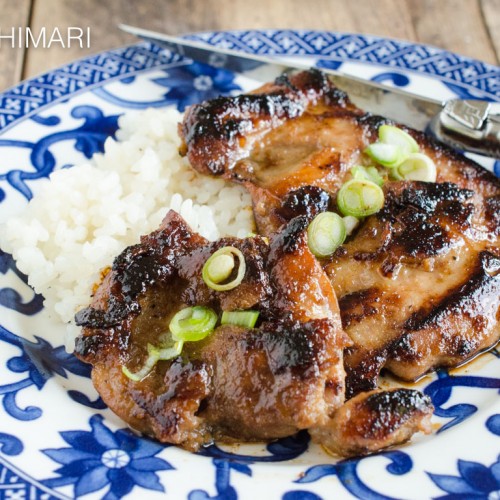
Instant Pot Yaksik Decorated 
Instant Pot Yaksik Sweet Sticky Rice 
Yaksik Korean Sticky Rice Dessert with Jujube Tea
- Decorating – you can use additional pine nuts and also make a Jujube flower which is a traditional decoration that’s used for classic Korean desserts. Just cut into a jujube lengthwise and then peel around the seed in one continuous cut. Sort of like peeling an apple but peel with some of the flesh and not just the skin. Then you take that and roll it up like as you would a swiss roll. Then cut across. Hopefully this picture will help.
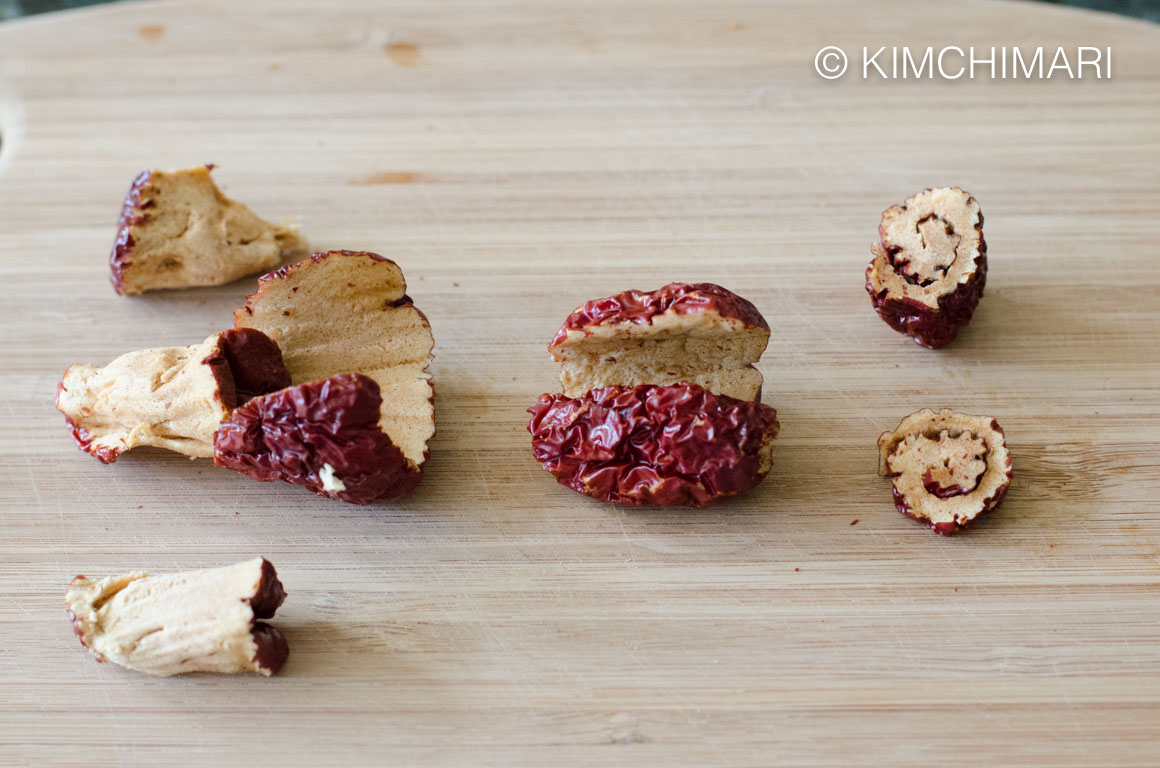
How to make flowers with Jujube Dates (Daechu) Instant Pot Yaksik - Korean Sticky Rice Dessert
Instant Pot Yaksik (Korean Sticky Rice Dessert) recipe that comes out perfectly soft and chewy. A perfect balance of sweet, salty and nutty!Prep: 1 hourCook: 8 minutesTotal Time: 1 hour 30 minutesserves: 6Ingredients
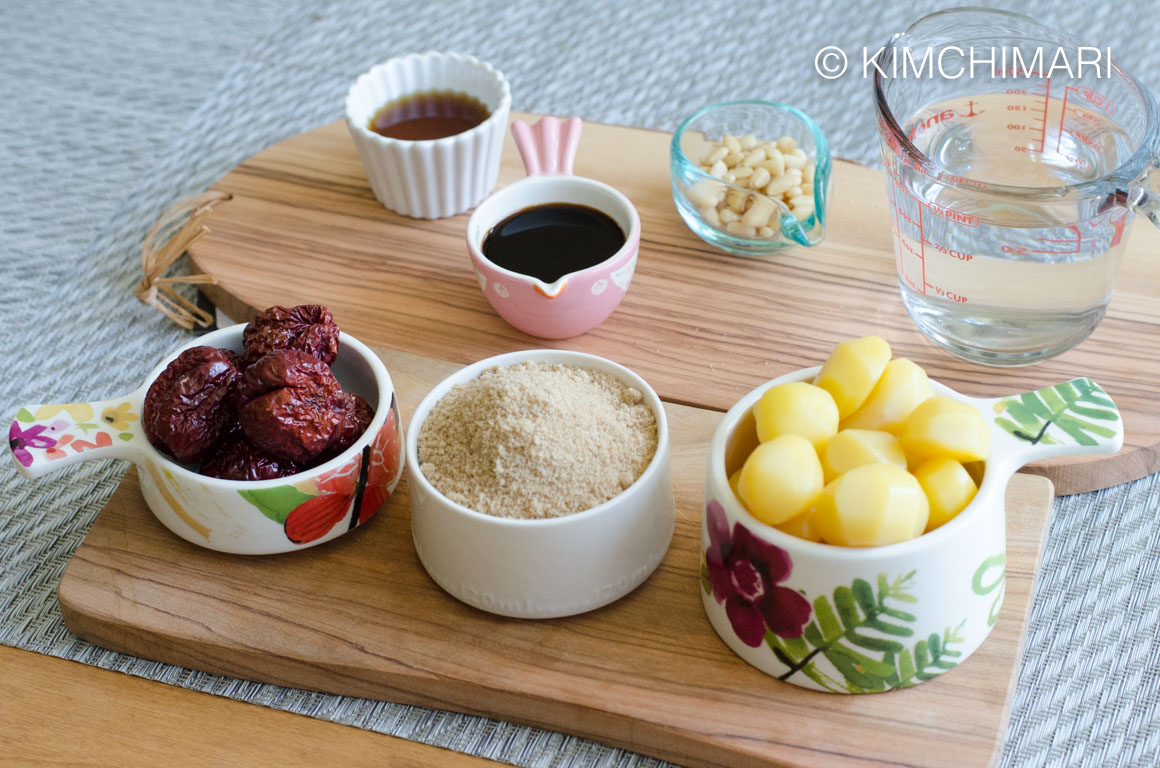
- 2 cups sweet rice (sticky rice or glutinous rice)
- 1 cup water
- 1/2 cup light brown sugar (up to 2/3 cup / 166.67 ml)
- 2 Tbsp soy sauce (jin ganjang)
- 2 Tbsp sesame oil
- 1/2 cup dried jujube dates (Daechu)
- 1 Tbsp pine nuts
- 13 oz chesnuts (Korean canned in syrup)
Instructions
- Rinse and soak sweet sticky rice (chapssal) in water for at least 1 hr up to even 5 or 6 hrs. The more you soak, the softer your rice will be.
- Prepare jujube dates by rinsing under water and then with a knife, cut lengthwise to separate flesh from the pit. Cut flesh into smaller pieces like so.
- Open the canned chestnuts and drain. Discard the syrup. Cut chestnuts into quarters.
- Drain sticky rice and let it drain for few minutes.
- Add sesame oil to Instant Pot and coat the bottom.
- Add drained sweet rice.
- Add soy sauce, sugar and water. Stir a few times to mix everything.
- Add chestnuts, jujube and pine nuts.
- Close the cover and set 8 minutes at Low Pressure.
- Natural release (which takes about 20 min or so).
- Using a large wooden spoon, mix the cooked sticky rice so that everything is evenly mixed. You will find that when you first open, the rice looks a little paler than how it looks in my finished pictures. Make sure you mix the bottom parts because they will be the darkest. Once everything is mixed, it will get darker in a few minutes.
- Serve warm as is or put it in a cupcake mold like I did. For a more traditional style, pour the content into a bread pan and then line the top with plastic wrap. Then press everything down gently with your hands to mold it into a bread like shape. Let it cool and then cut into thick slices and serve.
Tips & Notes:
- For 8 QT Instant Pot - my recipe was made for 6 QT IP. If using 8 QT, increase water amount to 1.5 cups to avoid burning.
- Sweet level - if adding canned chestnuts, use the lower amount of sugar because chestnuts come in syrup and even though you drain it, it will still add sweetness to it.
- Yaksik can be stored at cool room temperature for 1-2 days. Otherwise, it should be refrigerated or frozen.
- If frozen, you can thaw at room temp and enjoy it. If refrigerated, it is best to steam it or reheat it in the microwave.
- Additional ingredients - you can add various dried fruits like raisins, apricots and other nuts like walnuts. You can also add some cinnamon powder for additional flavor. Molasses also add a great caramel flavor so you can add some molasses and reduce sugar amount. Honey can also be used.
Nutrition Information:
Calories: 497kcal (25%)| Carbohydrates: 102g (34%)| Protein: 5g (10%)| Fat: 7g (11%)| Saturated Fat: 1g (6%)| Sodium: 313mg (14%)| Potassium: 476mg (14%)| Fiber: 1g (4%)| Sugar: 18g (20%)| Vitamin A: 15IU| Vitamin C: 27.2mg (33%)| Calcium: 48mg (5%)| Iron: 1.4mg (8%)

Notes on Instant Pot Yaksik
- Reduced Sugar Yaksik – Normally, this Korean sticky rice is sweet but you can also make it less sweet and it still tastes really good. I reduced the sugar amount to 1/2 cup + 1 Tbs and with no chestnuts (canned chestnuts are quite sweet) in my 1st test and it came out tasting almost not tasting sweet but it was still sooo good the way it was.
- Storing Yaksik – can be stored at cool room temperature for 1-2 days. Otherwise, it should be refrigerated or frozen. If frozen, you can thaw at room temp and enjoy it just like that. If refrigerated, it is best to steam or reheat in the microwave.
- Adding other ingredients – although not traditional, you can add various dried fruits like raisins, apricots and other nuts like walnuts. You can also add some cinnamon powder for additional flavor. Molasses also add a great caramel flavor so you can add some molasses and reduce sugar amount. Honey can also be used.
Enjoy!
XOXO ❤
JinJoo


Hi Jinjoo! I recently discovered your site and have tried a couple of your recipes to the delight of my family! Tonight, my yaksik turned out to be caramelized and crusty like 누룽지 on the bottom. I followed the recipe as written and using a 6qt IP, except I substituted a 1/4 cup of mixed Korean beans for chestnuts I can’t get a hold of at this time, used dark brown sugar instead of light, and added 1 tablespoon of honey. Thankfully it didn’t taste burnt and had a delicious flavor. However, I do want to retry making this. What can I adjust to prevent the crunchy bottom? Thanks!
I’m so happy you found me!! So.. I think using the Korean beans probably absorbed some moisture which means you didn’t have enough water. Also, dark brown sugar and honey will both caramelize quicker than light sugar…so next time, I would omit the beans. And not put in the extra honey. See if that works better. Also, can you try adding 1/2 dark brown sugar and 1/2 white sugar? That might work better too.. hopefully that will work. Please let me know how it goes!
Hi Sarah, so I have been thinking about your issue and have just read that the newer models definitely have issues cooking sticky rice with burn notices. People have said that while they never had issues with the older models, they are having burnt sticky rice issue with the latest models they purchased. One of the solution was to use a PIP (pot in pot) method – perhaps you can try that. Hope it works for you! Take care –
Simple recipe, wonderful outcome
Thank you so much Betsy! Glad it turned out well for you. 😍
I am using this recipe for a class project where it needs to be quantified to feed 60 people. I was wondering if you had any recommendations since it seems like a lot of your recipes you have down sized them.
Thank you,
Rita
HI Rita, thank you for deciding to use my recipe for your class. How fun!! So my recipes are scalable in the recipe card – if you hover your mouse over the servings number, you should see a sliding bar which allows you to scale. But I know my Yaksik will only scale to 20 servings. And even if you were able to scale it more, you probably would not have a big enough cooker to cook the whole recipe. My recommendation is to cook in batches (look at your cooking equipment and see what would be the max about you can cook at one time) – as much as your IP or rice cooker will hold. Yaksik also can be made ahead and frozen so I suggest you make it ahead of time, cut into small pieces, wrap them up individually and freeze it and bring it to class. It should thaw after few hours or you can heat it in the microwave.
I tried a few different times with different quantities of water. I tried with 3 cups and continued adding more. I think I stopped thinking more water would fix the problem around 7 cups or so.
What ended up working for me was using the trivet that comes with the pot with some water at the bottom. Unfortunately, what seems to have happened is that by the time I tried that, I’d added way to much water and so it came out kind of mushy like cooked oatmeal.
OH dear.. so sorry to hear that. I don’t know if you are part of my Korean Food with Kimchimari FB group but we had quite a few discussion on making Yaksik in the 8 qt and the person trying it had tried many times and succeeded with 1.5 cups for 2 cups of soaked sweet rice. I guess I will just have to buy 8 qt and test it out there myself. Steaming in the trivet pot will definitely work but in that case yes, you should use less water. You are using soaked sweet rice correct? Thank you so much for getting back to me!
So.. I have found another Yaksik IP recipe which uses 2 cups sweet rice and 2 cups water but she uses the 2 cups water to also soak the rice. So in total she either uses about the same amount of water or uses even less. Also, did you halve the recipe or making less than 1/2 the recipe? Just trying to figure out why it’s not working for you.. would love to hear back. Thanks!
I did presoak the rice – I presoaked overnight, so about 7-8 hours. I think that part of my problem is that there were a bunch of smaller periods of boiling each time I tried adding more water and I think that as the rice began to soak up the water it began to burn easier, but that’s just my guess. Also, I doubled the recipe, not halved. So, I was using 4 cups of rice total.
Here’s what I tried
1) Soak rice overnight
2) Drain rice
3) Chop nuts and fruit
4) Add sesame oil
5) Add rice and stir in remaining ingredients
6) Set low pressure mode for 8 minutes
I got the burn message, removed the rice, cleaned the burnt rice off the pan, added the rice back with another 2 cups of water. I tried that a few times, Maybe 7 cups of water or so total, but I kept getting the burn message.
I’m not a part of the FB group, though I might check it out. I was honestly just trying to find a good use for some sticky rice haha
Hi Jinjoo, I am also getting the burn message and I’m wondering if I used the wrong type of cup to measure the rice.. is it 2 cup with rice cup (180 ml), or dry volume cup, or liquid cup (250 ml)? I used a dry volume measuring scoop that I use for baking and after the soak overnight, it looks like my water level in the instant pot is much lower than yours after adding the rice and water. Ie. The rice is mostly not submerged.
You use the right cup size. It is 2 cups using 250 ml cup, not the 180 ml rice cup. What is your Instant Pot size? Is it 6 or 8qt? If it’s 8 qt, note that I said you need to use more water. 1.5 cup instead of 1 cup. I’ve made this recipe many times in the 6 qt and I never got a burn message.. but I have heard some people getting the burn message with 8 qt. Please let me know. Thank you!
Hi Jinjoo, I’m using 6 qt, so it seems like 1 cup should have been fine? Is soaking overnight too long?
Yes, maybe soaking overnight is too long or you are measuring your cups of sweet rice exactly? Flat on top? No mound on top? And you are not adding too many other additional ingredients? And you are using SWEET STICKY RICE, not regular white rice? Because they puff up considerably compared to white rice when soaked. If you try soaking less hours and you still see not enough liquid on top like my picture, then just add a bit more water – 1/4 cup? and see if that works better for you. Please let me know how it goes. Good luck!
Hi! I was trying to make this recipe, but I wanted to double it for my 8qt pot. I tried just doubling the water, but my pot keeps giving me the ‘burn’ message. I tried adding more water and I tried switching to steam mode, but the pot keeps going to burn. Do you have any suggestions or any ideas why doubling the water wouldn’t work?
Hi Jamie
How much more water did you add? Did you see my notes in my recipe card where I say to increase from 1 cup to 1.5 cups water for 8QT? You get the ‘burn’ message because 8qt is bigger in volume and it takes longer for the steam to fill up to pressure which means the 8QT IP will heat for longer time than 6QT and if there isn’t enough water, you may get burn before it comes to pressure. So if you are doubling the recipe, try using 3 cups water. Please let me know if you have any more issues. Thank you so much for asking!