Why can’t making Kimchi be quick and easy? Why does making Kimchi seem so complicated with so many steps? Why does Kimchi need so many ingredients? Does Kimchi need all those ingredients to really make it taste good? These are questions that not only non-Koreans or should I say, non-Kimchi-making people ask but I also ask myself sometimes when I make Kimchi.
Wouldn’t it be just wonderful if you can make Kimchi with just 5 ingredients (or so)?
Wouldn’t it be great if you can make Kimchi in less than 30 minutes? or even an hour??
After some search and experiments on my own to answer these questions – answer to first question is a YES!!
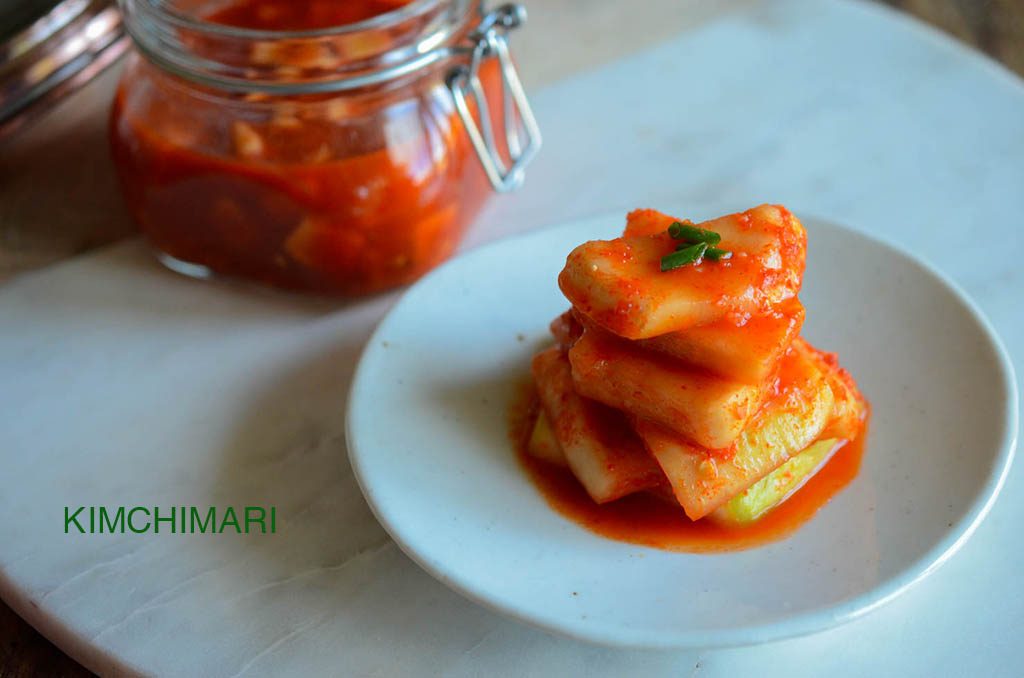
So here, I post a 6 ingredient (minus the brine) Easy Radish Kimchi recipe that is still traditional and fabulously delicious. The answer to the second question – I will write about that on my next post :)).
So, you know how in life, when stars align and you later realize it all led up to a certain happening or a decision.
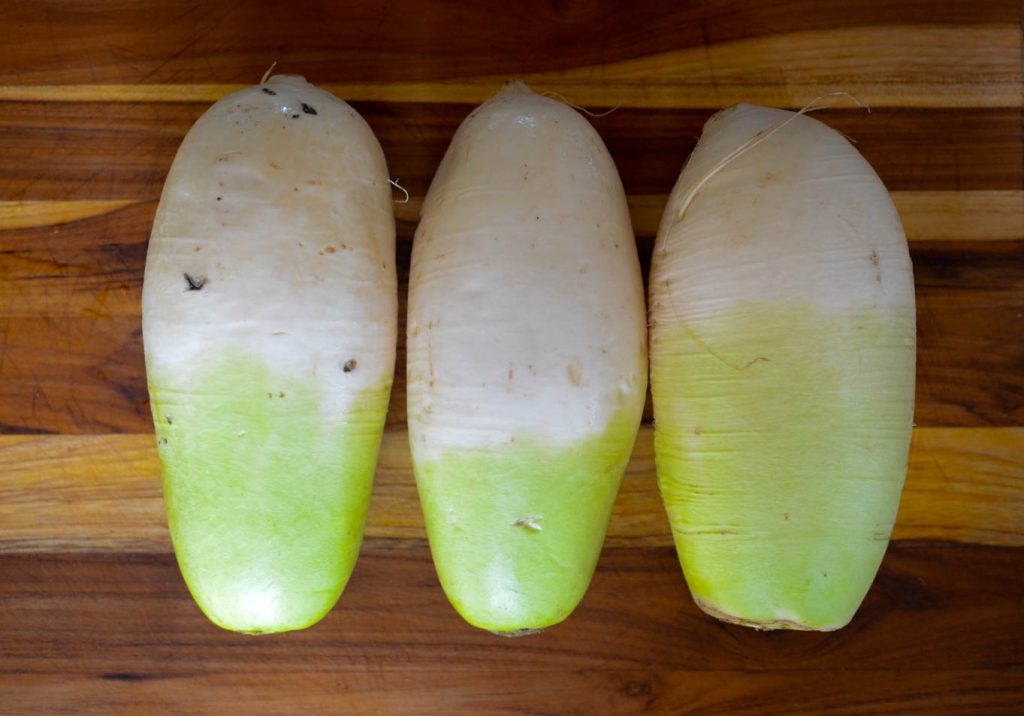
Here is how it happened for me…Recently, when I went to our local Korean grocery market (Hankook Market), I saw that they had imported Radish from Korea!! Real, genuine Korean Radish that is sweet, crunchy, juicy and little bit spicy~~ I could not resist but to buy it to make some real good authentic radish Kimchi at home.
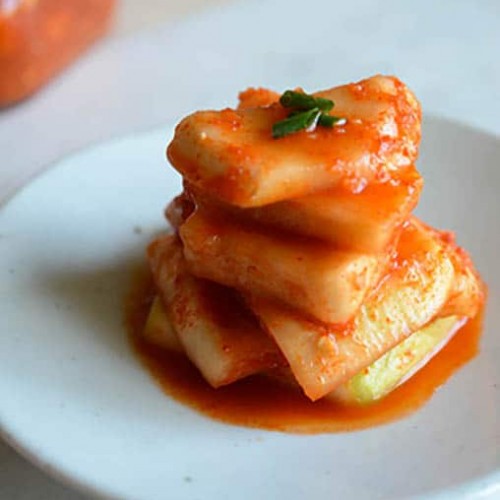
Thus, my search began for new Radish Kimchi recipe that is simple and easy with minimal ingredients. Kimchi made from large Korean radish, little radish, all kinds of radish is oh, just so lovely. I really enjoy the crunch and the sweet and cleansing feeling you get when you bite into a piece of Kkakdugi (깍두기),

Chonggak kimchi( 총각김치) or Seokbakji(섞박지). Click on Chonggak kimchi image for recipe.
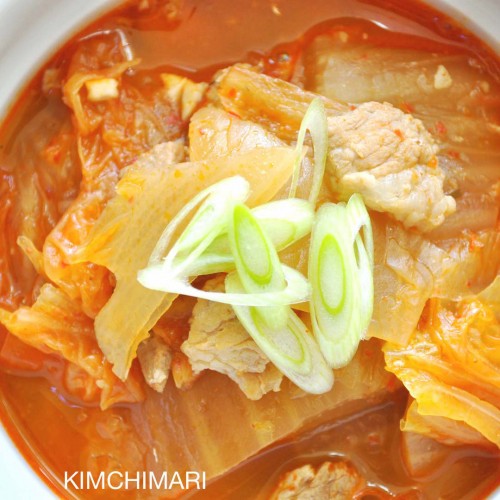
I found a recipe for Seokbakji which is traditionally the radish Kimchi served with Seolleongtang (설렁탕) or Gomtang(곰탕). Seolleongtang is soup made from bone and other innards while Gomtang is soup made from various beef parts but no bone. Seolleongtang comes out milky and opaque and Gomtang comes out clear. Both are good in their own way and talking about this reminds me of me when I was a kid, following my dad to his favorite Gomtang restaurant.
I would tell my Dad “Gomtang with towel, please!” Huh?! TOWEL???
HAHAHA…. It was my way of describing TRIPE.
You know, tripe does kind of look like a towel, doesn’t it? But I I loved it when I was a kid until I grew up and learned that it was actually cow’s stomach. Oops..umm..suddenly, I could not eat it anymore. I still don’t have much of an appetite for tripe even today. Sad.. too much knowledge is not a good thing, no??
FYI – The name “Seokbakji” comes from the word “Seok (섞)” which means to mix (seokda 섞다) and “ji(지)” which means Kimchi in traditional Korean. The history goes back to 1700-1800’s when records show that it was made in the Royal Palace right before Kimjang just as the days start to get cold and the radishes are just ready for picking. It is a great way to tide you over until Kimjang Kimchi is ready to eat!
This Radish Kimchi recipe is an adaptation of Soonee Kang’s Seokbakji recipe –
Easy Radish Kimchi (Seokbakji)
Makes 1 quart or 1 liter bottle Time: 3 hrs Difficulty: Easy
Ingredients
- 2 large Korean radish
- For Brine (only for pickling radish)
- 5 cups (approx 1200ml) water (spring water)
- 7 Tbs (approx 100ml) Korean coarse sea salt for brining (with bittern removed) – cheonilyeom 천일염
- For Seasoning
- 1/2 cup (120 ml) sweet rice flour paste(10 Tbs water + 1 Tbs sweet rice flour)
- 4 Tbs Korean red chili powder (Gochukaru) – adjust to taste
- 2 Tbs chopped garlic
- 1/2 tsp chopped ginger
- 4 Tbs Korean fermented anchovy sauce (멸치액젓 myeolchi aekjeot ) or fish sauce
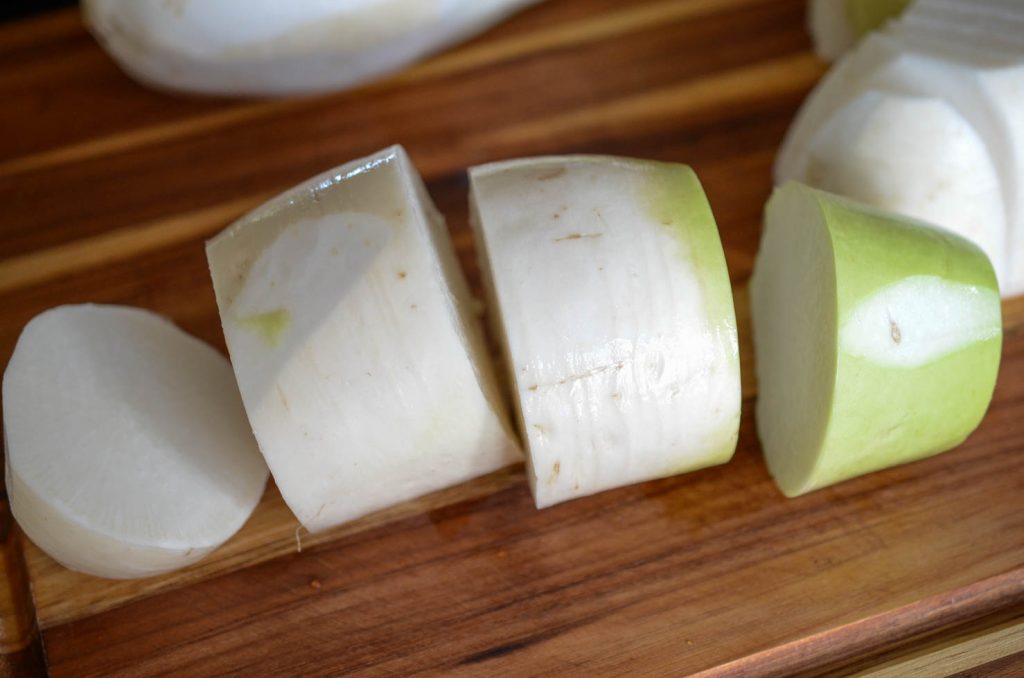
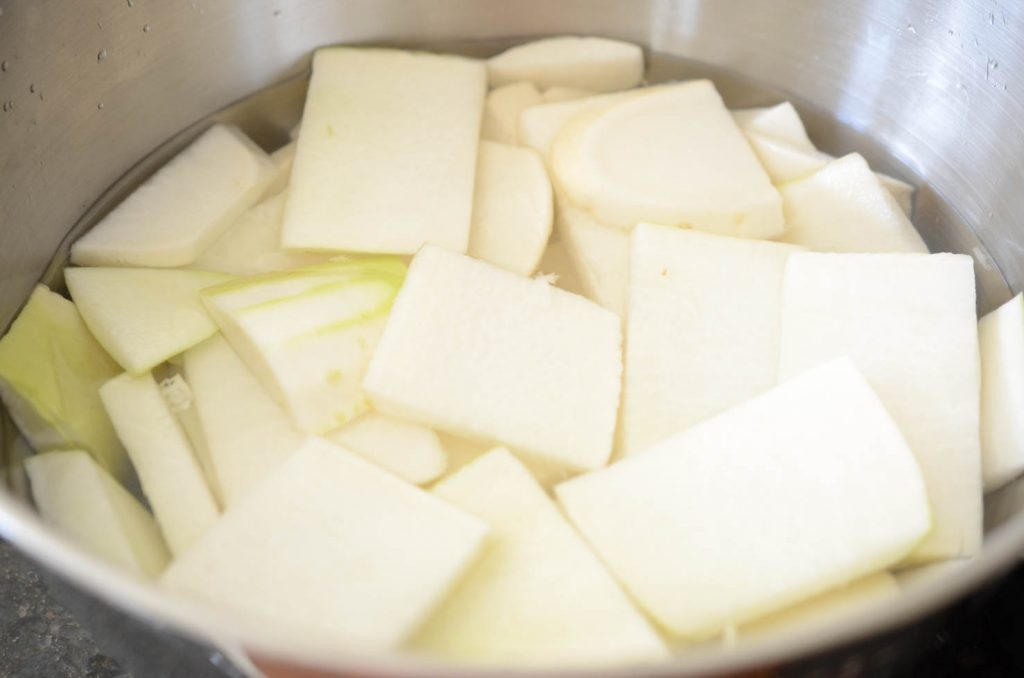
- Rinse radish under water and cut into 2 1/2 inch (6cm) chunks. Do NOT peel.

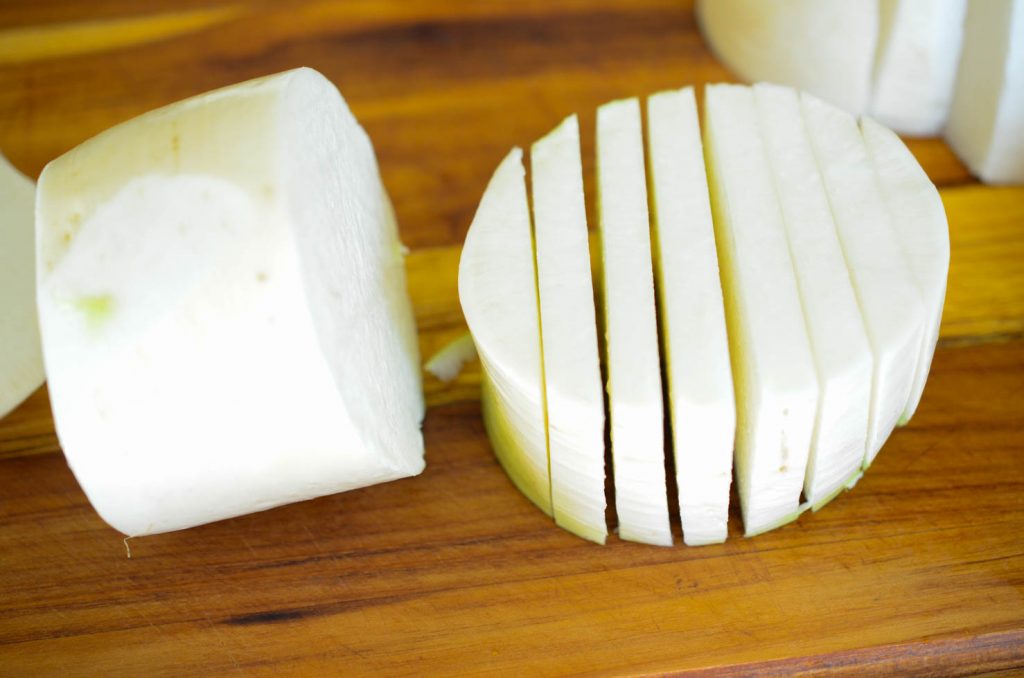
Cutting radish into chunks for Kimchi - Turn each radish chunk 90° and cut into 1/2 inch (1 cm) thick slices.
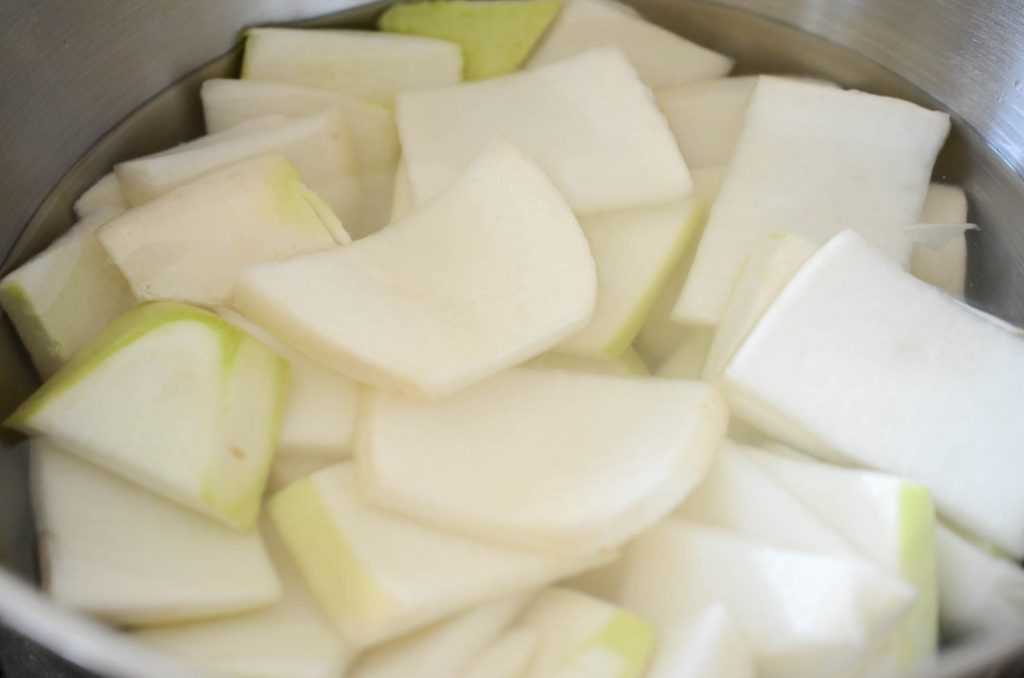
- Make brine by mixing 5 cups lukewarm water (use cold water in summer) and 7 Tbs sea salt.
- Pickle radish in brine for 3 hrs. Turn over once to make sure the top ones get fully immersed in brine.
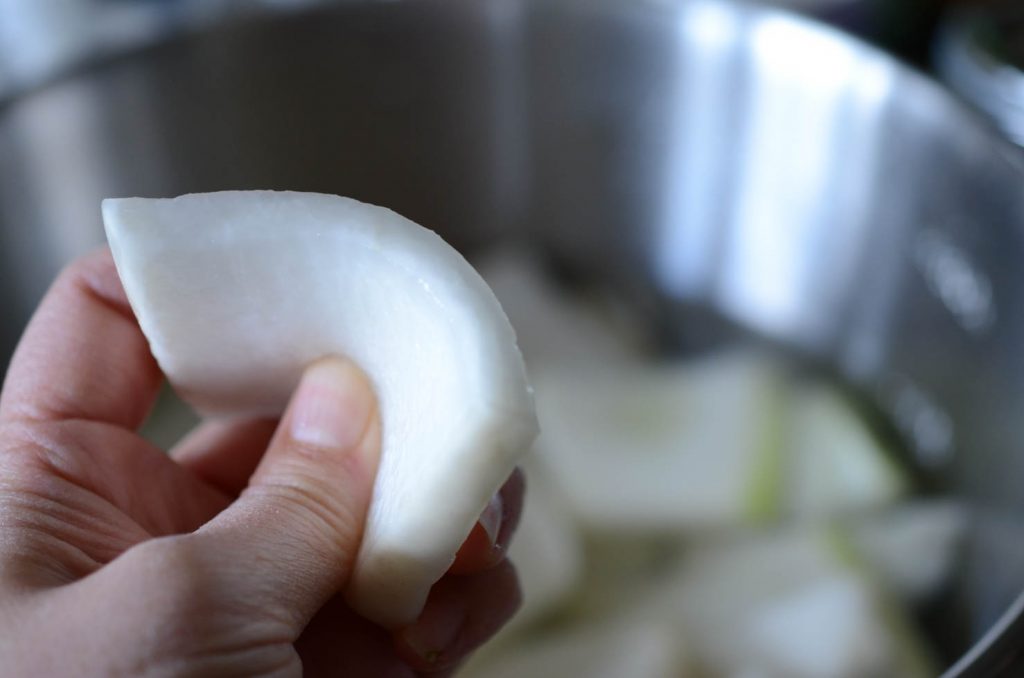
Pickling radish in salt water for Kimchi Radish brined for 3 hrs – ready for Kimchi - Radish is this flexible – like so- when fully pickled in brine. Drain out all the brine from radish by pouring out everything in a colander and letting it drain for good 5 min or more. DISCARD brine.
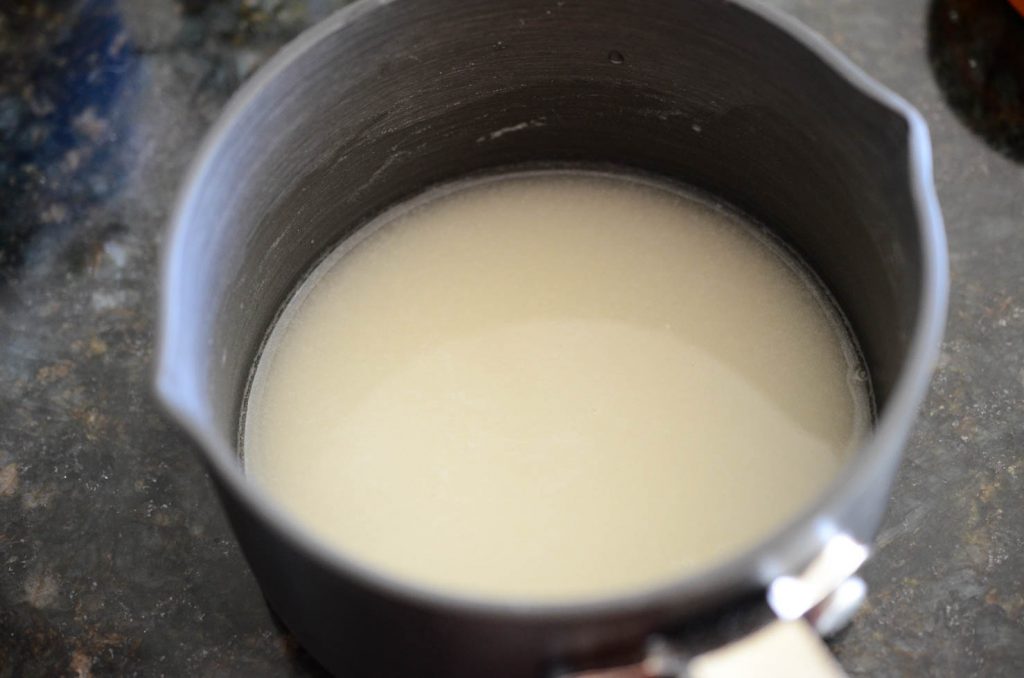
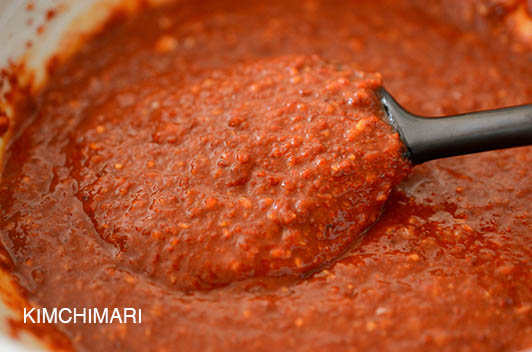
Radish is flexible when fully pickled in brine (salt water) - Make sweet rice flour paste my mixing 1 T sweet rice flour and 10 Tbs water and bring to boil. Simmer for 7-8 min while stirring often. A whisk works well. Let it cool.

Sweet Rice Flour paste for kimchi - Make seasoning by adding remaining seasoning (red chili powder, garlic, ginger, myeolchi aekjeot) to cooled rice flour paste. Mix it well. It should look gloriously red and delicious like this.

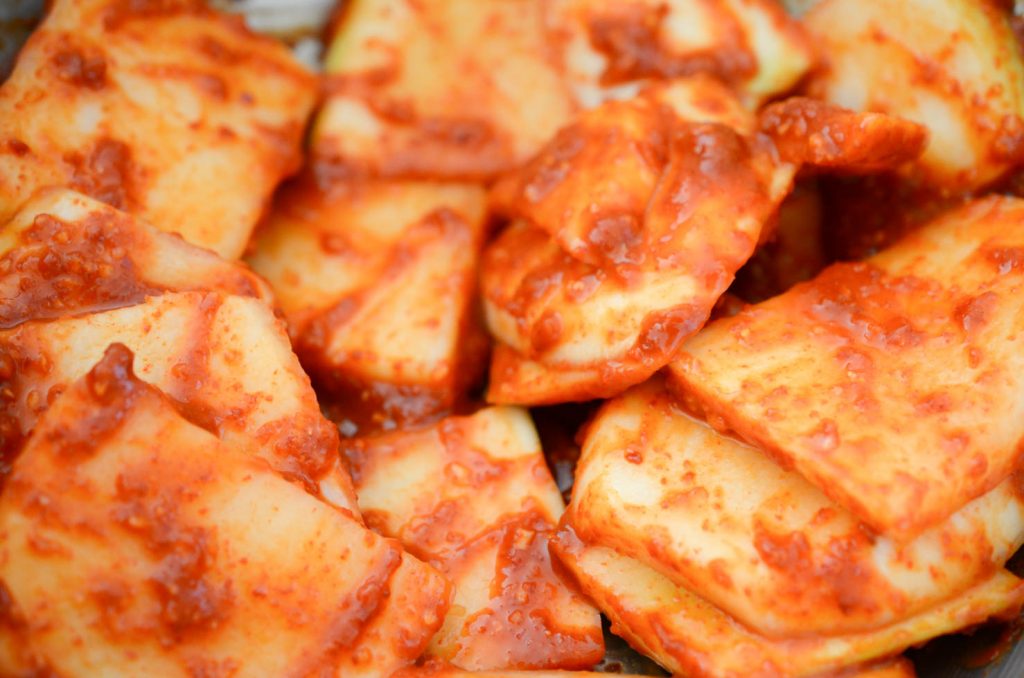
Radish Kimchi (Seokbakji) seasoning with gochukaru, garlic, ginger, anchovy sauce in rice paste - In a bowl, add radish and kimchi seasoning mix. Use plastic gloves (your hands may sting later if you use your bare hands) to mix everything well so that each radish piece gets nicely coated with the red stuff.
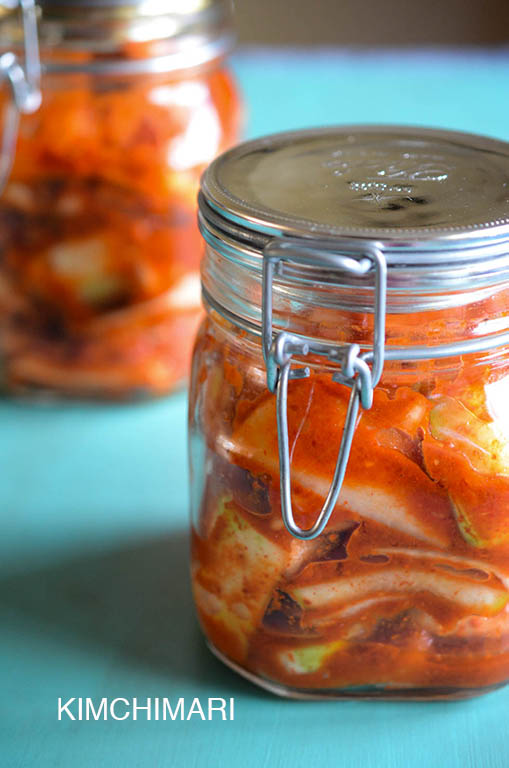
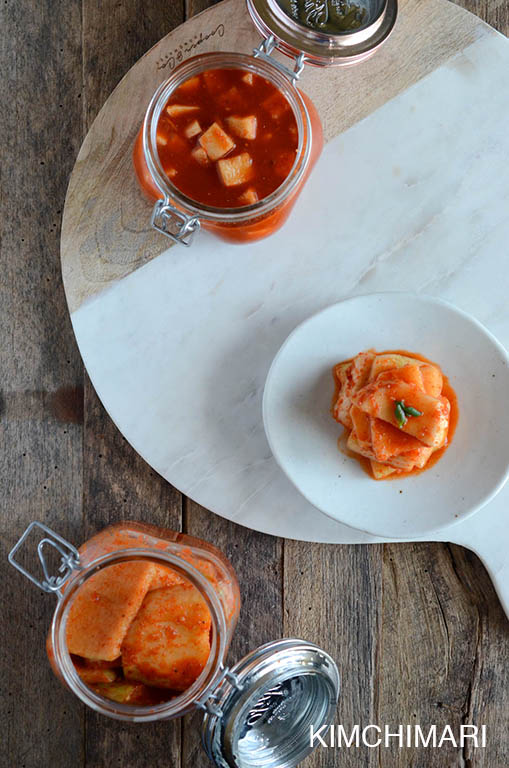
Radish mixed with Kimchi seasoning - That’s it!! Get a glass jar or plastic container large enough (leave some extra room on top for expansion) and put radish kimchi into it. Try to leave as little air pockets as possible. It will look like there’s not enough liquid but if your radish is fresh and juicy, you enough liquid will form in a couple days.
- Leave out at room temp for 2 – 3 days (shorter in summer) until it is just about ripe. See my No Crazy Kimchi post for more details on how to ripen Kimchi.
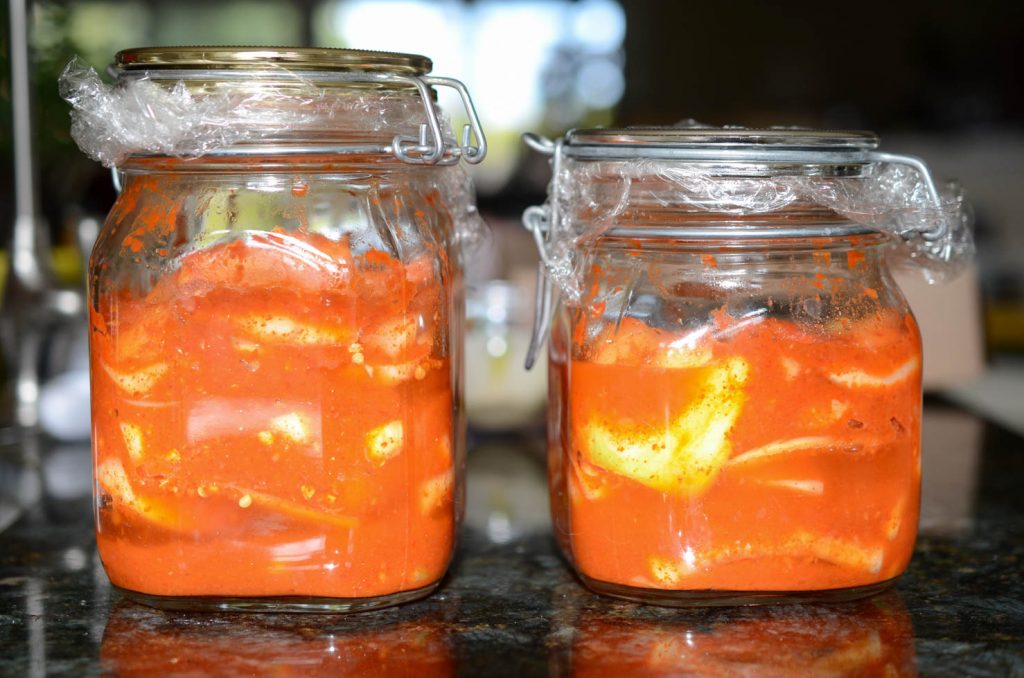
Here is my radish kimchi at Day1 and Day 2 while outside at room temp:
Easy Radish Kimchi - traditional recipe
Ingredients
- 2 lb large Korean radish (each radish approx. 1 lb x 2 = 2 lb / 907 g total)
For Brine
- 5 cups water (spring water)
- 7 Tbsp coarse Korean sea salt (with bittern removed, 7 Tbsp = 1/3 Cup + 2 Tbsp = 109 ml)
For Seasoning
- 4 Tbsp Korean red chili powder (Gochukaru – adjust to taste)
- 2 Tbsp chopped garlic
- 1/2 tsp chopped ginger
- 4 Tbsp Korean fermented anchovy sauce (멸치액젓 myeolchi aekjeot, or fish sauce)
Sweet Rice Paste
- 10 Tbsp water (10 Tbsp = 1/2 Cup + 2 Tbsp = 148 ml)
- 1 Tbsp sweet rice flour (Mochiko flour)
Instructions
- Rinse radish under water and cut into 2 1/2 inch (6cm) chunks. Do NOT peel.
- Turn each radish chunk 90° and cut into 1/2 inch (1 cm) thick slices.
- Make brine by mixing 5 cups lukewarm water (use cold water in summer) and 7 Tbs sea salt.
- Pickle radish in brine for 3 hrs. Turn over once to make sure the everything gets brined evenly.
- Make sweet rice flour paste my mixing 1 T sweet rice flour and 10 Tbs water and bring to boil. Simmer for 7-8 min while stirring often. A whisk works well. Let it cool.
- Make seasoning by adding remaining seasoning (red chili powder, garlic, ginger, myeolchi aekjeot) to cooled rice flour paste. Mix it well.
- When radish is fully pickled, drain radish until there’s no additional liquid.
- In a bowl, add radish and kimchi seasoning mix. Use plastic gloves (your hands may sting later if you use your bare hands) to mix everything well so that each radish piece gets nicely coated with the red stuff.
- That’s it!! Get a glass jar or plastic container large enough (leave some extra room on top for expansion) and put radish kimchi into it. Try to leave as little air pockets as possible. It will look like there’s not enough liquid but if your radish is fresh and juicy, you enough liquid will form in a couple days.
- Leave out at room temp for 2 – 3 days (shorter in summer) until it is just about ripe.
Tips & Notes:
Will keep in fridge for weeks and even months if temp is low enough. Add 1 tsp of sugar for faster fermentation and sweeter taste. See my No Crazy Kimchi post for more details on how to ripen Kimchi. Korean Cheonilyeom Sea Salt for Kimchi is much less saltier than regular coarse sea salt so reduce the amount when using non-Korean sea salt. Adapted from Sunee Kang's kimchi cookbook
Nutrition Information:
Notes
- You can also use Daikon radish if you cannot get Korean radish.
- Add 1~2 tsp of sugar or maesil extract for faster fermentation and sweeter taste. But it will taste good without it if your radish is good quality.
- If you find that it is not ripe enough after you put it in the fridge, you can always take it out again and leave at room temp for longer and put back.
- I used a typical canning jar to put my kimchi but TAKE OUT the rubber insert because kimchi NEEDS to BREATHE.
- You can buy ALL the ingredients in this recipe (except for radish) from my new Amazon store – so check it out!
- Please do NOT add the brine into your Kimchi. Discard all of brine liquid after you are done pickling the radish.
Enjoy and even YOU can make this Kimchi so give it a try!!


My mother gave me a recipe years back and I have lost it in a move. It was a chicken stew that used chicken drumettes, potatoes, carrots, soy sauce sugar and Ground red pepper. I cannot get the measurements right now, 😭 so I feel I am forgetting something to mellow out the salt from the soy sauce. Do you happen know the recipe I am talking about ? And the name of it.
Hello Andi, I think you are talking about Dakdoritang? or Maybe Jjimdak? So there are the non-spicy version and the spicy version. I have the non-spicy version here – https://kimchimari.com/soy-sauce-chicken-dak-doritang-hearty-stew/. You could just add red pepper powder here to make it spicy. To mellow out the saltiness, just add some water or kombu broth. Also, try adding some mirim (rice wine). That should take care of it.
I just made this recipe and it was way too salty! I looked at your other cubed radish recipe and you only use 2 Tbs of fish sauce for 4 lbs of radish whereas this recipe is for 2 lbs of radish and you call for 4 Tbs of fish sauce.
Also, I noticed this recipe doesn’t call for any sugar. I have made other radish recipes (including your other cubed radish recipe) that uses sugar and salt in the brining process. Is there a reason why there is no sugar in this recipe? Also, what is the scientific purpose of using sugar to brine? I love all your detailed explanations of the history of ingredients. I find it so educational and informative.
THank you for all your delicious recipes and detailed explanations!
I’m going to try making a different batch using your other cubed radish recipe.
Any tips on what to do with this too salty batch? I didn’t mix in other radish during the fermentation process and now it’s all fermented and in the fridge.
Hello Eunyoung, so this kind of radish kimchi is different from the very common Kkakdugi cubed radish kimchi. Cubed radish kimchi are supposed to be somewhat sweet thus many use sugar and salt to brine or add sugar in the seasoning. This particular type is not supposed to be sweet. Also, did you taste the kimchi right after making it? The saltiness will go down once the Kimchi is ripened and is a little sour. But if you prefer the kimchi to be sweet, you can always add sugar – everyone has different preference in flavors when it comes to kimchi so you can totally make it your own. If you think the kimchi is still too salty, you can add unsalted fresh radish in the kimchi and it should balance out the saltiness. You can also swirl in some maesil cheong or some sugar right before eating to balance the saltiness. Sorry for the late response, hope it’s helpful. Thank you for your kind words regarding my recipes!
Thanks for the recipe! It was very easy to follow and our kimchi has ripened and in the fridge now. Just wondering how long it will be good for in the fridge?
Oh it should last you for several weeks. Maybe a bit longer if you have a kimchi fridge or if you can keep it at the lowest temp of 32-35F. Unfortunately they don’t last as long as cabbage kimchi. Enjoy!