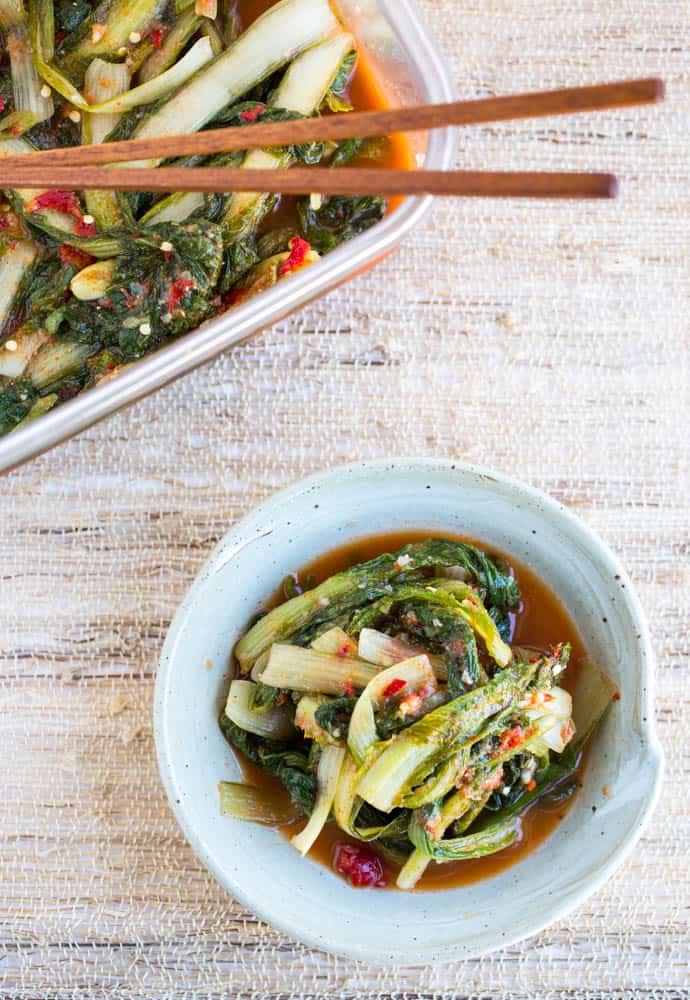
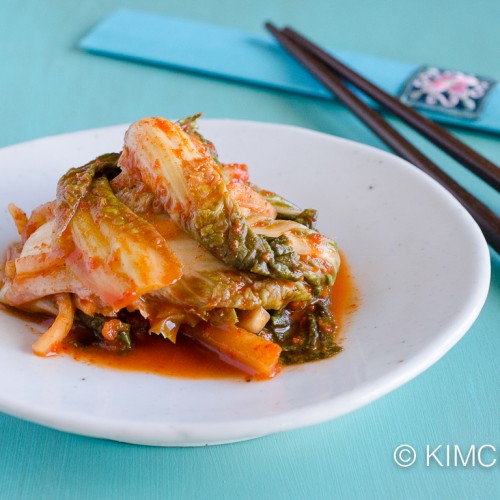
Summer Seoul Green Cabbage Kimchi with Putbaechu is a perfect simple refreshing kimchi to make for the warmer days. This kimchi recipe can be enjoyed both fresh like a kimchi salad or after it’s ripened.
Eolgari or Putbaechu kimchi
What is Putbaechu Kimchi
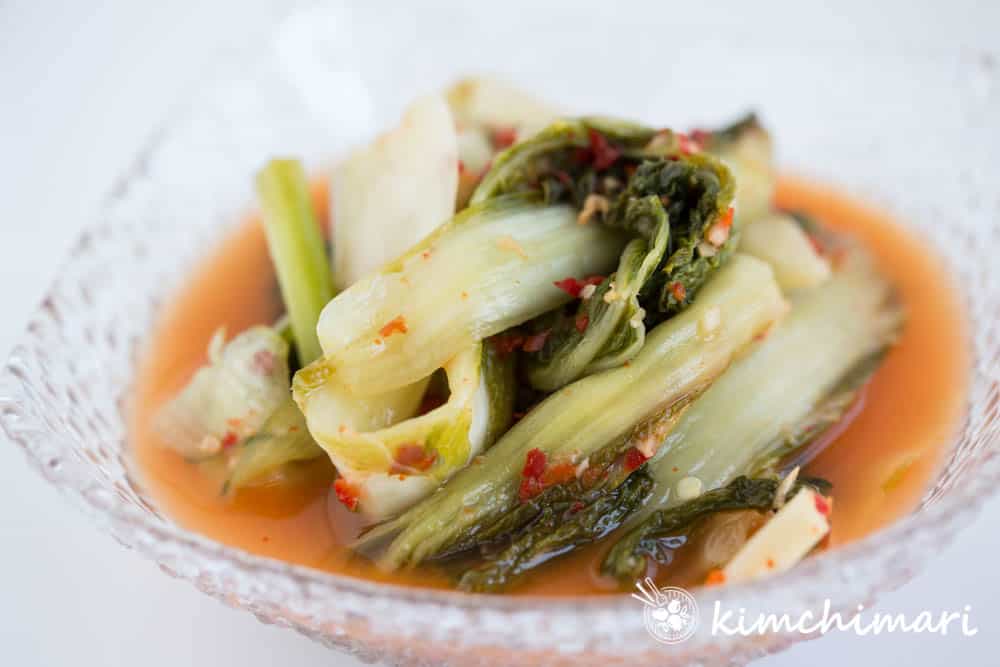
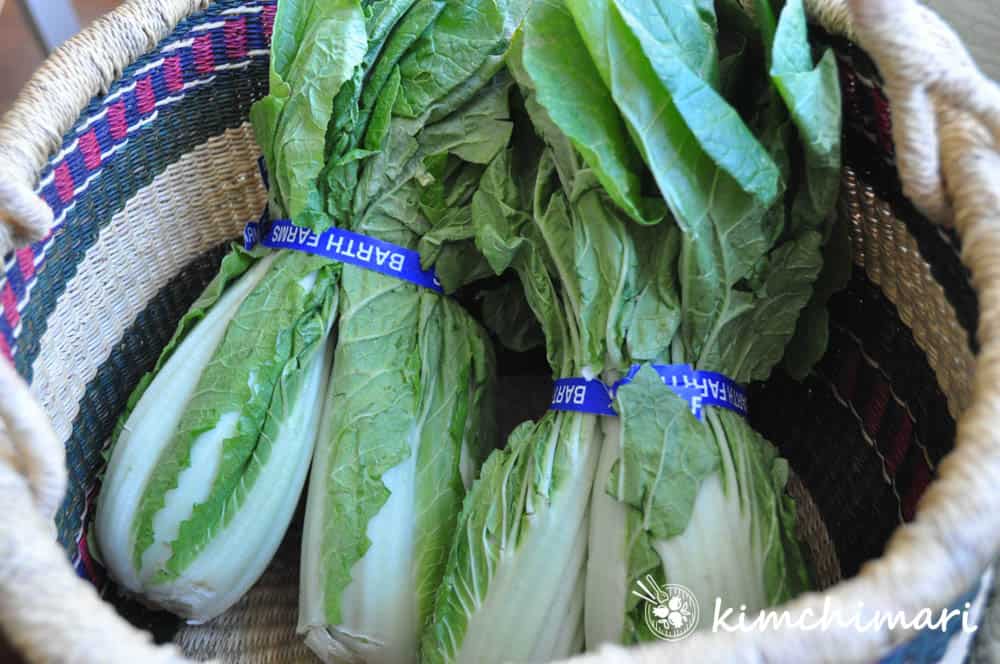
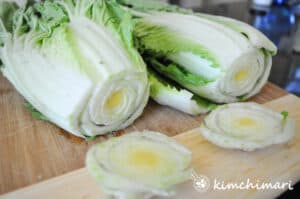
Putbaechu Kimchi 풋배추 김치 is a great summer kimchi made using a smaller cabbage with slender and greener leaves which are called Putbaechu (풋배추) or Seoul Green Cabbage (see pic below) in the US. This kimchi is not meant to be stored for many months like a typical cabbage kimchi but is meant to be consumed pretty quickly. It is also often made with more liquid than usual and the juice is very refreshing in the summer – especially in cold noodle soups like Naengmyeon.
Because this is a summer kimchi, fresh red chili peppers are used instead of dry chili powder which adds an fantastic freshness. You also don’t add a lot of jeotgal (fish sauce) to this because having too much fish or shrimp sauce can make the kimchi taste muddled and not as refreshing, light and bright as it can be.
You can also use part of the juice to season cold noodle soups (Naengmyeon) which adds a fabulous ZING to the soup – with much similar flavors to Yeolmu Kimchi Naengmyeon. Sooo goood!!
PutBaechu vs Eolgari Baechu
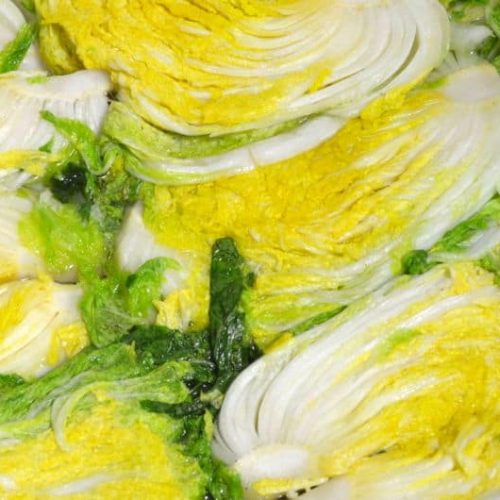
putbaechu seoul green cabbage bunches
Sometimes this kimchi is also called Eolgari Kimchi 얼갈이김치 because Putbaechu also go by Eolgari Baechu (although technically they are not the same) by many Koreans. Now, I bet not many Koreans know the difference. The main difference is that Putbaechu is grown in the summer vs Eolgari Baechu is grown in winter.
It seems Eolgari Baechu was traditionally planted in the fall after the summer vegetables were harvested and left to grow through winter. Koreans enjoyed this baechu so much (it’s also popular in making Baechu Doenjang Guk) that in recent times they developed a new summer variety that can withstand the heat and thus can be grown in warmer weather. So these are now are planted and harvested in spring and summer and sold as Putbaechu.
So although Eolgari Kimchi is known as a winter kimchi, now Putbaechu Kimchi is considered a summer time kimchi because it’s made with cabbages grown for the warmer months!! Confusing right!! I agree!! But what matters is that they are delicious either in summer or winter!😍
FROM JINJOO!
Chef’s Tips
Handle the cabbage leaves with care – when making kimchi with vegetables that have a lot of green leaves like this Putbaechu, Yeolmu (radish greens), Gat (mustard greens), you need to be careful not to bruise or break the green leafy part too much as they can leak a very grassy flavor onto the kimchi which can make it unpleasant to eat.
Kelp Broth adds great flavor – making and using the Dasima (kelp) broth is optional but it adds great umami flavor to your kimchi as this is a natural MSG.
Use Fresh Red Chili for a refreshing spicy kick! – using Korean fresh red chili pepper is best but that’s not always available in the US and a fresh Fresno red chili is a great substitute
Substitute dry whole red Korean chili for fresh ones by adding liquid (use some of the liquid from recipe) to it and letting it rehydrate then using a chopper
Add pepper seeds for extra spicy kick – it also it helps prevent kimchi from spoiling. But it’s not a must.
Cut the bottom root end of the cabbage so all the leaves become loose. Rinse the leaves in water lightly and gently. Try not to break the leaves as you rinse. Read in my TIPs section why you shouldn’t. 😉 Drain.
Cut green onions into 1.5 inch lengths and peel garlic cloves. Set aside.
Make brine in a large bowl – mix 10 cups water + 1 cup Cheonilyeom Korean salt until salt is all dissolved. Read HERE for info on Cheonilyeom.
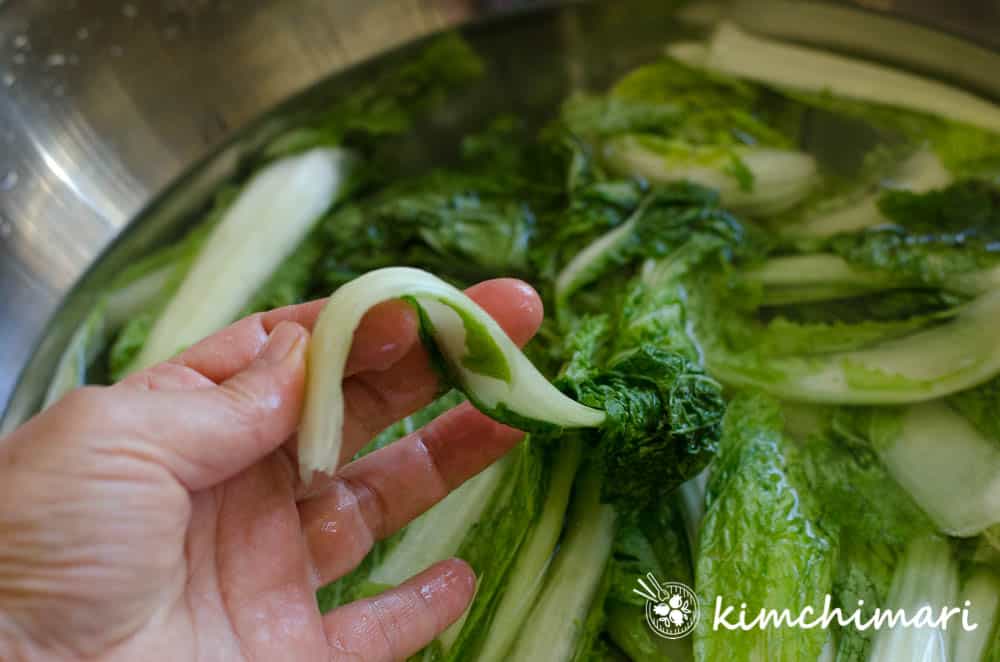
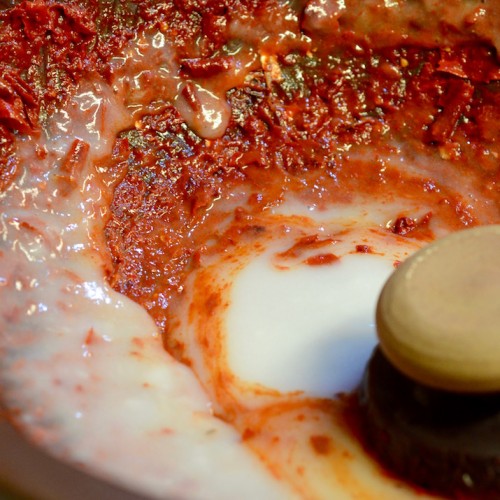
Add cabbage leaves in brine for 1 hr for regular small putbaechu. Leave in brine up to 2 hr if your cabbage leaves are bigger or thicker than usual. The best way to tell if it’s ready is to check the large cabbage leaves at 1 hr mark with a bend test – bend the white fleshy part and if fully pickled, they should bend easily without breaking or much resistance. Like this –
While the cabbage is in the brine, make the seasoning.
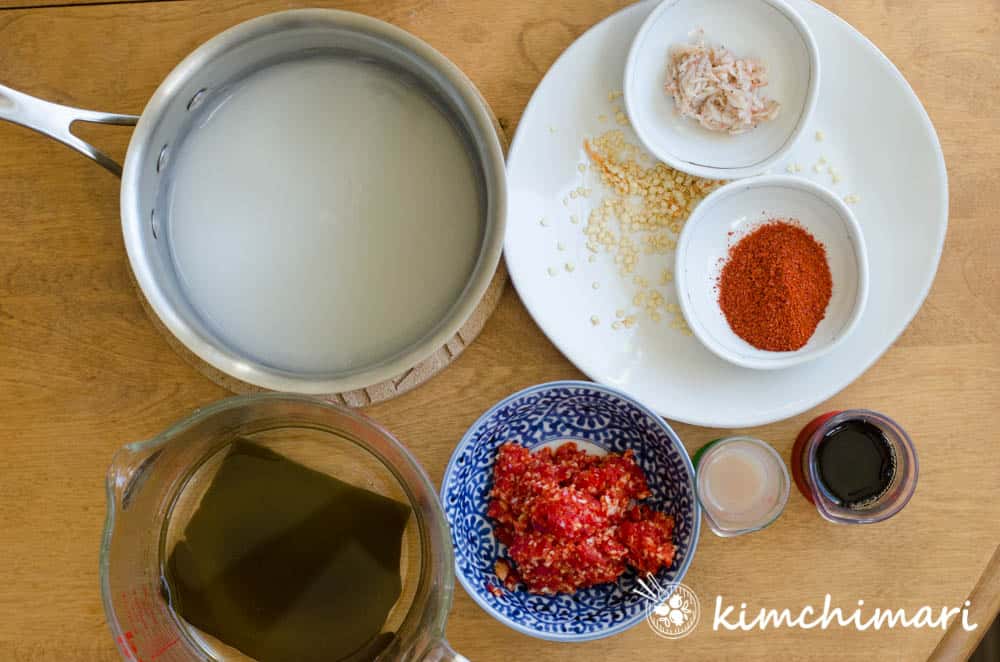
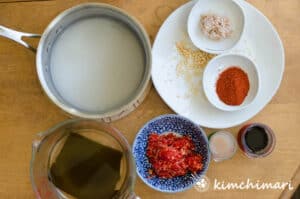
Make Kelp Broth (dasima gukmul 다시마국물) – in a small pot, add 1 cup water and 1 large piece of kelp (Dasima) and bring to boil but turn off heat immediately once it starts to boil. Let it cool. Alternately, you can also simmer on very low heat for 10-15 min. If you boil too long, you will see a slime come out from the kelp so don’t boil it. Let it COOL.
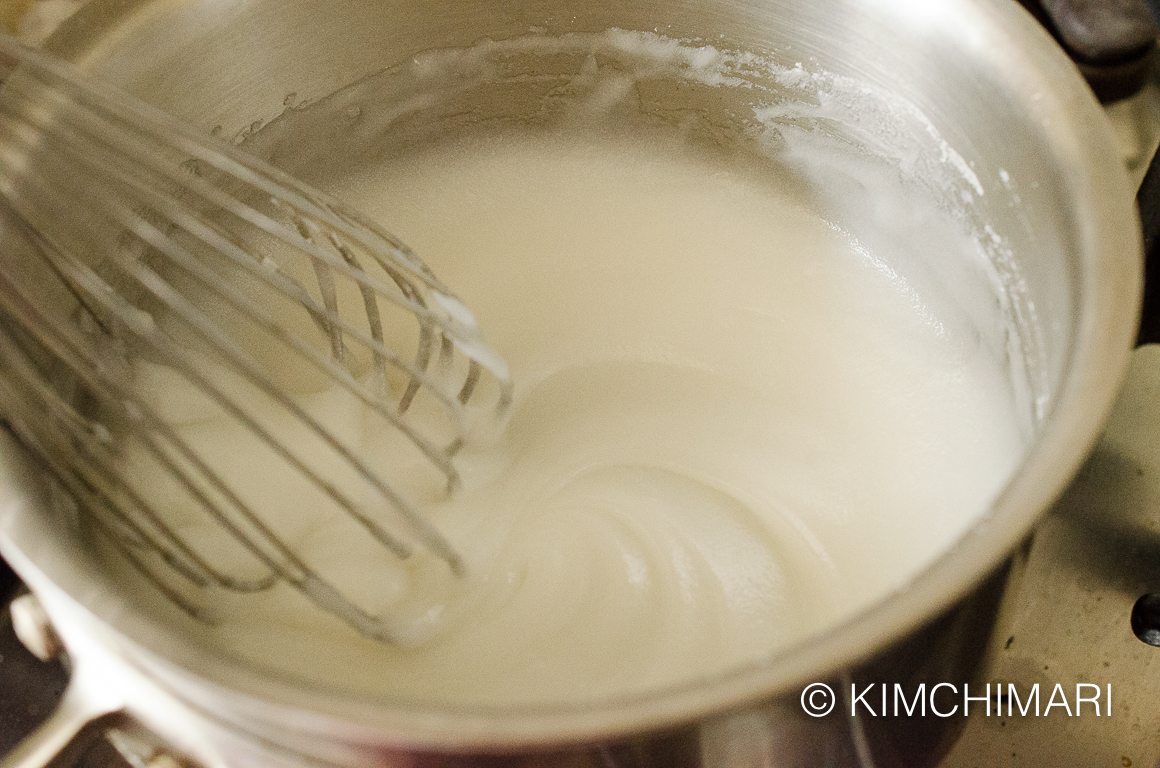
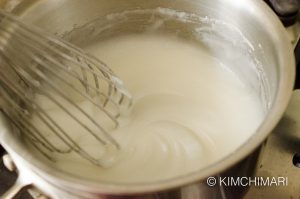
Make Sweet Flour paste (chapssalpul 찹쌀풀) – in a small pot, add 1/2 cup of the Kelp broth from above and 1.5 Tbsp sweet rice flour. Kelp broth is optional – it adds great umami flavor but if you don’t want to, you can just use water here instead. Mix well with a whisk until there are no lumps. Put it on the stove and turn heat to medium and bring to boil. Keep stirring to make sure there are no lumps. Lower heat and simmer for 2-3 min while stirring. Let it COOL.
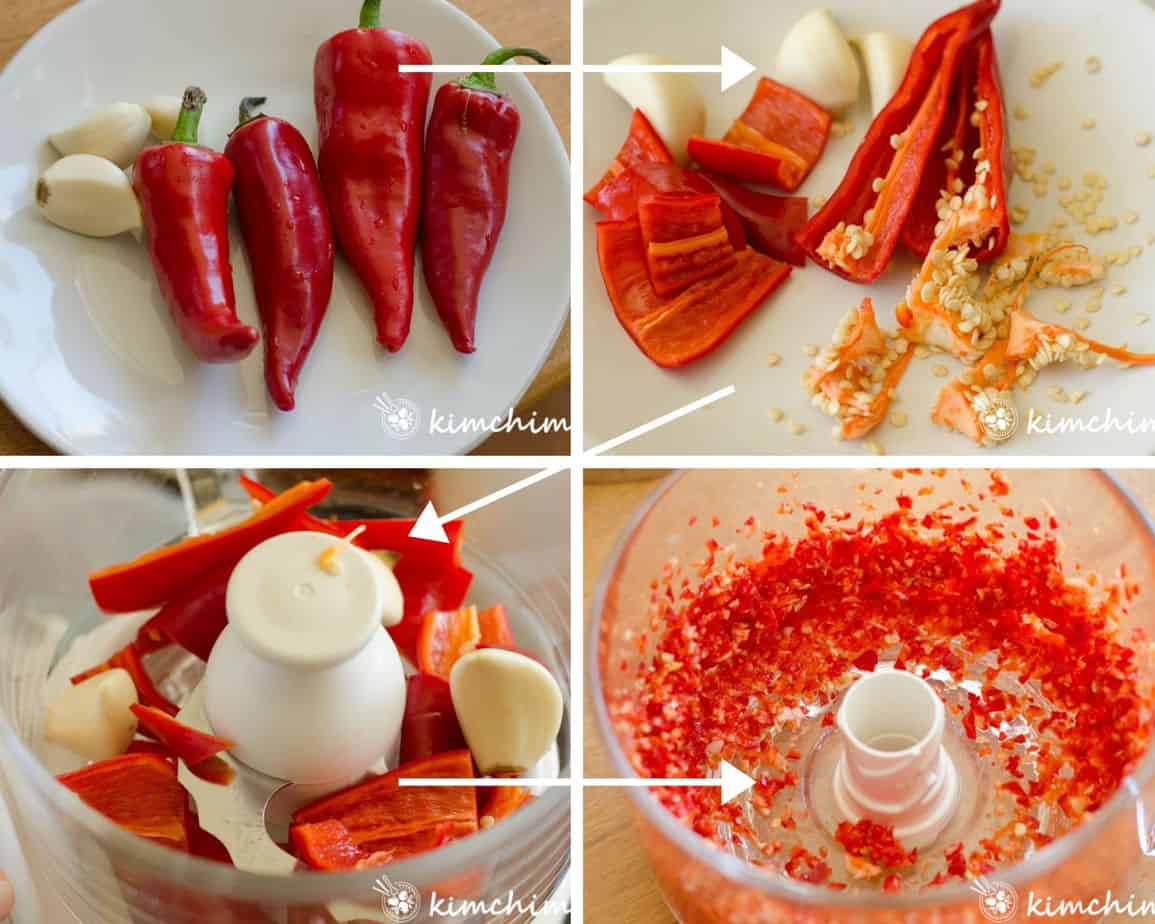
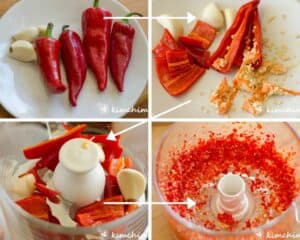
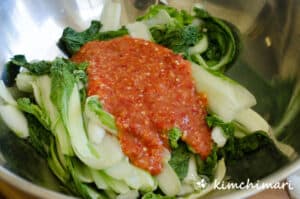
Rinse and cut fresh red chili into big chunky pieces for the chopper. When cutting the chili, remove and save some of the seeds which will be added later. In a chopper, add the red chili (not the seeds) and garlic cloves and chop until fine but not too fine. I like it when you can see the little seeds. It’s ok if a few seeds get in the chopper, I just like having the seeds whole in the kimchi. BE CAREFUL when handling peppers 🌶🌶. I forgot and touched my eyes after and wow.. my eyes 👀 were on fire!! 🔥 🙀
Measure Saewoojeot (fermented shrimps) and the fermented juice separately.
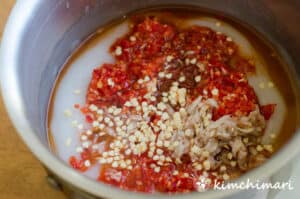
In the cooled flour paste, add the blended chili and garlic from 3, saewoojeot shrimps, saewoojeot juice,anchovy sauce, kelp broth, maesil syrup, sugar and chili seeds. MIX!
When your cabbages are ready, drain them and rinse in water just ONCE quickly and gently. Drain again. *To reduce sodium level, you can rinse up to 2 more times but you risk bruising the leaves so I usually don’t do it more than once.
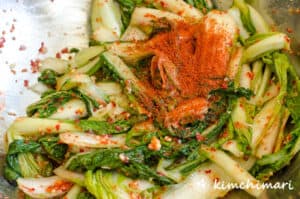
In a large bowl, add the drained cabbages and the seasoning mix from above. Wear a plastic glove and gently mix until cabbages are all nicely coated with the yangnyeom (seasoning) like below. Once you mix cabbages with seasoning, taste to see the spice level. The fresno chilies were quite spicy so I just add 1 Tbs of red chili powder (gochukaru) but if you like spicy, add another 1 Tbs.
Add cut green onions and gently mix again. Find a glass jar or plastic container and transfer the kimchi. You should have some leftover seasoning in your bowl, add 1/4 cup water or leftover kelp broth to the bowl, rinse it and add the rinse liquid to the container. This way, you don’t waste any seasoning and also increase the yummy liquid!! Tip from our moms!! Normally, it’s best to use a container that’s just the right size for your kimchi – read my notes at the end of post for more info.
Leave it out at room temperature for 1-2 days. Unlike regular cabbage kimchi, this kimchi taste best when it’s just slightly sour. But it’s up to you. Taste it every 6-8 hrs and put in the fridge when it tastes a little ripe. Well, that’s it!!
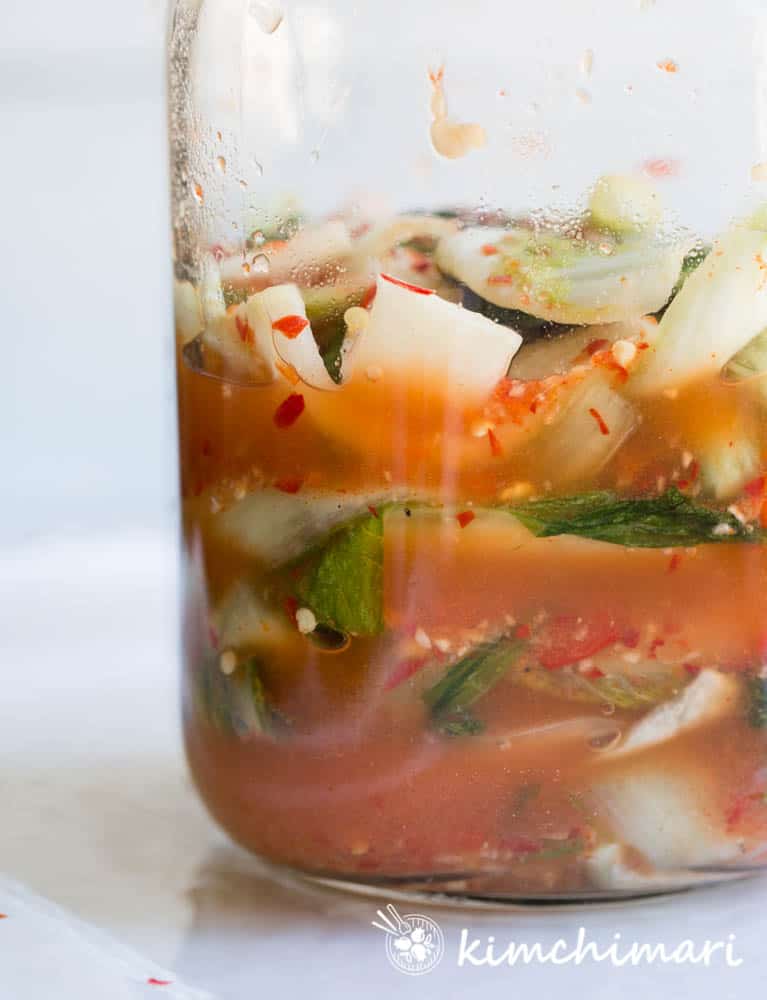
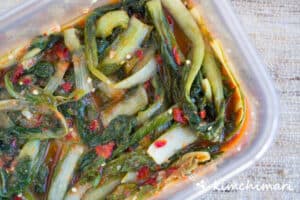
putbaechu summer cabbage kimchi in jar
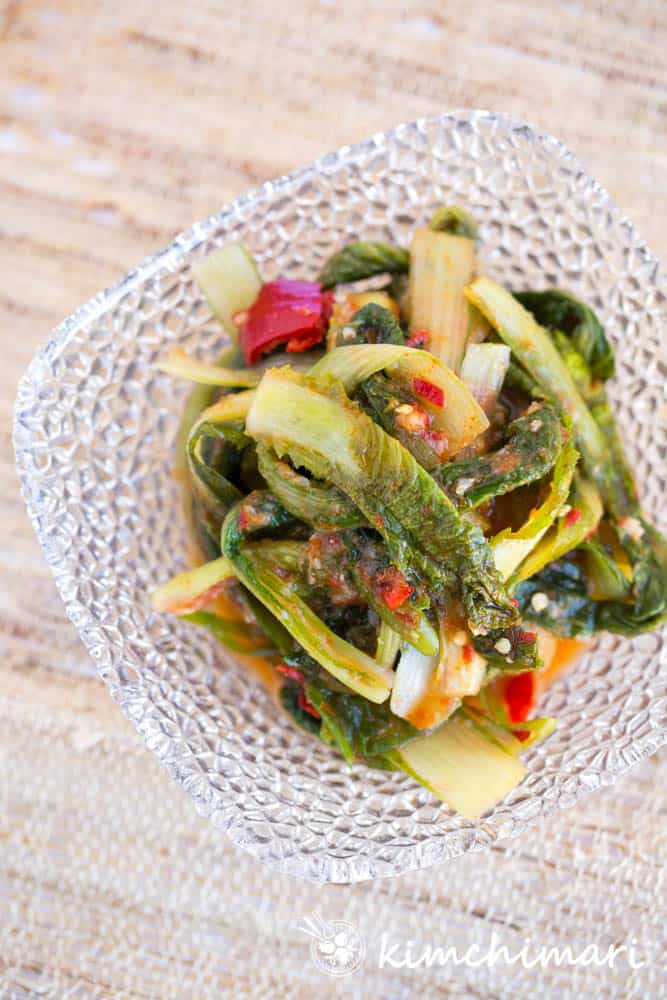
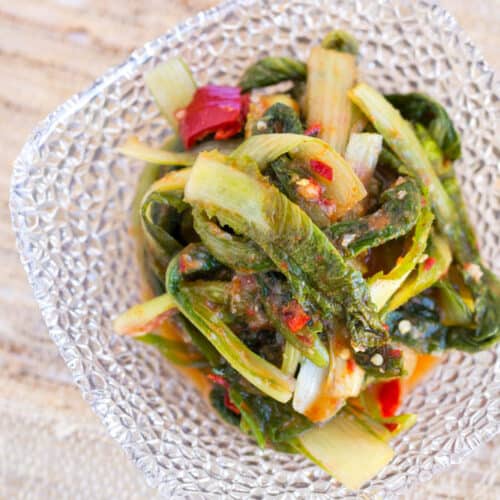
Here’s a close up of the kimchi on day 3.
Seoul Cabbage Putbaechu kimchi
Kimchi & air exposure & container size
When making kimchi, here are few things you should note –
choose the right size container for your kimchi – not too big and of course not too small. You need some extra room on top when the kimchi ferments and expands so it doesn’t overflow but also it should fill near to the top
if the container is too big, cover top with a plastic wrap or big pieces of cabbage leaves to lesson contact with air
you can also put kimchi inside a plastic bag and then put in the container to prevent exposure of the kimchi to air. It can also save your container smelling later but we are creating another plastic waste so I don’t do it.
when you take kimchi out from the container always make sure the top stays even and is covered afterwards
don’t dig out kimchi from the middle or bottom of the container, better to eat from the top first
don’t put leftover kimchi from the table back into the container – this also can ruin the kimchi flavor
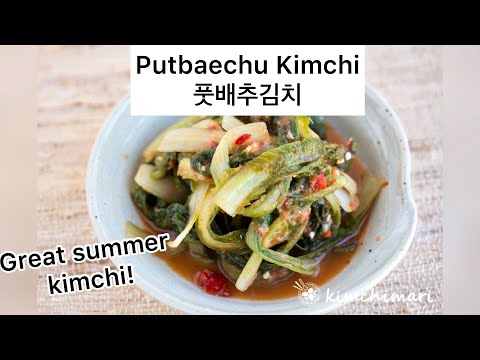
Watch My Narrated Video!
Korean Summer Cabbage Kimchi Putbaechu Kimchi
If you liked this recipe, please leave me a comment and ☆☆☆☆☆ rating below!
Follow along on social for more Korean recipe inspiration!
1/4cup water or kelp brothto rinse the bowl at the end
3green onions
Instructions
Cut the bottom root end of 2 lbs putbaechu (seoul green cabbage) so all the leaves become loose. Rinse the leaves in water lightly and gently. Try not to break the leaves as you rinse. Drain. Cut green onions into 1.5 inch lengths and peel garlic cloves. Set them aside.
10 cups water, 1 cup cheonilyeom (solar sea salt)
Make brine and add cabbages
Make brine in a large bowl – mix 10 cups water + 1 cup cheonilyeom (solar sea salt)until salt is all dissolved. Read HERE for info on Cheonilyeom. Pickle cabbage leaves in brine for 1 hr for regular small putbaechu. Leave up to 2 hr if your cabbage leaves are bigger or thicker than usual. The best way to tell if it’s ready is to check the large cabbage leaves at 1 hr mark with a bend test – bend the white fleshy part and if fully pickled, they should bend easily without breaking or much resistance. Like in this pic.
Prepare seasoning while cabbages are in brine.
Make Kelp Broth
In a small pot, add 1 cup water and 1 piece dasima kelp and bring to boil but turn off heat immediately once it starts to boil. Alternately, you can also simmer on very low heat for 10-15 min. If you boil too long, you will see slime come out from the kelp so don’t boil it. Let it COOL.
Make Sweet Flour paste
In a small pot, add 1/2 cup kelp broth or water from above and 1.5 tbsp sweet rice flour. Kelp broth is optional – it adds great umami flavor but if you don’t want to, you can just use water here instead. Mix well with a whisk until there are no lumps. Put it on the stove and turn heat to medium and bring to boil. Keep stirring to make sure there are no lumps. Lower heat and simmer for 2-3 min while stirring. Let it COOL.
Chop red chili and garlic
Rinse and cut fresh 3 pieces fresh red chili into big chunky pieces to put in the chopper. When cutting the chili, remove and save the seeds and set aside. (will be added later). In a chopper, add the red chili and 4 garlic cloves and chop until fine but not too fine. I like it when you can sometimes see the little pieces. It’s ok if a few seeds get in the chopper, I just like having the seeds whole in the kimchi.
Mix seasoning
In the cooled flour paste, add the blended chili and garlic, 1 Tbsp saewoojeot, 1 Tbsp saewoojeot liquid, 4 tsp myeolchi aekjeot (anchovy sauce), 1 tsp Maesil Syrup (Maesil Cheong), 1 tsp sugar, 2 Tbsp Kelp broth and chili seeds (optional).
When your cabbages are fully brined, drain them and rinse in water just once quickly and gently. Drain again.
Mix everything!
In a large bowl, add the drained cabbages and the seasoning mix from above. Wear a plastic glove and gently mix until cabbages are all nicely coated with the yangnyeom. Once you mix cabbages with seasoning, taste to see the spice level. I add about 1 Tbsp Korean red chili powder (Gochukaru) The fresno chili was quite spicy so I just add 1 Tbs. You can always add more.
Add cut 3 green onions and gently mix again. Find a glass jar or plastic container and transfer the kimchi. You should have some leftover seasoning in your bowl, add 1/4 cup water or kelp broth to the bowl, rinse it and add the rinse liquid to the container.
Leave it out at room temperature for 1-2 days. Unlike regular cabbage kimchi, this kimchi taste best when it’s just slightly sour. But it’s up to you of course. Taste it every 6-8 hrs and put in the fridge when it tastes ripe. Well, that’s it!!
Equipment
2 qt container (glass jar or plastic container)
4 qt or larger mixing bowl
chopper
small pot
whisk
plastic gloves
Tips & Notes:
Please note the sodium level are an estimate due to inaccurate info available regarding saewoojeot and also the brine is all discarded.
Handle the cabbage leaves with care – when making kimchi with vegetables that have a lot of green leaves like this PutBaechu, Yeolmu (radish greens), Gat (mustard greens), you need to be careful not to bruise or break the green leafy part too much as they can leak a very grassy flavor onto the kimchi which can make it unpleasant to eat.
Kelp Broth adds great flavor – making and using the Dasima (kelp) broth is optional but it adds great umami flavor to your kimchi as this is a natural MSG.
Use Fresh Red Chili for a refreshing spicy kick! – using Korean fresh red chili pepper is best but that’s not always available in the US and a fresh Fresno red chili is a great substitute
Substitute dry whole red Korean chili for fresh ones by adding liquid to it then using a chopper


I always love Kimchimari’s recipes!
Thank you soo much!!! I’m so glad to hear that. You totally made my day!
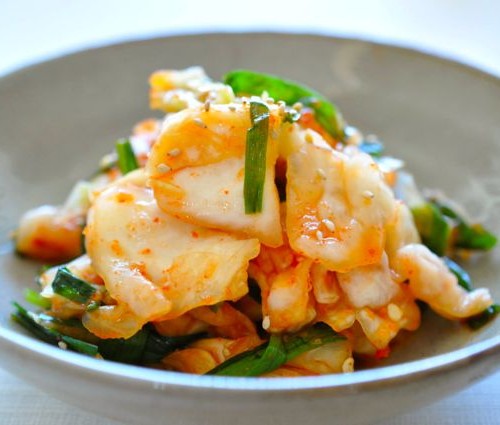
My putbaechu kimchi is over ripe now. What can I do with it?
You can make soup with it or make regular baechu kimchi with it. But I would recommend the soup – https://kimchimari.com/cabbage-soybean-paste-soup/
My favorite Kimchi in the summer!
I’m going to try this, but it will take me some time to get supplies
I hope you will be able to do it! BTW, I’m teaching how to make this kimchi LIVE on Kittch today at 3pm PST. Hope you can join and watch me make it! https://app.kittch.com/streams/view/c12333ae-0c37-4c04-8f06-3c23c3cad84d/?utm_source=Creator_Social&utm_medium=Social&utm_campaign=AAPI is the link!