
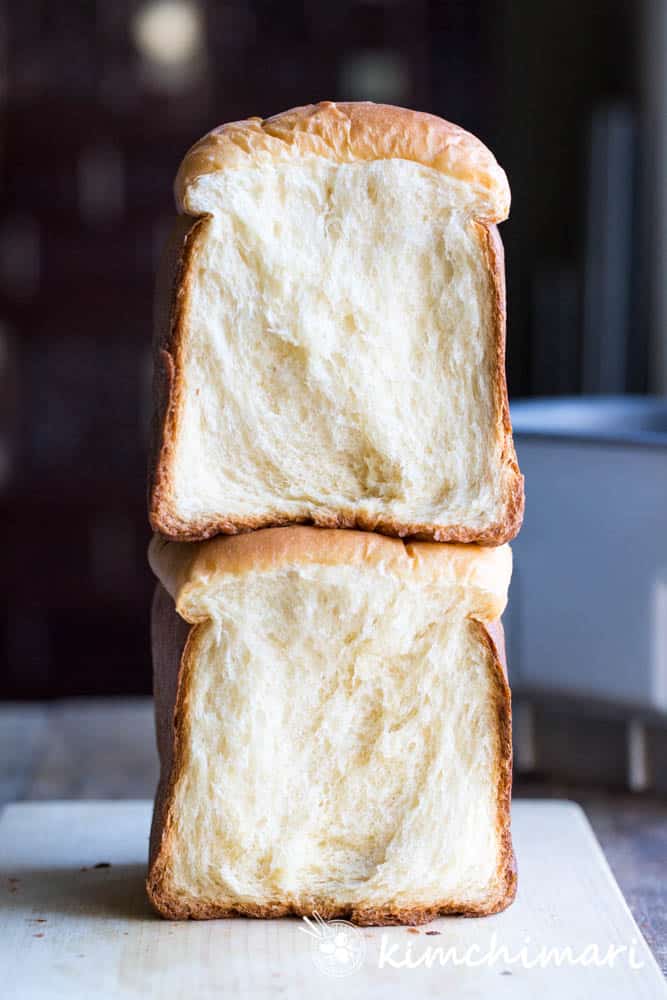
Milk Bread is the most favorite bread in Korea, Japan and many Asian countries. This buttery milk bread is pillowy soft, light, delicious and totally addicting!! It comes out just like my original recipe but now you can make the same in the bread machine!
This Milk Bread recipe has been one of my top most popular recipes ever since I shared it on my blog a couple of years ago. This bread originates in Japan and so it’s often called Japanese Milk Bread or Hokkaido Milk Bread but it’s now become so popular in many Asian countries including Korea. In Korea, it’s called Uyu Sikppang 우유식빵. Uyu means milk in Korean and is definitely a big part of Korean cuisine as Koreans just love this bread.
I have been asked a few times by many readers if one could make the milk bread in the bread machine and I wasn’t sure because I didn’t have a bread machine back then. 😝 So I bought one last year saying I was going to develop a recipe but just never got around to it until now. To those of you who asked, here it is!! Whew!! I almost gave up on this one because it just wasn’t giving me as good bread as my oven recipe but I prevailed!! HAHA!
NOTE – Every bread machine is different and your machine may not even have a custom programming feature. Unfortunately, I cannot create a recipe that works for all machines and you may have to figure out what you can do with your machine. But please don’t hesitate to ask questions on my FB page or in my FB group and we can try to solve it together.
How is milk bread different from other breads?
1. Milk bread is more moist, buttery, very slightly sweet and VERY light. It also uses a starter called Tangzhong which allows the bread to hold more moisture than the common bread recipe and thus you will have a more moist bread. You can get around this by using dry milk powder if you don’t want to go through the extra step of making the starter.
2. In between steps of rising, you roll the dough resulting in a bread that has a feathery and stringy texture. Not at all crumbly as most sandwich breads are. So because of that, this bread works well as toasts or for PB&J sandwiches or egg salad sandwiches.
BTW, here’s a quick video of how fluffy and amazing the bread is – fresh out of the breadmaker!
Baking Milk Bread in Bread Machine
The machine I use is Zojirushi Home Bakery Supreme Breadmaker BB-CEC20. I chose this machine because it has customizable functions for kneading, rise and baking. Also a 2 lb loaf capacity plus great reviews! If you need one, you can buy it from my amazon store HERE. (FYI, I make a small commission if you buy, thank you!)
There are a few things that are different when baking milk bread in the bread machine –
- Add WET ingredients -> then DRY ingredients on top of the liquid when adding ingredients in the pan. Not a must for all machines but this ensures the most successful result.
- Because each bread machine is different, you may have to adjust the recipe to your situation. You need 3 cycles for this recipe. If you don’t have custom rise or dough capability, I suggest you make the dough and do rising on your counter or in your oven – just follow my original milk bread recipe HERE. And then just bake in your breadmaker.
- Different baking pan sizes – bread machines have different shapes and sizes so that’s another thing you will have to think about. Just for reference a pullman loaf pan is about 7.75″ x 4.25″ while my Zojirushi bread maker’s pan is 8.75″ x 5″. This recipe will bake well in both of these sizes but of course, the bread will come out less tall in wider pans. If you have a taller but smaller 1 lb bread machine, you need to 1/2 the dough in your final baking step. Refrigerate leftover dough
Here’s an overview of the 3 cycles needed in making this bread in your machine:
- Basic Dough cycle (1h 50 min) – My cycle does – preheating (20~30 min) -> 20 min kneading -> 45 min rising -> stir down or punch down -> 22 min 2nd rising.
- Simple Rise (20-30 min) – let the dough balls rise in bread machine for 30 min, OR let it rise in 2 separate bowls on warm counter or 100 F proof temp in oven for 20 min.
- Bread Baking cycle (1h 50 min)- 1 hr rising -> 50 min baking. Hopefully you have a way to mimic what I did here or you can just stop the dough after kneading and then use the oven to prove by following my original milk bread recipe by proving for 40 – 60min until dough has doubled in size.
FROM JINJOO!
Chef’s Tips
- Tangzhong OR Dry Milk Power – to make this lovely feathery light and fluffy milk bread, you either need to make and add Tangzhong or use dry milk powder. The milk powder helps the bread to rise higher and easily. I tested both ways and they come out equally yummy! The recipe below uses milk powder but if you want to, you can just use Tangzhong instead and reduce the liquid accordingly. Basically, take out 1/4 cup water and 1/4 cup milk and 22g flour and make Tangzhong with it. Then, add the Tangzhong with the wet ingredient and make the dough and the rest the same as in the recipe. Check my original OVEN Milk Bread recipe for more info on how to make Tangzhong.
- Make sure liquid and butter is not cold – yeast needs a warm environment to become active so either warm up your liquid before adding to machine or use the preheat function to ensure things are warmed up first
- Instant Yeast vs Active Dry Yeast – If possible, use Instant Yeast because Active Dry Yeast needs to be activated in warm water first and takes a bit longer to rise when compared to instant yeast. I usually use SAF Instant Yeast but you can use any brand. You can read more about the different yeasts HERE.
What is Dry Milk Powder?
- What is dry milk powder? Do I have to use dry milk powder?
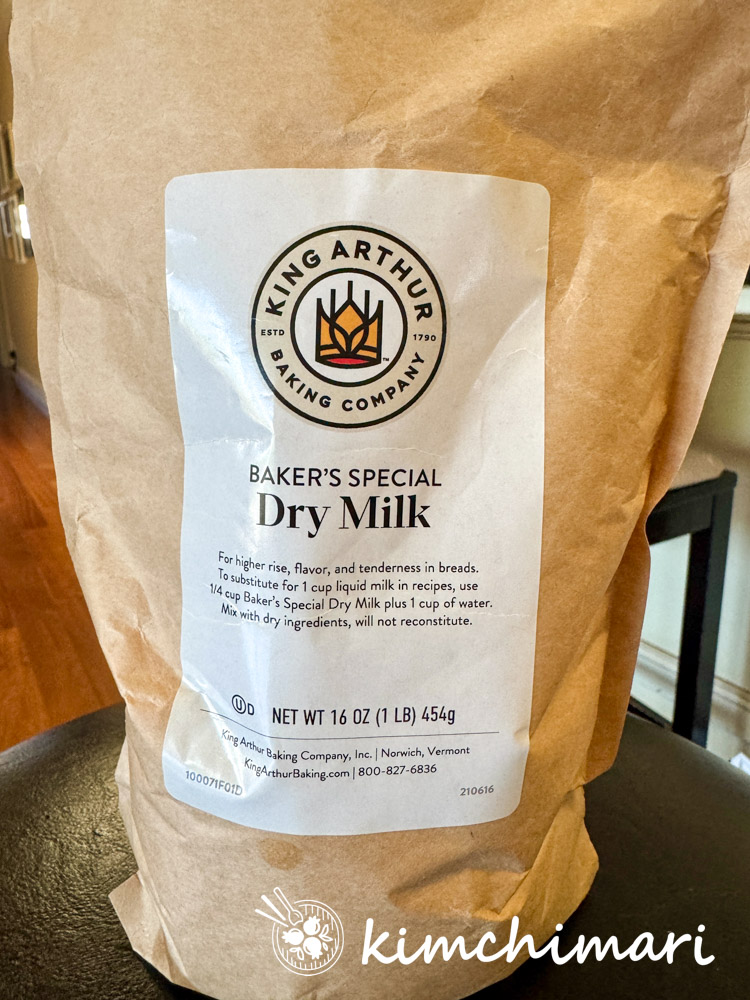
- Dry milk powder is an ingredient used in baking to help the bread rise higher. The brand I use is King Arthur’s Baker’s Special Dry Milk powder. This is NOT the same as ‘instant’ dry milk powder. This helps your bread or any yeasted recipe rise higher. If you want the same feathery light bread as my regular milk bread without the Tangzhong, then YES, you need to use it. OR..you can always make Tangzhong instead of using dry milk as in my regular recipe and just add to dough ingredients and use the dough cycle to make and prove the dough. I’ve tested this in my bread machine and that works fine too.
Ingredients for breadmaker Milk Bread
WET ingredients
- 3/4 cup 2% milk (plus a little extra for top of loaf)
- 1/4 cup water
- 60g unsalted butter
- 1 egg
DRY ingredients
- 365g bread flour (2 3/4 cup)
- 50g sugar
- 7g instant yeast
- 1 tsp fine sea salt
- 2 Tbs dry milk powder (for baking)
- 1/2 Tbsp unsalted butter (for pan)
Step-by-Step Instructions
- This recipe assumes your breadmaker has a dough cycle. If your machine doesn’t have one, you may want to make the dough following instructions in my original Milk bread recipe and then you can still bake it in your machine. You can watch the full you tube video of how I make the Milk Bread with Tangzhong here.
- Melt butter in the microwave until it’s fully melted (50% power 20-25 sec in microwave).
- Warm up your milk (to bath water temperature) and use room temp water and eggs – especially if you don’t have a preheat function within your dough cycle.

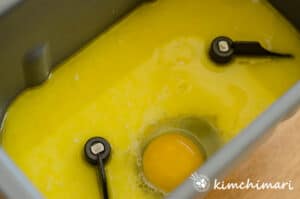
- Add all the wet ingredients (milk, water, melted butter, egg) + SALT into the bread pan. You can add salt with your dry ingredients but I like to add the salt in this step to ensure it doesn’t inhibit the yeast in anyway.
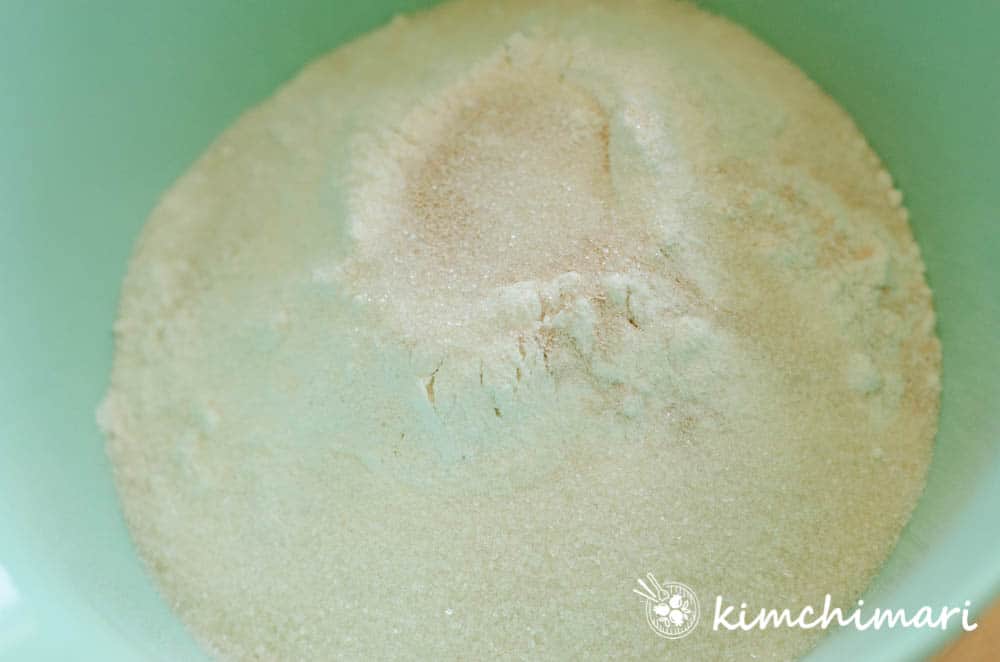
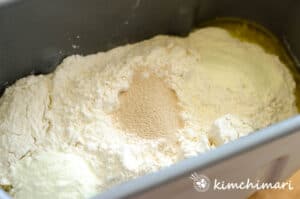
- Mix DRY ingredients – mix flour and sugar first in a bowl and then add to pan on top of the wet ingrdients.

- Make a little well (or a divot) in the middle of the dry ingredients and add yeast inside the well and also add milk powder (I usually add it in the corner of the pan).
- Put the bread pan in the machine with all the ingredients in and start a full Basic Dough cycle. See above for details of my machine’s dough cycle – it basically takes 1 hr 50 min total of preheating and proving 2 times. If you don’t have a dough cycle, you can use just make the dough with a stand mixer by following steps in my regular milk bread recipe.
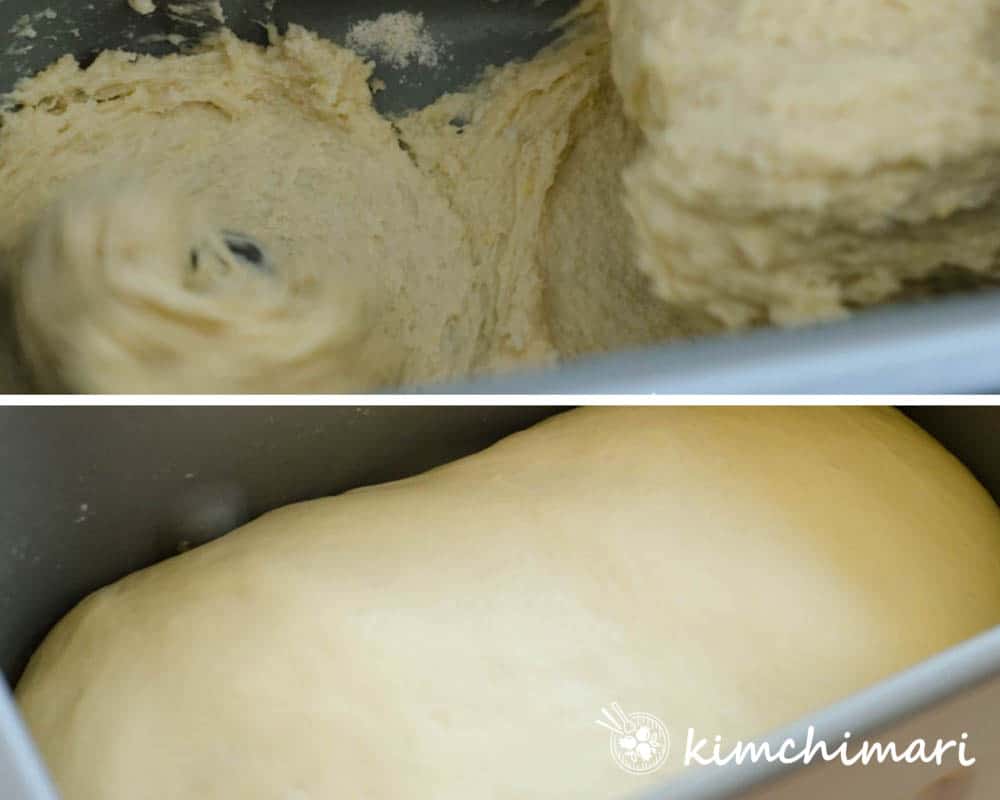
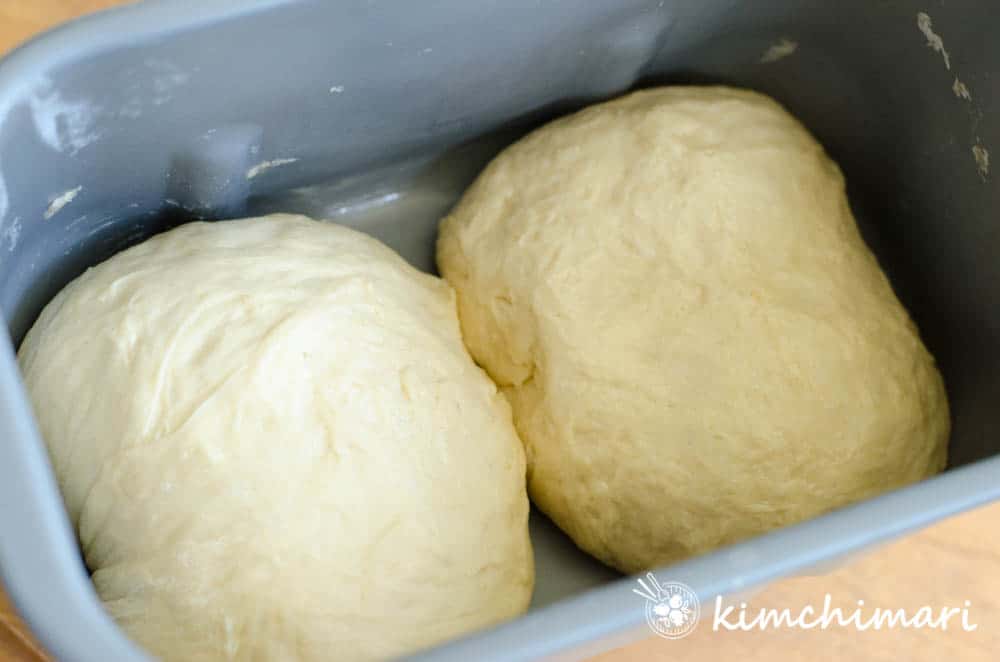
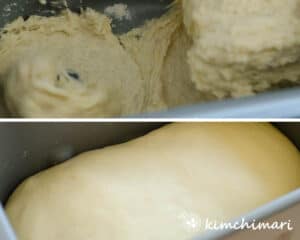
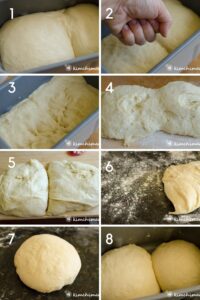
- After the dough cycle is complete and finished proving, your dough should look something like the bottom pic in the picture above. Top pic is how the dough looks like at the start of the kneading process.

- When the dough is done proving (1 in pic), punch it down (2) and then take the dough out of the pan onto a granite or wood cutting board (4) and divide into 2 equal size dough (5). Sprinkle some flour on the surface and knead each dough a few times then shaping it tightly into a ball (7). IF you have custom rise function THEN nestle each dough ball back in the bread pan next to each other (8) and let the dough balls rise in the machine for 30 min. IF there’s NO custom rise function in your machine, you can put each dough ball into separate bowls, cover with plastic wrap or towel and let it rise in warm location or 100℉ oven. Below pic is when the dough balls have finished proving in the machine.
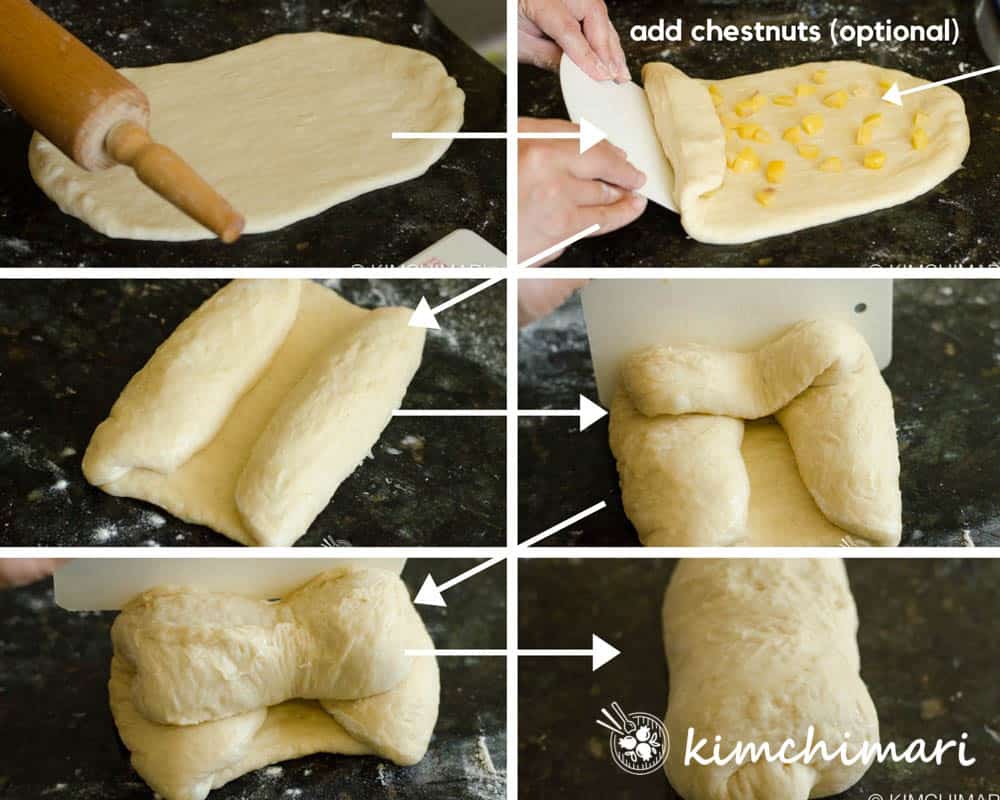
- Once the dough has risen, transfer the dough one at a time on a smooth surface (granite or marble works well), sprinkle surface very lightly with flour and also coat the rolling pin lightlly with flour. Roll out one dough ball into a thick rectangle about 12 inches long and 4-5 inches wide. The dough will be quite sticky so it may stick to counter or the rolling pin, it’s ok, just sprinkle a bit more flour and it should work then. Roll the top of the dough (3 inches) down and then fold the bottom up about the same amount, resulting in a square-like dough shape. Roll it into a log, starting from one end of the square until you have a roll all rolled up. If you would like to see a video of how it’s done, you can see it at the end of the instructions.
- Lightly butter the sides of the bread pan (I didn’t bother washing the pan, just smeared some butter with my hands) and nestle the 2 logs down in the bread machine pan like above. With the rolled swirl facing the side of the pan.
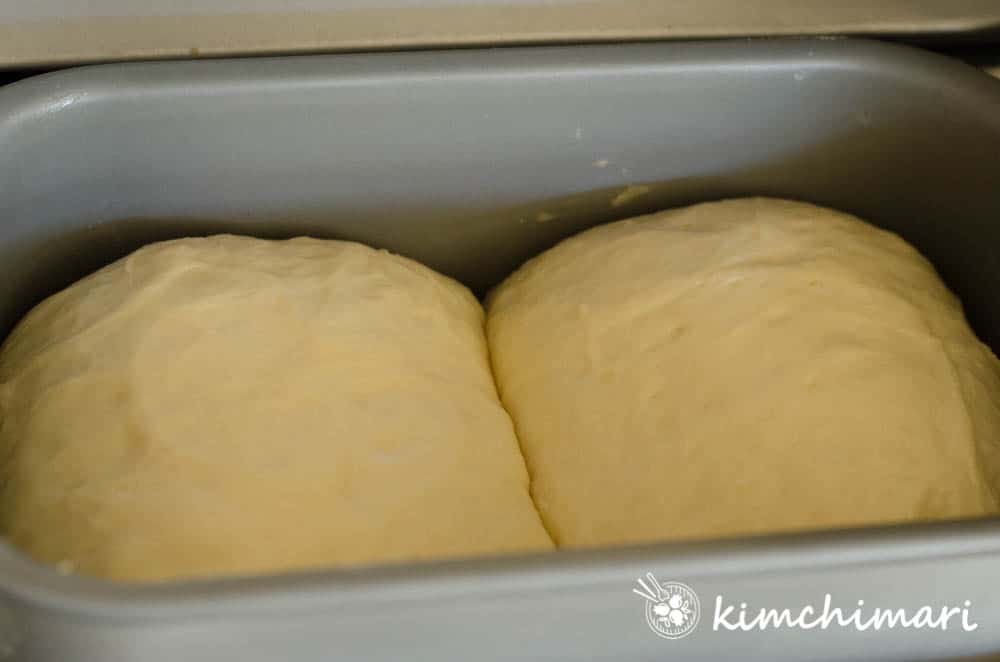
- Put pan back in the bread machine and for the FINAL TIME set it to rise for 1 hr or until the top of the dough is up about 70% height of the pan. Again, if you don’t have custom rise function, let dough rise in the pan at room temp or in 100℉ oven for 40 min.
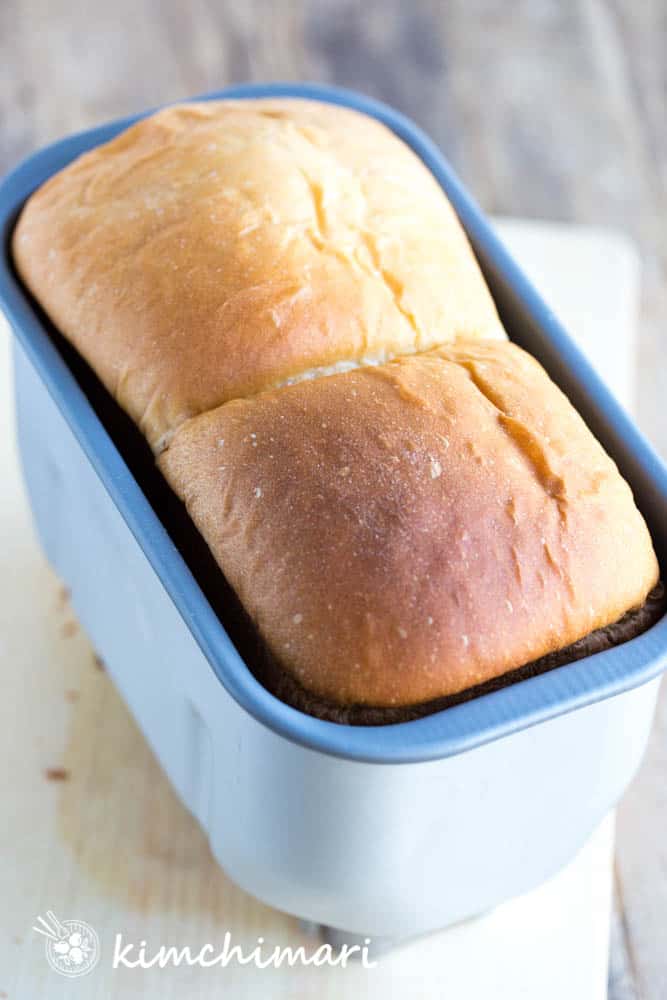
- Let’s start baking! Bake for 50 min. Select the your crust preference. I usually set crust to medium. Optionally, for some shine, brush the top with some milk or egg whites before baking. Note that bread baked in the bread machine won’t have the same golden brown top like you get in the oven. BUT, believe me, the taste and texture is just as good as my original milk bread recipe!
Video on how to roll out Milk Bread dough
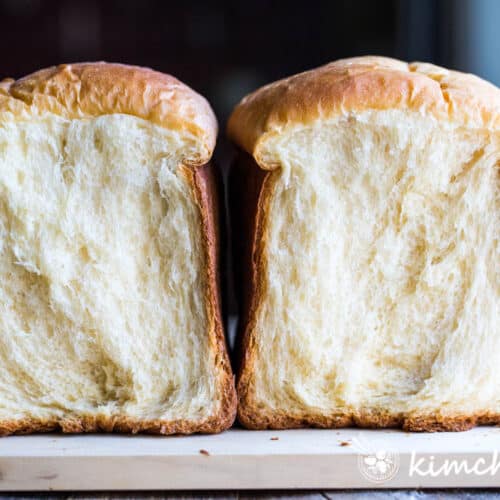
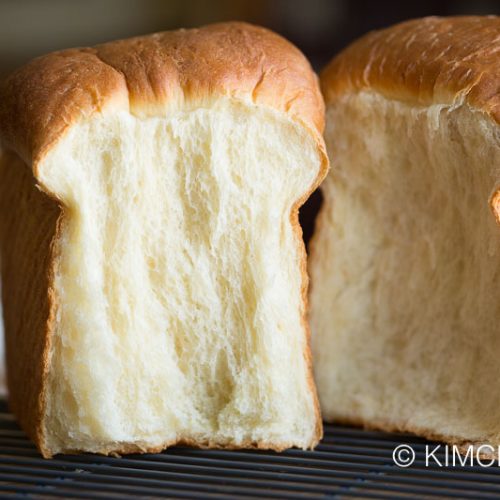
Here’s a picture of milk bread – freshly baked in the bread machine!
Enjoy the bread with some butter, jam and make some egg salad sandwiches with it!
XOXO,
JinJoo
If you liked this recipe, please leave me a comment and ☆☆☆☆☆ rating below!
Milk Bread Recipe for Bread Machine
Ingredients
Wet Ingredients + salt
- 3/4 cup 2% low fat milk (use preheat function or warm up milk)
- 1/4 cup water room temp
- 60 g unsalted butter 60g = 1/4 cup, melted
- 1 egg
- 1 tsp sea salt
Dry Ingredients
- 365 g unbleached bread flour 365g = 2 3/4 cups
- 50 g sugar 50g = 3.5 Tbsp
- 2 Tbsp milk powder
- 7 g instant yeast 7g = 1 packet = 2 tsp
For coating bowls and pan
- 1 Tbsp unsalted butter
Instructions
- Melt 60 g unsalted butter in the microwave until it's fully melted (50% power 20-25 sec in microwave).
- Warm up your 3/4 cup 2% low fat milk (to bath water temperature) and use room temp 1/4 cup water and 1 egg – especially if you don't have a preheat function within your dough cycle.
- Add all the wet ingredients (milk, water, melted butter, egg) + 1 tsp sea salt into the bread pan. You can add salt with your dry ingredients but I like to add the salt in this step to ensure it doesn't inhibit the yeast in anyway.
- Mix DRY ingredients – mix 365 g unbleached bread flour and 50 g sugar first in a bowl and then add to pan on top of the wet ingrdients.
- Make a little well (or a divot) in the middle of the dry ingredients and add 7 g instant yeast inside the well and also add 2 Tbsp milk powder (I usually add it in the corner of the pan).
- Put the bread pan in the machine with all the ingredients in and start a full Basic Dough cycle. See above for details of my machine's dough cycle – it basically takes 1 hr 50 min total of preheating and proving twice. If you don't have a dough cycle, you can use a stand mixer by following steps in my regular milk bread recipe. After the dough cycle is complete and finished proving, your dough should look something like the bottom pic in the picture. Top pic is how the dough looks like at the start of the kneading process. So just be patient!
- When the dough is done (1), punch it down (2) and then take the dough out of the pan onto a granite or wood cutting board (4) and divide into 2 equal size dough (5). Sprinkle some flour on the surface and knead each dough a few times then shaping it tightly into a ball (7). IF you have custom rise function THEN nestle each dough ball back in the bread pan next to each other (8) and let the dough balls rise in the machine for 30 min. IF there's NO custom rise function in your machine, you can put each dough ball into separate bowls, cover with plastic wrap or towel and let it rise in warm location or 100℉ oven for 20 min.
- Once the dough has risen, transfer the dough one at a time on a smooth surface (granite or marble works well), sprinkle surface very lightly with flour and also coat the rolling pin lightlly with flour. Roll out one dough ball into a thick rectangle about 12 inches long and 4-5 inches wide. Roll the top of the dough (3 inches) down and then fold the bottom up about the same amount, resulting in a square-like dough shape. Roll it into a log, starting from one end of the square until you have a roll all rolled up.

- Lightly use 1 Tbsp unsalted butter on the sides of the bread pan and nestle the 2 logs down in the bread machine pan like above.
- Put pan back in the bread machine and set it to rise for 1 hr or until the top of the dough is up about 70% height of the pan. Again, if you don't have custom rise function, let dough rise in the pan at room temp or in 100℉ oven for 40 min.

- We are ready to start baking! Bake for 50 min. Select the crust to your preference. I usually set crust to medium. Optionally, for some shine, brush the top with some milk or egg whites before baking. Note that bread baked in the bread machine won't have the same golden brown top like you get in the oven. BUT, believe me, the taste and texture is just as good as my original milk bread recipe!
Equipment
- bread machine
- mixing bowls
- Rolling Pin
Tips & Notes:
- Tangzhong OR Dry Milk Power – to make this lovely feathery light and fluffy milk bread, you either need to make and add Tangzhong or use dry milk powder. The milk powder helps the bread to rise higher and easily. I tested both ways and they come out equally yummy! The recipe uses milk powder but you can just use Tangzhong instead and reduce the liquid accordingly. Basically, take out 1/4 cup water and 1/4 cup milk and 22g flour and make Tangzhong with it. Check my original Milk Bread recipe for more info.
- Make sure liquid and butter is not cold – yeast needs a warm environment to become active so either warm up your liquid before adding to machine or use the preheat function to ensure things are warmed up first.
- Instant Yeast vs Active Dry Yeast – If possible, use Instant Yeast because Active Dry Yeast needs to be activated in warm water first and takes a bit longer to rise when compared to instant yeast. I usually use SAF Instant Yeast but you can use any brand.
- NUTRITION – I calculated about 14 slices for 1 loaf and so the nutrition is per slice. if you want the calories for the whole loaf, just multiply the current values by 14.


Preparing to make the recipe and I have the same bread machine so I’m excited for that part. But my question is does the fat content of the milk matter (ie 2% vs whole)?
No not really. Whole will give you a richer tasting bread but other than that not a whole lot of difference. Thank you for asking!
Looks amazing. I have a smaller model Zojirushi BB-SSC10. I wish I could make this recipe but not sure it will work with half of the ingredients you have here. Any advice? My machine has “courses” for bread making, so difficult to know the cycles. I’m no cook, so I have to use the recipe book for every loaf so not sure how to make this one without wasting a bunch of precious ingredients.
Hi Shaun, you can always just bake 1/2 of the dough and leave the other dough in the fridge and bake later. You can do this either during the 1st rise or 2nd rise. But it’s best to at least do one of the rise at room temp and be sure to let the dough come back to room temp and finish the rise before you bake it. This article talks more about putting dough in the fridge – https://www.kingarthurbaking.com/blog/2021/09/28/how-to-refrigerate-bread-dough-to-bake-later Hope that helps!
My loaf came out beautifully. I wish I could share a photo. I used my bread machine’s dough function, then did the remaining two rises out of the machine (per your instructions). I didn’t bake the loaf in the machine however. I brushed some half & half on top before baking my 8.5 x 4″ pullman pan in the oven at 350°F for 32-33 minutes on the lower rack. I brushed a little more half & half on at the very end. Perfection! Glossy, beautifully and evenly browned, and delicious. Thank you for the recipe!
Hi June! Oh I know – I wish you can share a photo – do you think you could share it on my FB page – Korean Food with Kimchimari? Or send me email and I can just see for myself. Thank you for sharing your experience and so glad it turned out well!
Can I just do the whole thing in one foul swoop in bread machine on milk loaf setting as I dont have a basic dough cycle?
Oh it’s hard to say what exactly your milk loaf cycle will do but maybe it can work? Does it have 2 rises? Love to hear how it goes if you try it!
Ann-I don’t know if you’ll ever see this BUT I just made this bread in my regular bread maker on the milk bread cycle. All I did was dump everything in like in the recipe and turned it on. That is all I did, nothing more. It turned out beautifully! Try it and see if yours does too. I did set mine to 1.5 lbs loaf- not sure if you have an option like this. I have a kbs bread maker from Amazon by the way. Hope this helps you or someone else.
Love from Kansas City
Of course I see your comment! I read and respond to every single comment!! That’s great to know – thank you for sharing your result. But curious, I have no doubt the bread will taste great, I was wondering, do you still get the stretchy, stringy texture even if you don’t roll it and bake it? I will have to try it sometime. Sending hugs back! Thank you!!
I’m a food blogger who (sigh) sucks at bread making. I dragged out my bread machine to make these (I made rolls with the dough) because I couldn’t get your gorgeous photos out of my head and they were DIVINE!! Thank you for such a perfect recipe!
Oh I’m sure you can make bread! Although, I have to admit that when I first started my gf sourdough bread making journey, I failed many times before I succeeded. So I am soo happy that the recipe worked for you! I appreciate your comment so much – thank you!!
I can’t use eggs. Will the bread texture be badly affected if I don’t use eggs in the dough?
Can you suggest something to remediate that?
Hi SG – I’m afraid it just won’t be the same. Try to find egg substitutes for baking breads online and try them. I believe King Arthur Flour has an extensive list of egg substitutes for baking. Look for the one that says works well for yeast breads. Good luck!