Chicken Katsu 치킨 까스 made with chicken breasts is our family’s favorite chicken version of the popular Donkatsu (pork cultlet). Fresh Panko crumbs and my homemade Tonkatsu sauce make this dish extra yummy!! Bonus Korean style Donkatsu brown sauce recipe included.
Chicken Katsu or actually Tonkatsu is originally a Japanese dish but has become so popular in Korea, I really have to say it is now really part of Korean cuisine. Tonkatsu was one of my favorite food when I was little. As you may know, my sisters were all already in college when I was just in elementary school, and on the last day of my school semester, my sisters often took me to a restaurant to treat me for being a good student. ❤️
Because they were all 10+ years older, my sisters were more like a mom than a sister many times. And my top 3 favorites were either Tangsuyuk (sweet-sour pork), Tonkatsu 돈까스 and Tongmandu 통만두 (steamed 🥟 )!! These were my absolute favorites to get .. and I could never get enough of them.
After I got married to my husband and lived in Gainesville, Florida, there were no restaurants that served these and so I had to make them for myself. But because pork did not sit well with my husband (he gets red rashes and a stuffy nose), I ended up substituting chicken breasts to make Chicken Katsu instead. I still LOVE Tonkatsu and I get it whenever I have the chance but at home, I’m (almost) just has happy to eat Chicken Katsu because it’s also really yummy!!
What is Chicken Katsu 치킨 가스?
Chicken Katsu is a derivative of Donkatsu and Tonkatsu (Pork cutlet) 돈가스, 돈까스 originates from the European Schnitzel dish. Japanese started calling it Don Katsu-Letsu which was supposed to sound like ‘cutlet’ 😉 and then it got shortened to just ‘katsu’. Japanese Tonkatsu came into Korean cuisine after the war in the 1930’s and 40’s but it gained popularity when Kyeong Yang Sik started to become mainstream in the 60’s and beyond.
What is Kyeong Yang Sik 경양식?
Kyeong-Yang-Sik 경양식 means ‘light western meals’ and it refers to Koreanized western foods that were served in a more minimalistic fashion. Instead of having a full course meal that consists of several courses of appetizers, soups, salads, main, and desserts.. you know how it goes. These Korean restaurants served usually 2 courses. The first course is a soup (usually cream of corn or mushroom soup) and then the 2nd course included salad, main, rice, kimchi or danmuji pickles all served on one large plate! Sometimes it also had a piece of fruit as dessert but all together at the same time!
Note, there’s always rice on the plate. haha.. they sometimes do give you bread rolls separately with jam and butter.
Tonkatsu (돈가스), Beef katsu (비후가스), Hambak Steak (함박스텍), Omurice and Spaghetti are probably some of the most common and popular main menu items in a Kyeong-Yang-Sik restaurant. Once you choose the main protein, the rest are fixed and you will get a plate full of all the other items that come with it. Of course, if it’s Omurice or Spaghetti, you will most likely get the salad and pickles to go with the main dish.
Difference between Korean vs Japanese style Katsu
So interestingly enough, Korean Kyeong-Yang-Sik Tonkatsu or Chicken Katsu is somewhat closer to the original Schnitzel version because it uses every thinly pounded meat (vs Japanese Tonkatsu) and using a brown sauce instead of the Japanese Tonkatsu/Donkatsu sauce which has a lot of Worcestershire flavor in the sauce.
How to Make Chicken Katsu
Ingredients
- 3 lbs boneless, skinless chicken breasts
- 3 eggs
- 1 cup all purpose flour
- 2 cups Panko bread crumbs (fresh or storebought)
- 3-4 cups of vegetable oil (about 2 inches of oil in pot for deep frying, can be less if you want to do more of a pan-fry)
- Salt and Pepper
- Brown sauce (Korean style Tonkatsu)
- 1 Tbs butter
- 2 Tbs all purpose flour
- 1.5 tsp ketchup
- 1 Tbs Worcestershire sauce
- 1.5 tsp sugar
- 1.5 tsp soy sauce
- 105 ml water (105 ml = 1/4 cup + 3 Tbs)
- Tonkatsu Sauce
- 2 Tbsp ketchup
- 1.5 Tbsp soy sauce (Jin Ganjang)
- 3/4 tsp Worcestershire sauce
- 1/2 Tbsp sugar
- 1/2 Tbsp honey
- 1/2 tsp vinegar
- 1/8 tsp black pepper
Instructions
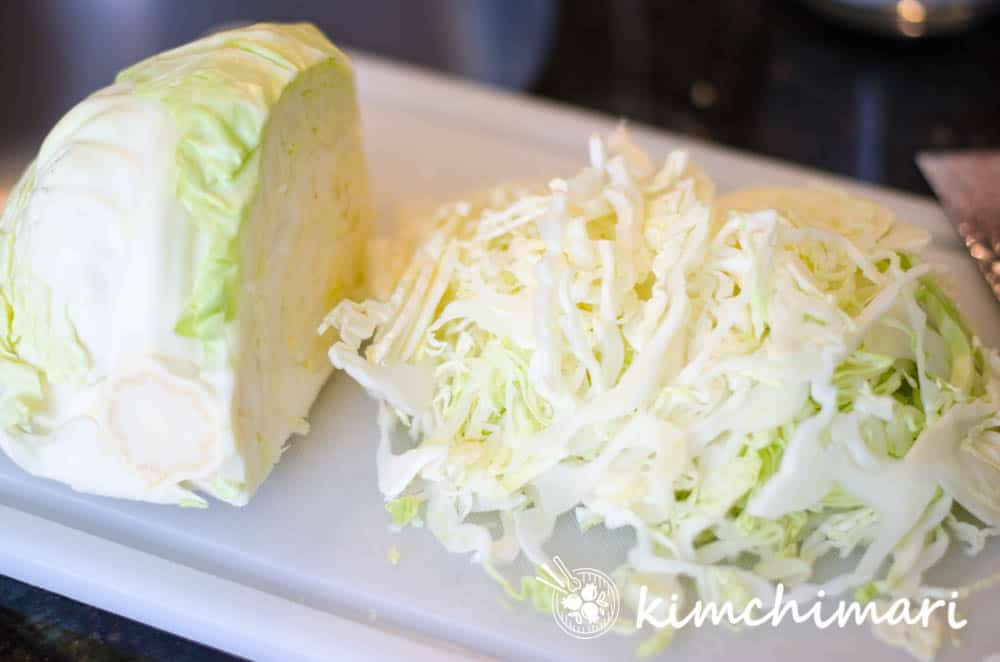
- PREPARE SALAD: slice green cabbages into thin slices (like for cole slaw) or just buy a package of cole slaw mix.

- MAKE SAUCE: (choose one of the two below – or do both!)
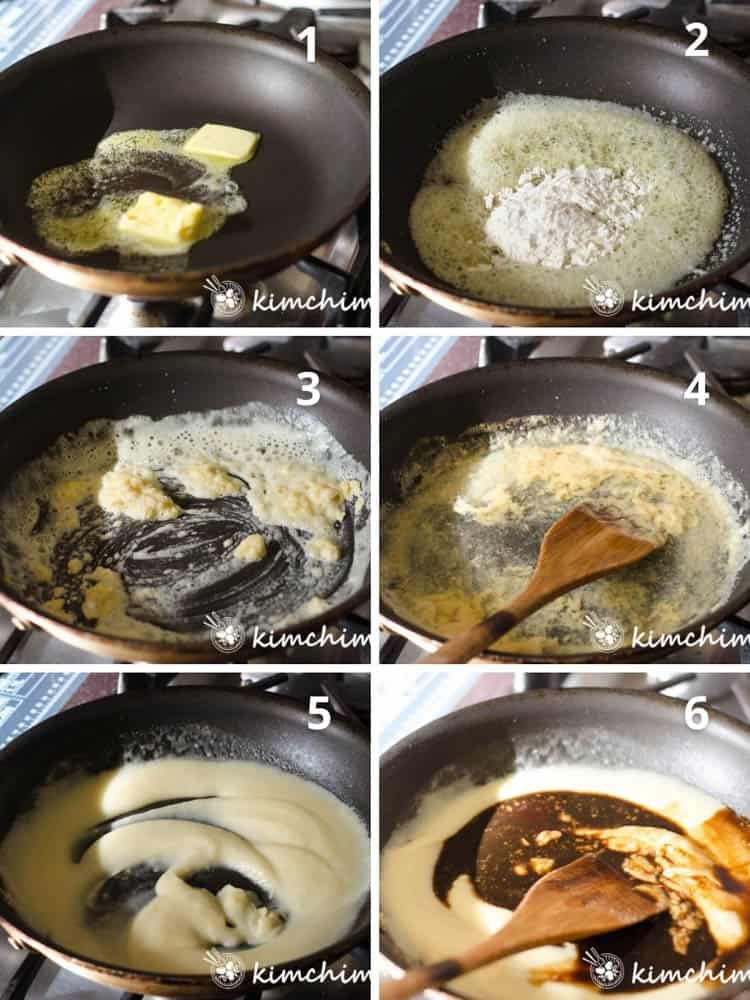
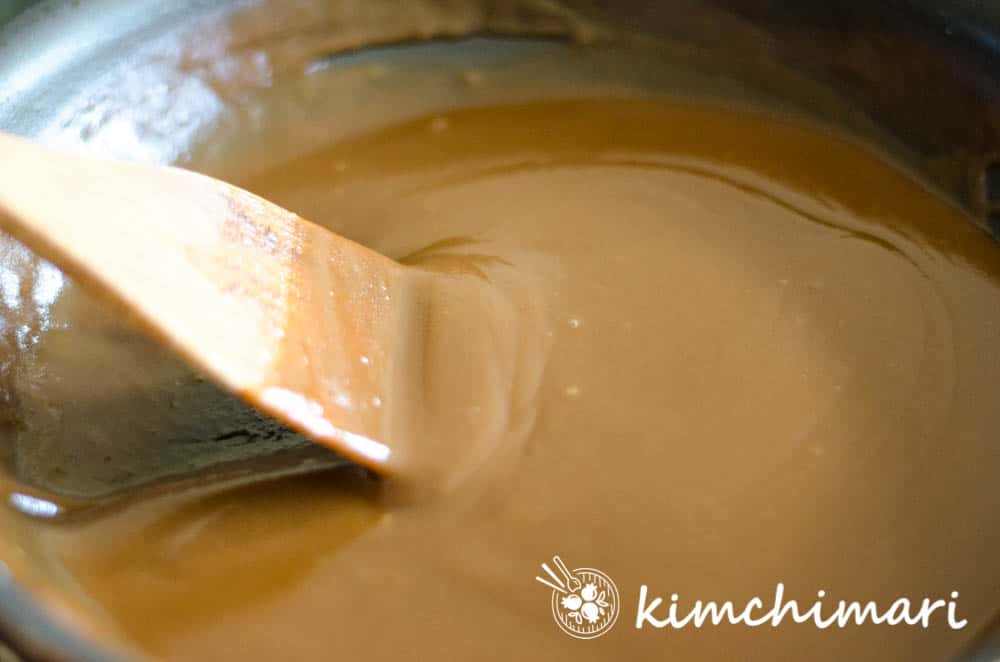
- Korean style Brown Sauce – 1) In a frying pan, melt butter on medium low heat. 2) When butter has melted, add flour. 3) stir the butter and flour constantly with a wooden spoon or wisk in for even cooking. In 2-3 minutes, you will have a light roux that puffs up slightly. 4) add water, stir and mix again and it will look like 5. 6) Add ketchup, worcestershire sauce, sugar, soy sauce. Keep stiring and let it cook 1-2 minutes more until everything is evenly mixed. Turn off heat.

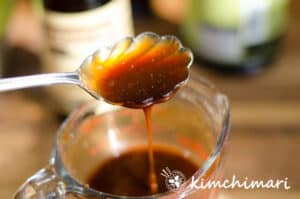
- And it should look like below when it’s all finished.

 Don’t forget to warm up the sauce again at time of serving!
- Homemade Tonkatsu Sauce – Mix ketchup, soy sauce, Worcestershire sauce, sugar, honey, vinegar and black pepper. You can also just buy the Bull Dog Tonkatsu sauce. I think mine taste better 😝 but it’s up to you.
- Korean style Brown Sauce – 1) In a frying pan, melt butter on medium low heat. 2) When butter has melted, add flour. 3) stir the butter and flour constantly with a wooden spoon or wisk in for even cooking. In 2-3 minutes, you will have a light roux that puffs up slightly. 4) add water, stir and mix again and it will look like 5. 6) Add ketchup, worcestershire sauce, sugar, soy sauce. Keep stiring and let it cook 1-2 minutes more until everything is evenly mixed. Turn off heat.
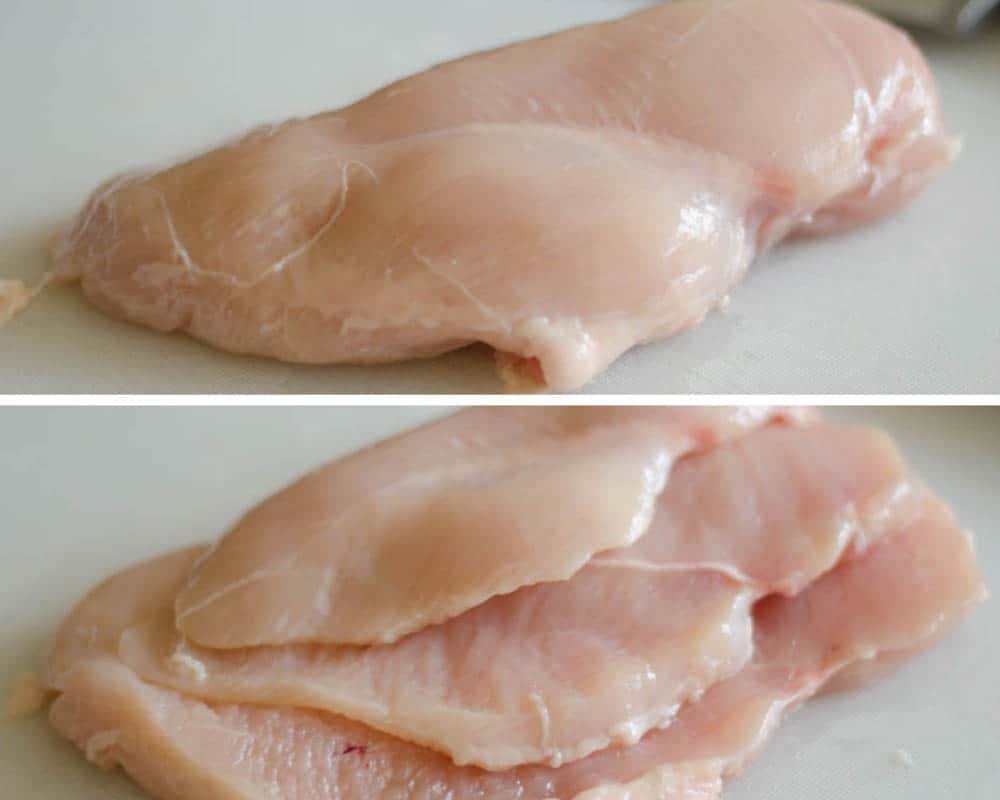
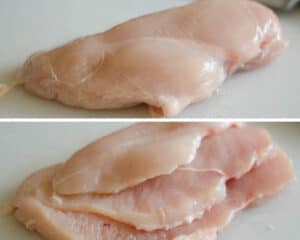
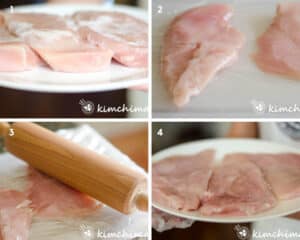
- PREP CHICKEN: Choose one of 2 ways to make thin slices of chicken breast. Pounding the chicken into very thin piece is actually the Korean style way of making Chicken Katsu.
- Slice each chicken breast, sideways, horizontally into 2-3 thinner slices like so.

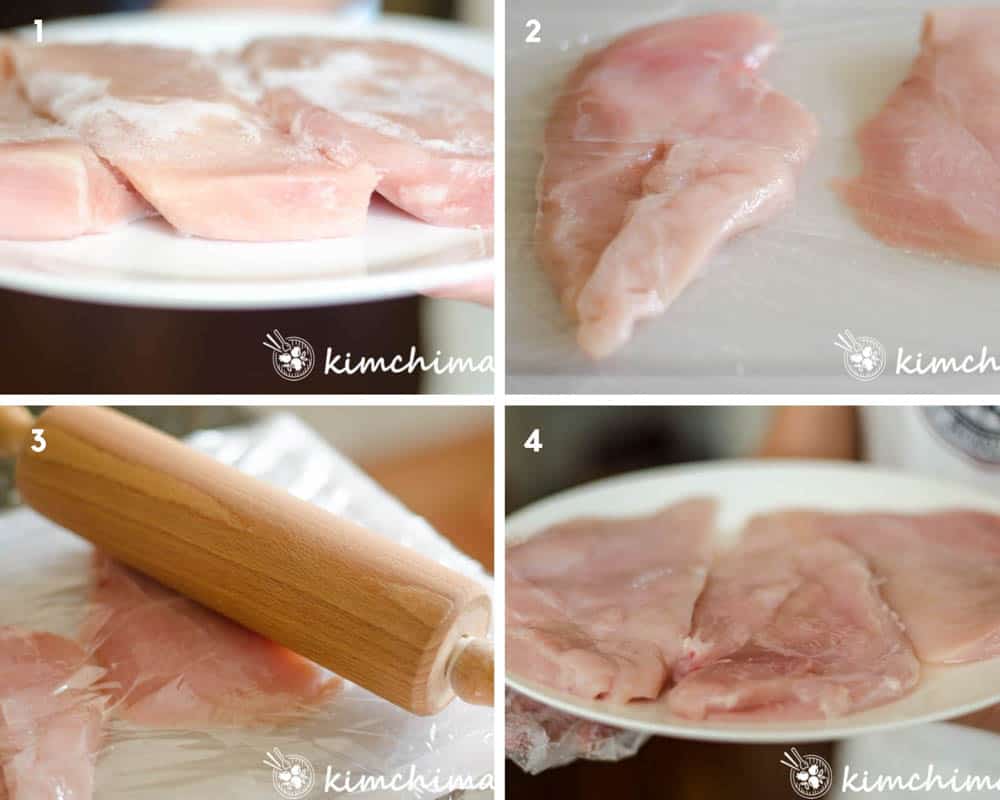
- OR Place the chicken breast between plastic wraps and then pound it with a rolling pin or a heavy frying pan or pot like below.
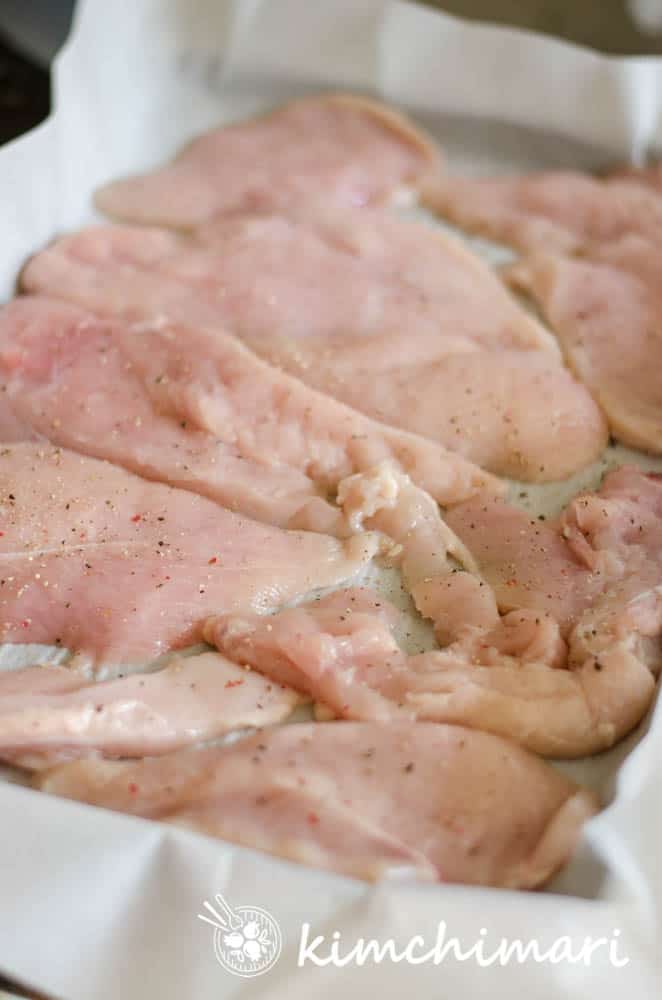
- Season thinned chicken breasts with salt and black pepper on both sides. Set aside.

- Slice each chicken breast, sideways, horizontally into 2-3 thinner slices like so.
- MAKE BREAD CRUMBS for Chicken Katsu: SKIP if using store bought Panko bread crumbs. Tear up old milk bread, white bread or even multigrain bread and put in a food processor. Chop until they become crumbs. Leave them bigger than store-bought Panko bread crumbs for best crispy and fluffly coating. I used my week old milk bread rolls that I had in the fridge and it was perfect!!
- HEAT OIL: In a medium size, heavy bottom pot (or fryer or deep frying pan), add vegetable oil. It’s best to have the oil be at least 1.5 to 2 inch deep. Turn heat to medium or medium low if you need more time to prepare the chicken. Heat until you reach 340 – 350℉ (170 – 175℃). If you don’t have a thermometer, throw in a salt granul and it should make a loud popping sound.
- Prepare coating and DREDGE(coat) CHICKEN:
- Whip eggs.
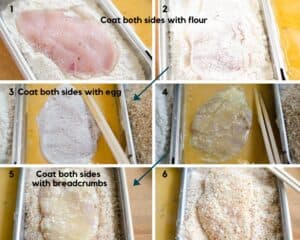
- In 3 separate shallow bowls or trays prepare flour, whipped eggs and bread crumbs in each. Line them up side by side. I like using these stainless containers for dredging purposes. Have these ready right next to your fryer as I like to just dredge them and put the chicken direclty into the oil.
- Dredge chicken in flour. Shake off excess flour but make sure chicken is evenly coated. (pics 1-2)
- Dredge flour coated chicken in egg wash (3-4)
- Finally, dredge egg coated chicken in breadcrumbs. (5-6)
- FRY CHICKEN:
- Prepare a colander or bowl and lined with paper towel to put the fried chicken katsu in.
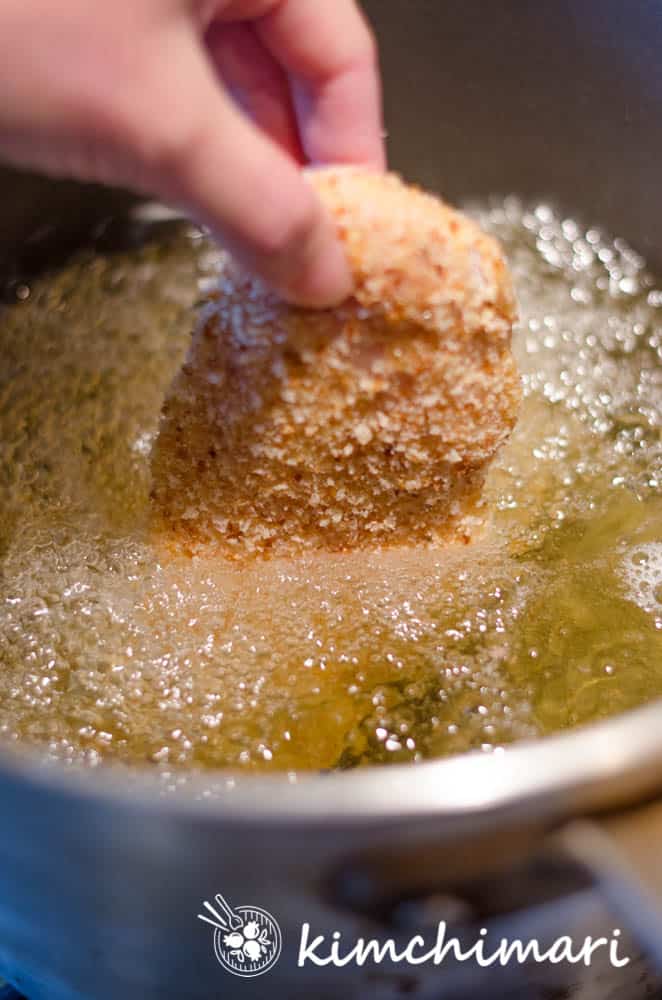
- When oil is hot enough, add the coated chicken from 6 into the hot oil.
 When cooking, add only about 2-3 chicken cutlet pieces at a time to a medium sized pot. Everytime you add a piece, it lowers the oil temperature significantly so if you add too many at the same time, the temperature may get too low. If the oil temp is too low, the chicken katsu will absorb too much oil and taste greasy and not crispy.
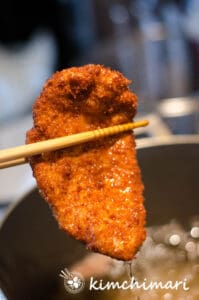
 - Fry chicken for a total of 4-5 min but turning it once half way, until it’s nicely browned. Note, if it browns too quickly (in less than 1 min) then lower the temperature or even turn it off for 10-20 seconds until it cools down to the right temperature. You can always cut open a piece to make sure it’s fully cooked.
- When chicken katsu is cooked, remove from oil and put in the paper towel lined bowl or colander so excess oil is absorbed. Try to lay down the pieces on the side so the oil drains and doesn’t collect in the center of the chicken as chicken cutlets tend to kind of curve up or down in the center.
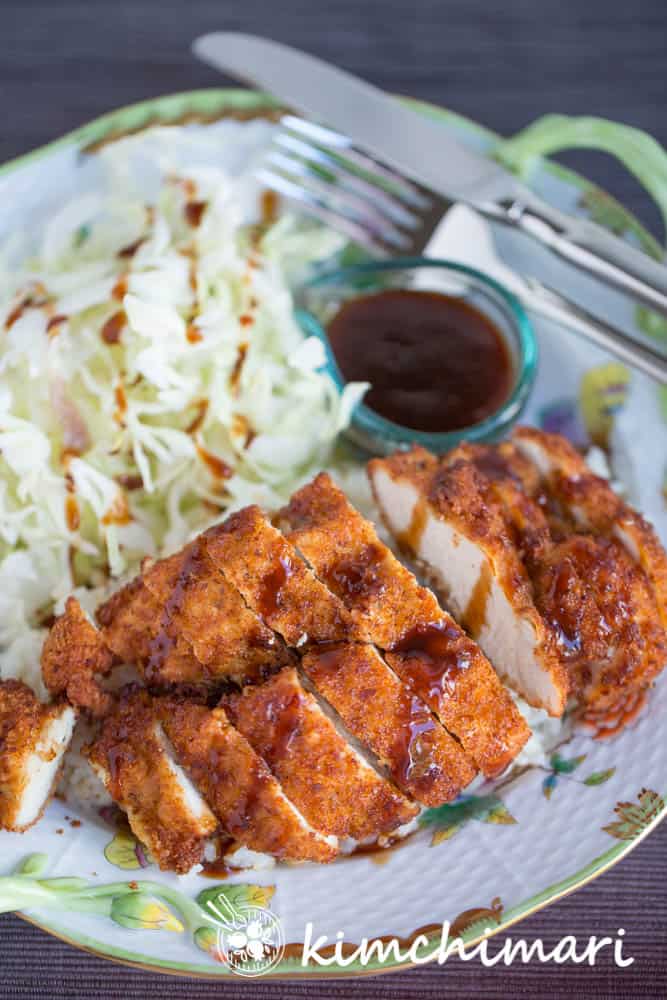
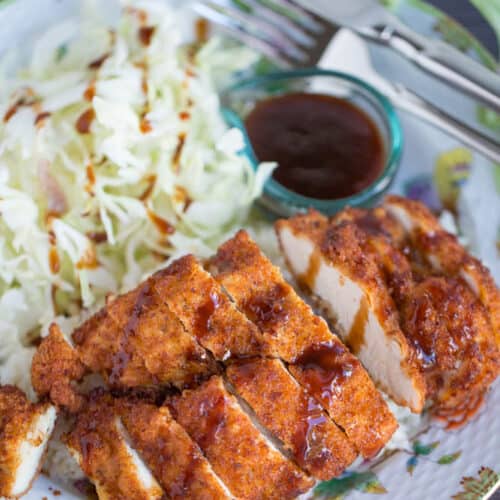
- Serve Chicken Katsu with Tonkatsu sauce on the side or drizzled on top. Typically, it is served with RICE and Green Cabbage Salad on the side. OR if you want to go the full Korean Kyeong Yang Sik way, pour Korean style brown sauce on top of the chicken – not drizzle but a generous pour. For the salad, you can use the Tonkatsu sauce, creamy sesame dressing or just mix mayo and ketchup. Oh and also serve with some Danmuji (yellow pickled radish) or Kkakdugi – they are perfect with chicken katsu!
 Don’t forget to warm up the sauce again at time of serving!
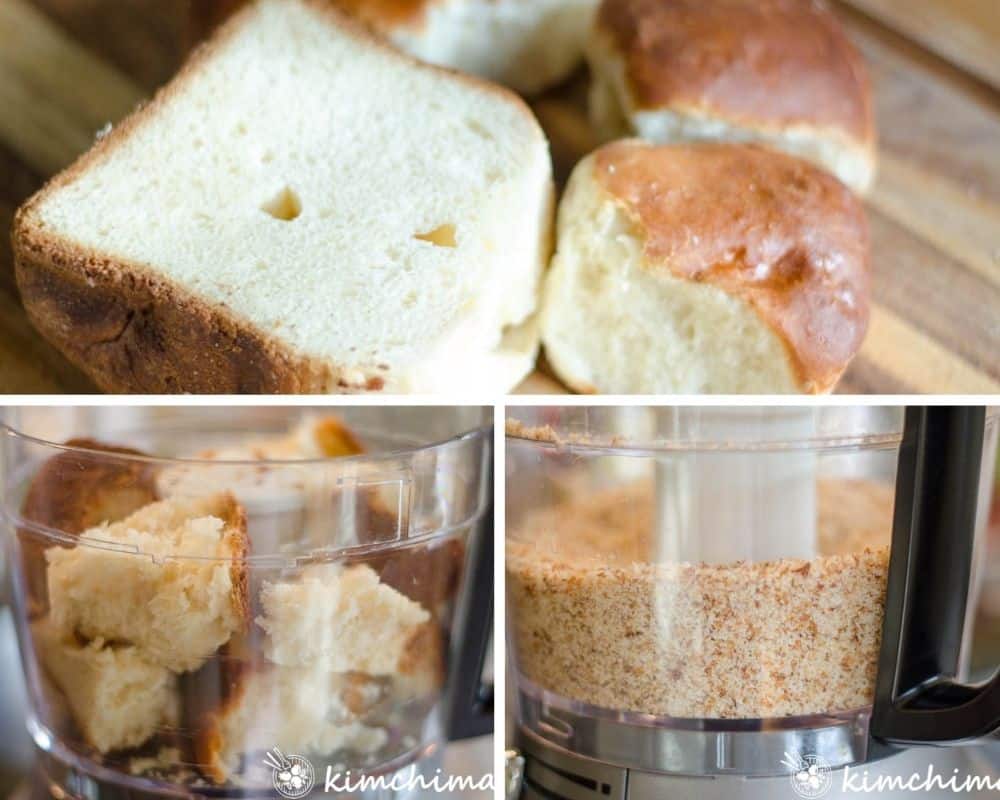 Tear up old milk bread, white bread or even multigrain bread and put in a food processor. Chop until they become crumbs. Leave them bigger than store-bought Panko bread crumbs for best crispy and fluffly coating. I used my week old milk bread rolls that I had in the fridge and it was perfect!!
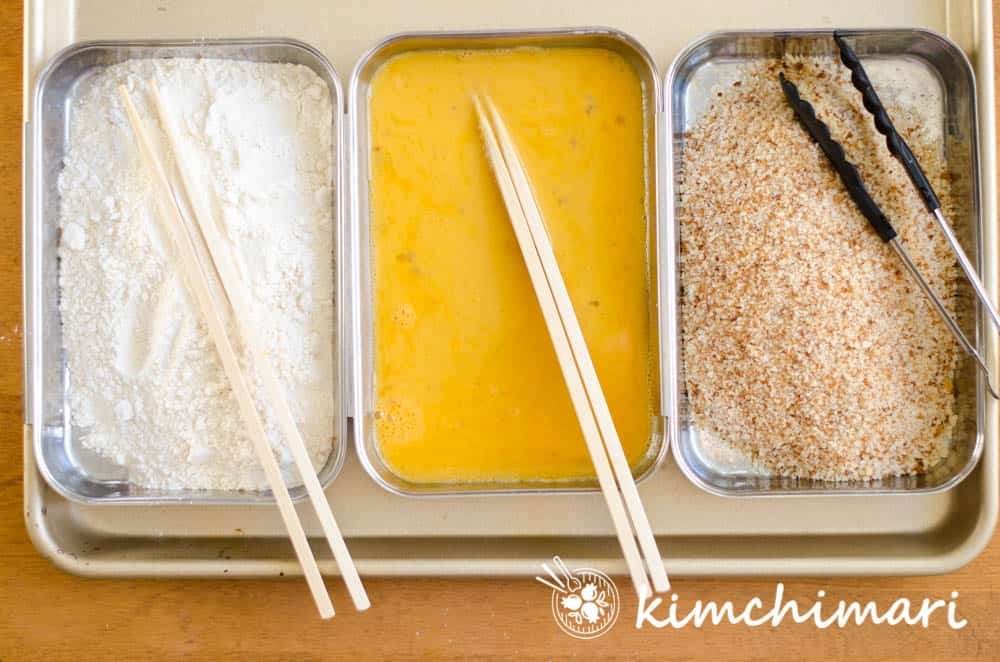

 When cooking, add only about 2-3 chicken cutlet pieces at a time to a medium sized pot. Everytime you add a piece, it lowers the oil temperature significantly so if you add too many at the same time, the temperature may get too low. If the oil temp is too low, the chicken katsu will absorb too much oil and taste greasy and not crispy.
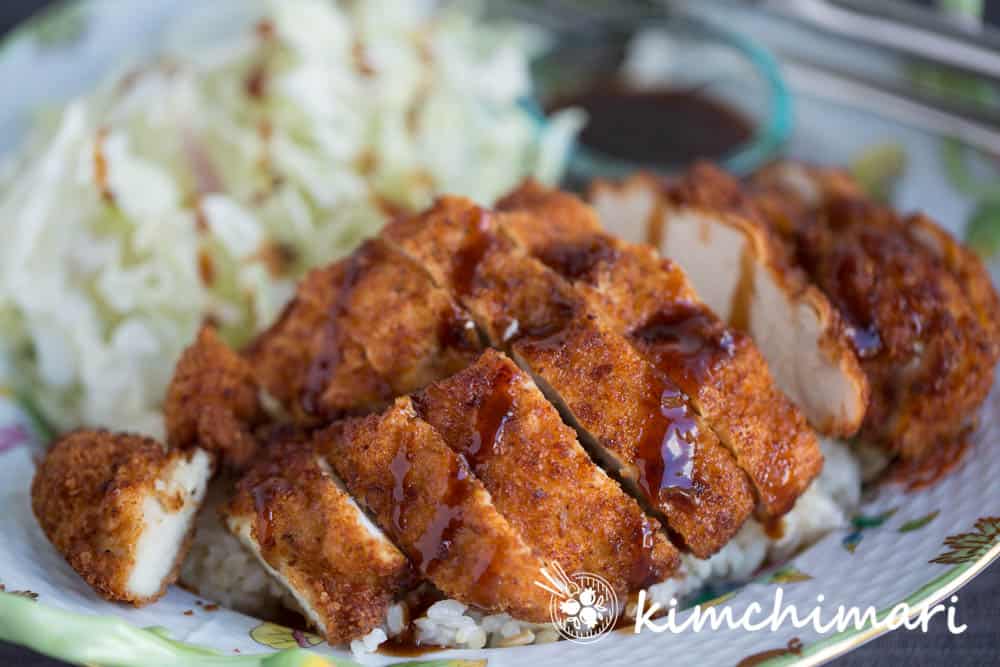
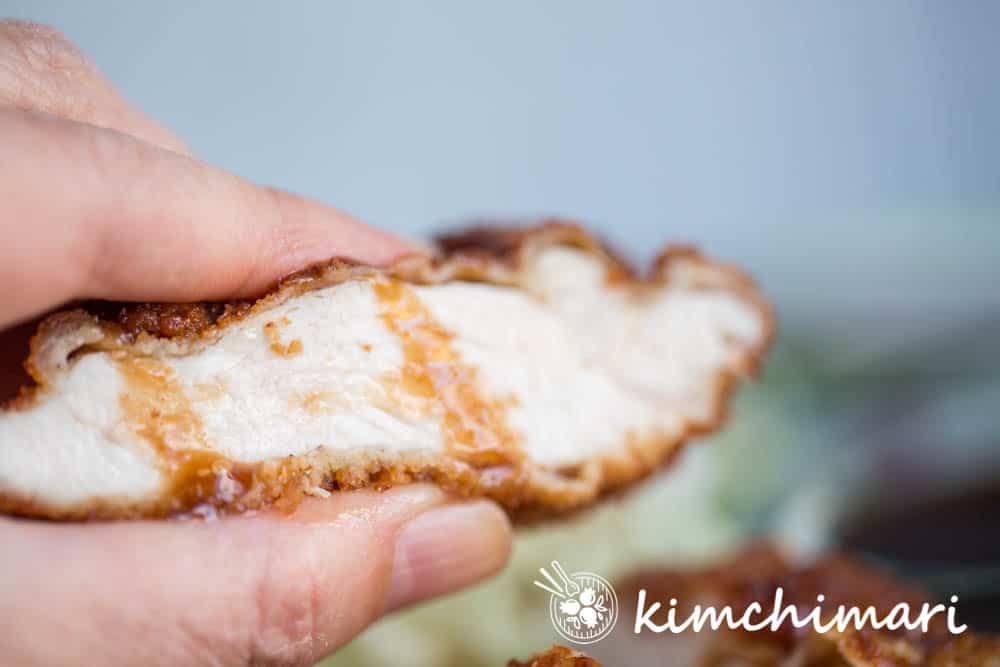
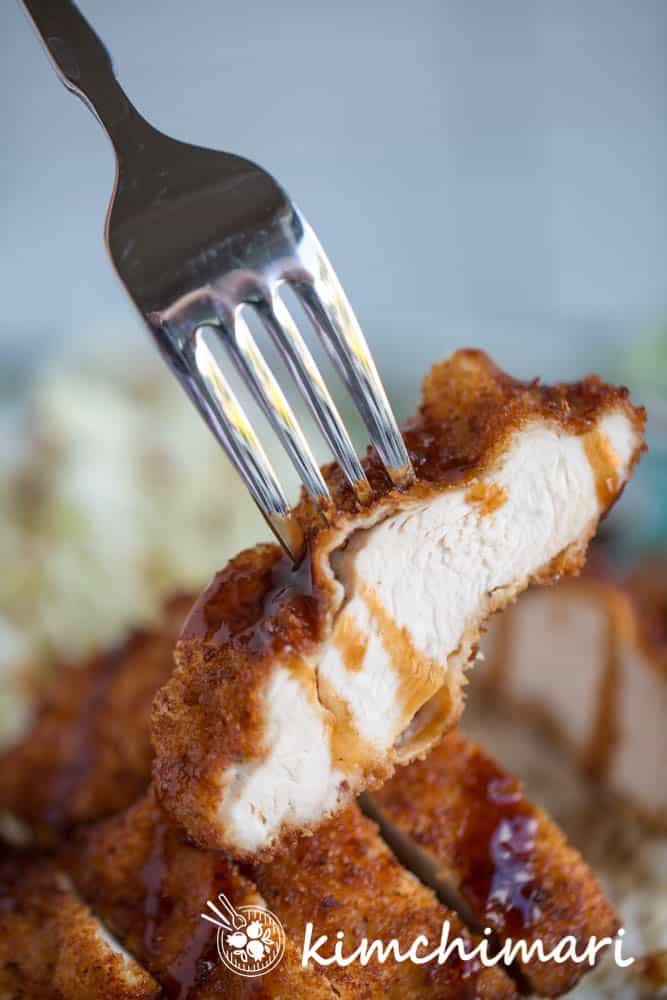
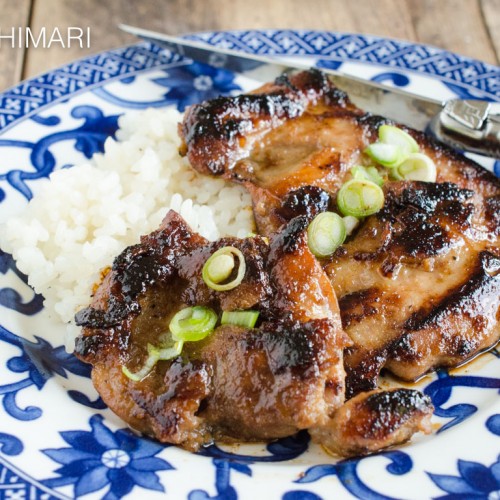
Oh and look how moist and juicy my Chicken Katsu is!!
TIP FROM JINJOO!
Chef’s Tips for Chicken Katsu
- Use any neutral flavored vegetable oil with high smoke point – canola, corn, rice bran, safflower, sunflower oils are all good.
- Air Fryer Chicken Katsu – if you want to cut down the fat and don’t want to mess with deep frying, you can cook the breaded chicken in the Air Fryer at 340 ℉ for 20 min or so. Remember to spray the breaded chicken with oil on both sides and also turn chicken over after 10 min to brown both sides equally. Time may vary depending on the thickness of your chicken.
- Oven baked Chicken Katsu – you can also just BAKE the breaded chicken in the oven at 365℉ for 25 min or so. Turn chicken over mid way and also be sure to spray them with oil on both sides. Time may vary depending on the thickness of your chicken.
- Right Oil temperature is very important for frying! If it’s too hot, it will burn the outside without cooking the inside. If it’s too low then fried food will come out soggy. Try to keep it at 340-350℉. When using thermometer, make sure you are using one that’s safe for high temperature above 350℉! A thermometer is not a must but pay close attention and adjust the heat necessary.
- Make FRESH bread crumbs for best results! Use leftover milk bread, multigrain bread or any other sandwich bread. Make ahead and keep it frozen for later use.
- If deep frying a big batch, keep oil clean between frying so the breadcrumbs don’t burn. Using a fine sieve, remove all bits of bread crumbs left in the oil after the chicken is removed.
- LEFTOVERS – keep refrigerated for 3-4 days or freeze it for longer.
- REHEATING – reheat in the oven at 350℉ for about 15 min. from refrigerated and 30 min from frozen. Deep frying a 2nd time also works well to make it extra crispy!
맛있게 드세요! Mat-it-gae Deu-sae-yo!
Enjoy!
xoxo
JinJoo
Chicken Katsu
Ingredients
- 3 lbs chicken breasts
- 3-4 cups vegetable oil have about 2 inches of oil in pot for deep frying, can be less if you want to do more of a pan-fry
- 3 eggs
- 1 cup all purpose flour
- 2 cups Panko bread crumbs fresh or storebought
- Salt and Pepper
Brown Sauce for Korean Style Katsu
- 1 Tbs butter
- 2 Tbs all purpose flour
- 1.5 tsp ketchup
- 1 Tbs Worcestershire sauce
- 1.5 tsp sugar
- 1.5 tsp soy sauce
- 105 ml water 105 ml = 1/4 cup + 3 Tbs
Tonkatsu Sauce
- 2 Tbsp ketchup
- 1.5 Tbsp soy sauce Jin Ganjang
- 3/4 tsp Worcestershire sauce
- 1/2 Tbsp sugar
- 1/2 Tbsp honey
- 1/2 tsp vinegar
- 1/8 tsp black pepper
Salad
- 1/4 green cabbage
Instructions
Prep Salad
- slice green cabbages into thin slices (like for cole slaw) or just buy a package of cole slaw mix.
Make Sauce (choose one of the two below – or do both!)
- Korean style Brown Sauce – in a frying pan, melt butter on medium low heat. When butter has melted, add flour and stir the butter and flour constantly with a wooden spoon or wisk in for even cooking. In 2-3 minutes, you will have a light roux that puffs up slightly. Then, add ketchup, worcestershire sauce, sugar, soy sauce and water. Keep stiring and let it cook 1-2 minutes more until everything is evenly mixed. Turn off heat. But remember to warm up the sauce again at time of serving.

- Homemade Tonkatsu Sauce – Mix ketchup, soy sauce, Worcestershire sauce, sugar, honey, vinegar and black pepper. You can also just purchase the Bull Dog Tonkatsu sauce. I think mine taste better but it's up to you.

Prep Chicken
- Choose one of 2 ways to make a thin slice of chicken breast.
- You can slice each chicken breast, side ways into 2-3 thinner slices like so.

- OR Place the chicken breast between plastic wraps and then pound it with a rolling pin or a heavy frying pan or pot.
- Season thinned chicken breasts with salt and black pepper on both sides. Set aside.
Make Bread Crumbs (if you want to)
- Tear up old milk bread, white bread or even multigrain bread in a blender and blend it until they become crumbs. Leave them bigger than store bought Panko bread crumbs for best crispy and fluffly coating. I used my week old milk bread rolls that I had in the fridge. SKIP if using store bought Panko bread crumbs.
Heat Oil
- In a medium size, heavy bottom pot (or fryer or deep frying pan), add vegetable oil. It's best to have the oil be at least 1.5 to 2 inch deep. Turn heat to medium or medium low if you need more time to prepare the chicken. Heat until you reach 340 – 350℉ (170 – 175℃). If you don't have a thermometer, throw in couple salt granules and they should make a loud popping sound if ready.
Coat Chicken
- In 3 separate shallow bowls or trays (I love these) add flour, whipped eggs and bread crumbs in each. Line them up side by side so you can coat the chicken. Have these ready right next to your fryer.
- Coat chicken with flour. Shake off excess flour but make sure chicken is evenly coated.Put floured chicken in egg wash. Coat with egg and then move it over to the bread crumb bowl and coat wiht bread crumbs. Lay them out on a plate. You can pre-coat the chickens altogether and then fry it but I like to do it right before you put it in to oil. If you let it sit, it's just not the same.

FRY
- Prepare a colander or bowl and lined with paper towel next to the fryer, to put the fried chicken katsu in.
- When oil is hot enough, add the coated chicken from above into hot oil. Only add about 2-3 chicken cutlet pieces at a time to a medium sized pot. Everytime you add a new piece, it lowers the oil temperature significantly so if you add too many at the same time, the temperature may get too low and the chicken katsu will absorb too much oil which wil make it soggy and not crispy.
- Once added to hot oil, cook chicken for about 2 min on each side (turn over after 2 min) for a total of 4-5 min until it's nicely browned. But, if it gets browned too quickly (like in just 1 min or so) then lower the temperature or even turn it off for 10-20 seconds until it cools down to the right temperature. You can always cut open a piece to make sure it's fully cooked.
- When chicken katsu is browned, remove from oil and let stand in the paper towel lined bowl or colander. Try to lay down the pieces on the side so all the oil drips away and doesn't collect in the center of the chicken as chicken cutlets tend to kind of curve up or down in the center.

- Serve with Rice, Cabbage Slaw and sauce on the side or pour a warmed up Korean style brown sauce on top for a yummy meal! Don't forget the pickled yellow radish – Danmuji. It's also great with some Kkakdugi.
Equipment
- 1 heavy pot or fryer
- 1 colander
Tips & Notes:
- Please note, the nutritional facts are calculated as if you are going to eat all the sauces. You probably won’t be eating it all – especially since I have 2 choices of sauces. So you will be eating one of them and not all of it, anyway.
- Use any neutral-flavored vegetable oil with high smoke point – canola, corn, rice bran, safflower, sunflower oils are all good.
- Right Oil temperature is very important for frying! If it’s too hot, it will burn the outside without cooking the inside. If it’s too low then fried food will come out soggy. Try to keep it at 340-350℉. When using a thermometer, make sure you are using one that’s safe for high temperatures above 350℉! A thermometer is not a must but pay close attention and adjust the heat necessary.
- Make FRESH bread crumbs for best results! Use leftover milk bread, multigrain bread or any other sandwich bread. Make ahead and keep it frozen for later use.
- If deep-frying a big batch, keep oil clean between frying so the breadcrumbs don’t burn. Using a fine sieve, remove all bits of bread crumbs left in the oil after the chicken is removed.
- LEFTOVERS – keep refrigerated for 3-4 days or freeze it for longer.
- REHEATING – reheat in the oven at 350℉ for about 15 min. from refrigerated and 30 min from frozen. Deep frying a 2nd time also works well to make it extra crispy!


I made this recipe tonight – with the brown homemade sauce. Oh, it is delicious! Will do it again!
Yay!! That’s wonderful to hear. Thank you – love hearing feedback on my recipes.
Hi JinJoo,
As always thank you for your wonderful recipes. To cut down the fat, can the chicken katsu be oven baked? If so, how long and at what temperature?
Thank you,
Of course! Yes, it can be oven baked – try about 365℉ for 25 min or so. And of course, you want to spray the bread chicken with some oil before you put in the oven. Also, remember to turn the chicken over once mid way. Good luck. Cheers!